- Secure order
- Easy return shipment
- Service-Hotline +32 50 89 35 27
Instructions No. 3145
Difficulty: Beginner
Working time: 8 Hours


First, paint the small advent calendar-houses with the craft paints of your choice. Make sure the colors are even so that the houses look nice later. Allow the paint to dry well before moving on to the next step.
Decorate the motif cut-outs
As soon as the paints have dried, take a white permanent marker and decorate the motif cut-outs of your houses.
vellum paper glue on
Now cut the vellum paper to the size of the motif cut-outs. Apply handicraft glue to the edges of the motif cut-outs and glue the vellum paper on from the inside. This will create a nice glowing effect when you place LED tea lights in the houses later.
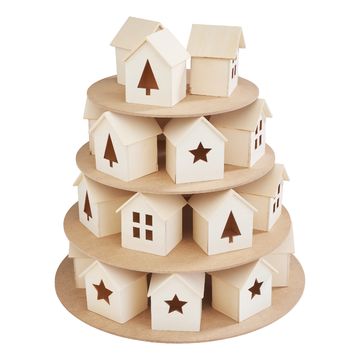
Arrange the houses on plates
Place the painted houses on the round plates. Then stack these plates on top of each other. Make sure that the arrangement is stable and does not tip over easily.
advent numbers attach
Starting from the top, glue the advent numbers to the houses using handicraft glue . Make sure that the numbers are clearly visible.
Filling the houses
Now comes the exciting part: you can fill the houses with little surprises and LED tea lights with a timer. The LED tea lights create a cozy atmosphere and make the motifs on the vellum paper light up beautifully.
Decorate
Finally, place miniature Christmas trees and small lanterns around the houses as desired. These final details give your advent calendar a festive touch and make it a real eye-catcher.