- Secure order
- Easy return shipment
- Service-Hotline +32 50 89 35 27
Instructions No. 3250
Difficulty: Beginner
Working time: 2 Hours

Step 1: Prepare the stamping
Choose any Clear Stamp from your collection. These transparent stamps allow for precise designs as they are placed on a transparent Clear Stamp Holder. Press the Clear Stamp onto the holder and dab it carefully with the ink pads, to ensure even ink application.
Step 2: Stamp printing on transfer or water slide foil
Use the prepared transfer/water-slide foil and print the stamp motif onto it. Allow the ink to dry thoroughly to avoid smudging during further work.
Step 3: Transfer the motif to the candle
Once dry, cut the motif out of the foil. Dip the motif in water for around 30-40 seconds. When the backing film can be easily moved, it is ready to be applied to the candle. Carefully slide the motif onto the surface of the candle.
Step 4: Finishing touches and drying
You can now use a soft cloth to smooth out any creases in the motif and dab off any excess water. Leave the decorated candles to dry overnight so that the motif adheres securely.
Tip: To keep your stamps clean and usable for a long time, clean them after use with a special stamp cleaner. Apply a small amount of cleaner to a clean cloth and rub the stamp with it.
Step 5: Design terracotta-pots
Take your craft paints and paint the small terracotta-pots and two craft blocks to your taste. Let the paint dry thoroughly. Decorate the dried blocks with your stamps of choice.
Step 6: Create the sturdy candle basket
Press a soft wax plate into each painted pot. This ensures that the candles are stable. Make a frame out of four wooden blocks by joining them together with handicraft glue . Once the glue has dried, set up the frame and glue one block in front and one in back to hold the terracotta-pots securely in place. For additional stability, we recommend gluing a back wall. To do this, use an upright block as a placeholder to ensure equal spacing.
Tip: Leave a little space at the top of the frame so that you can transport your candle basket more easily later.
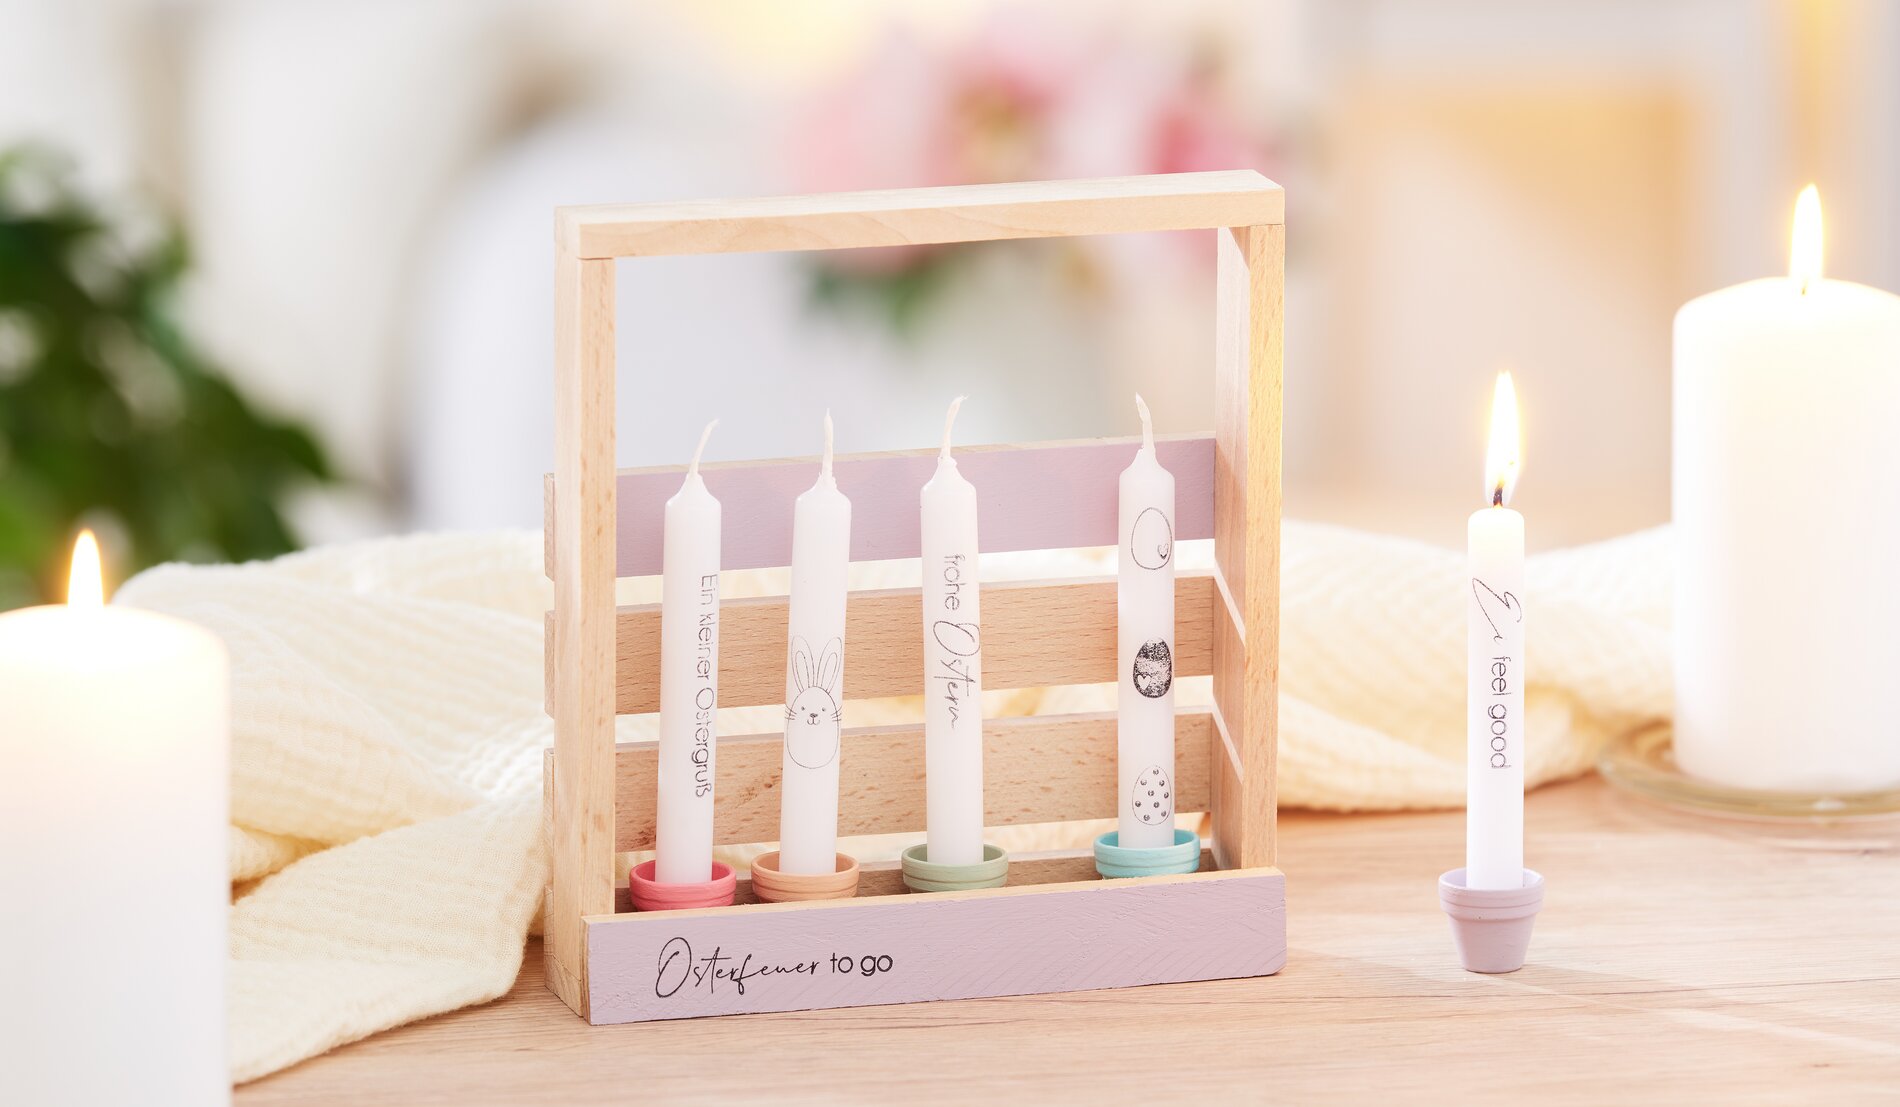
Step 7: Final decoration
Once all the components have dried thoroughly, place the decorated candles in the prepared pots in the frame. And voilà - your unique candle basket is ready!
You have now created a beautiful decorative piece for your home or a unique gift for friends and family.