Step 1: Transfer the template to the fabric
Start by printing out the motif template. transfer the motif using carbonless paper: place the yellow side of the transfer paper directly onto the fabric. Then place the printed template on the Paper. Now it's time to carefully trace the motifs with a pen. Make sure that you trace every part of the pattern exactly so that the design is clearly transferred to the fabric.
Tip: You can also use the "Strich-Ex" sublimation pen to transfer the motif. The violet color liquid of the pen disappears by itself after a while and leaves no traces.
Step 2: Attach chain of light
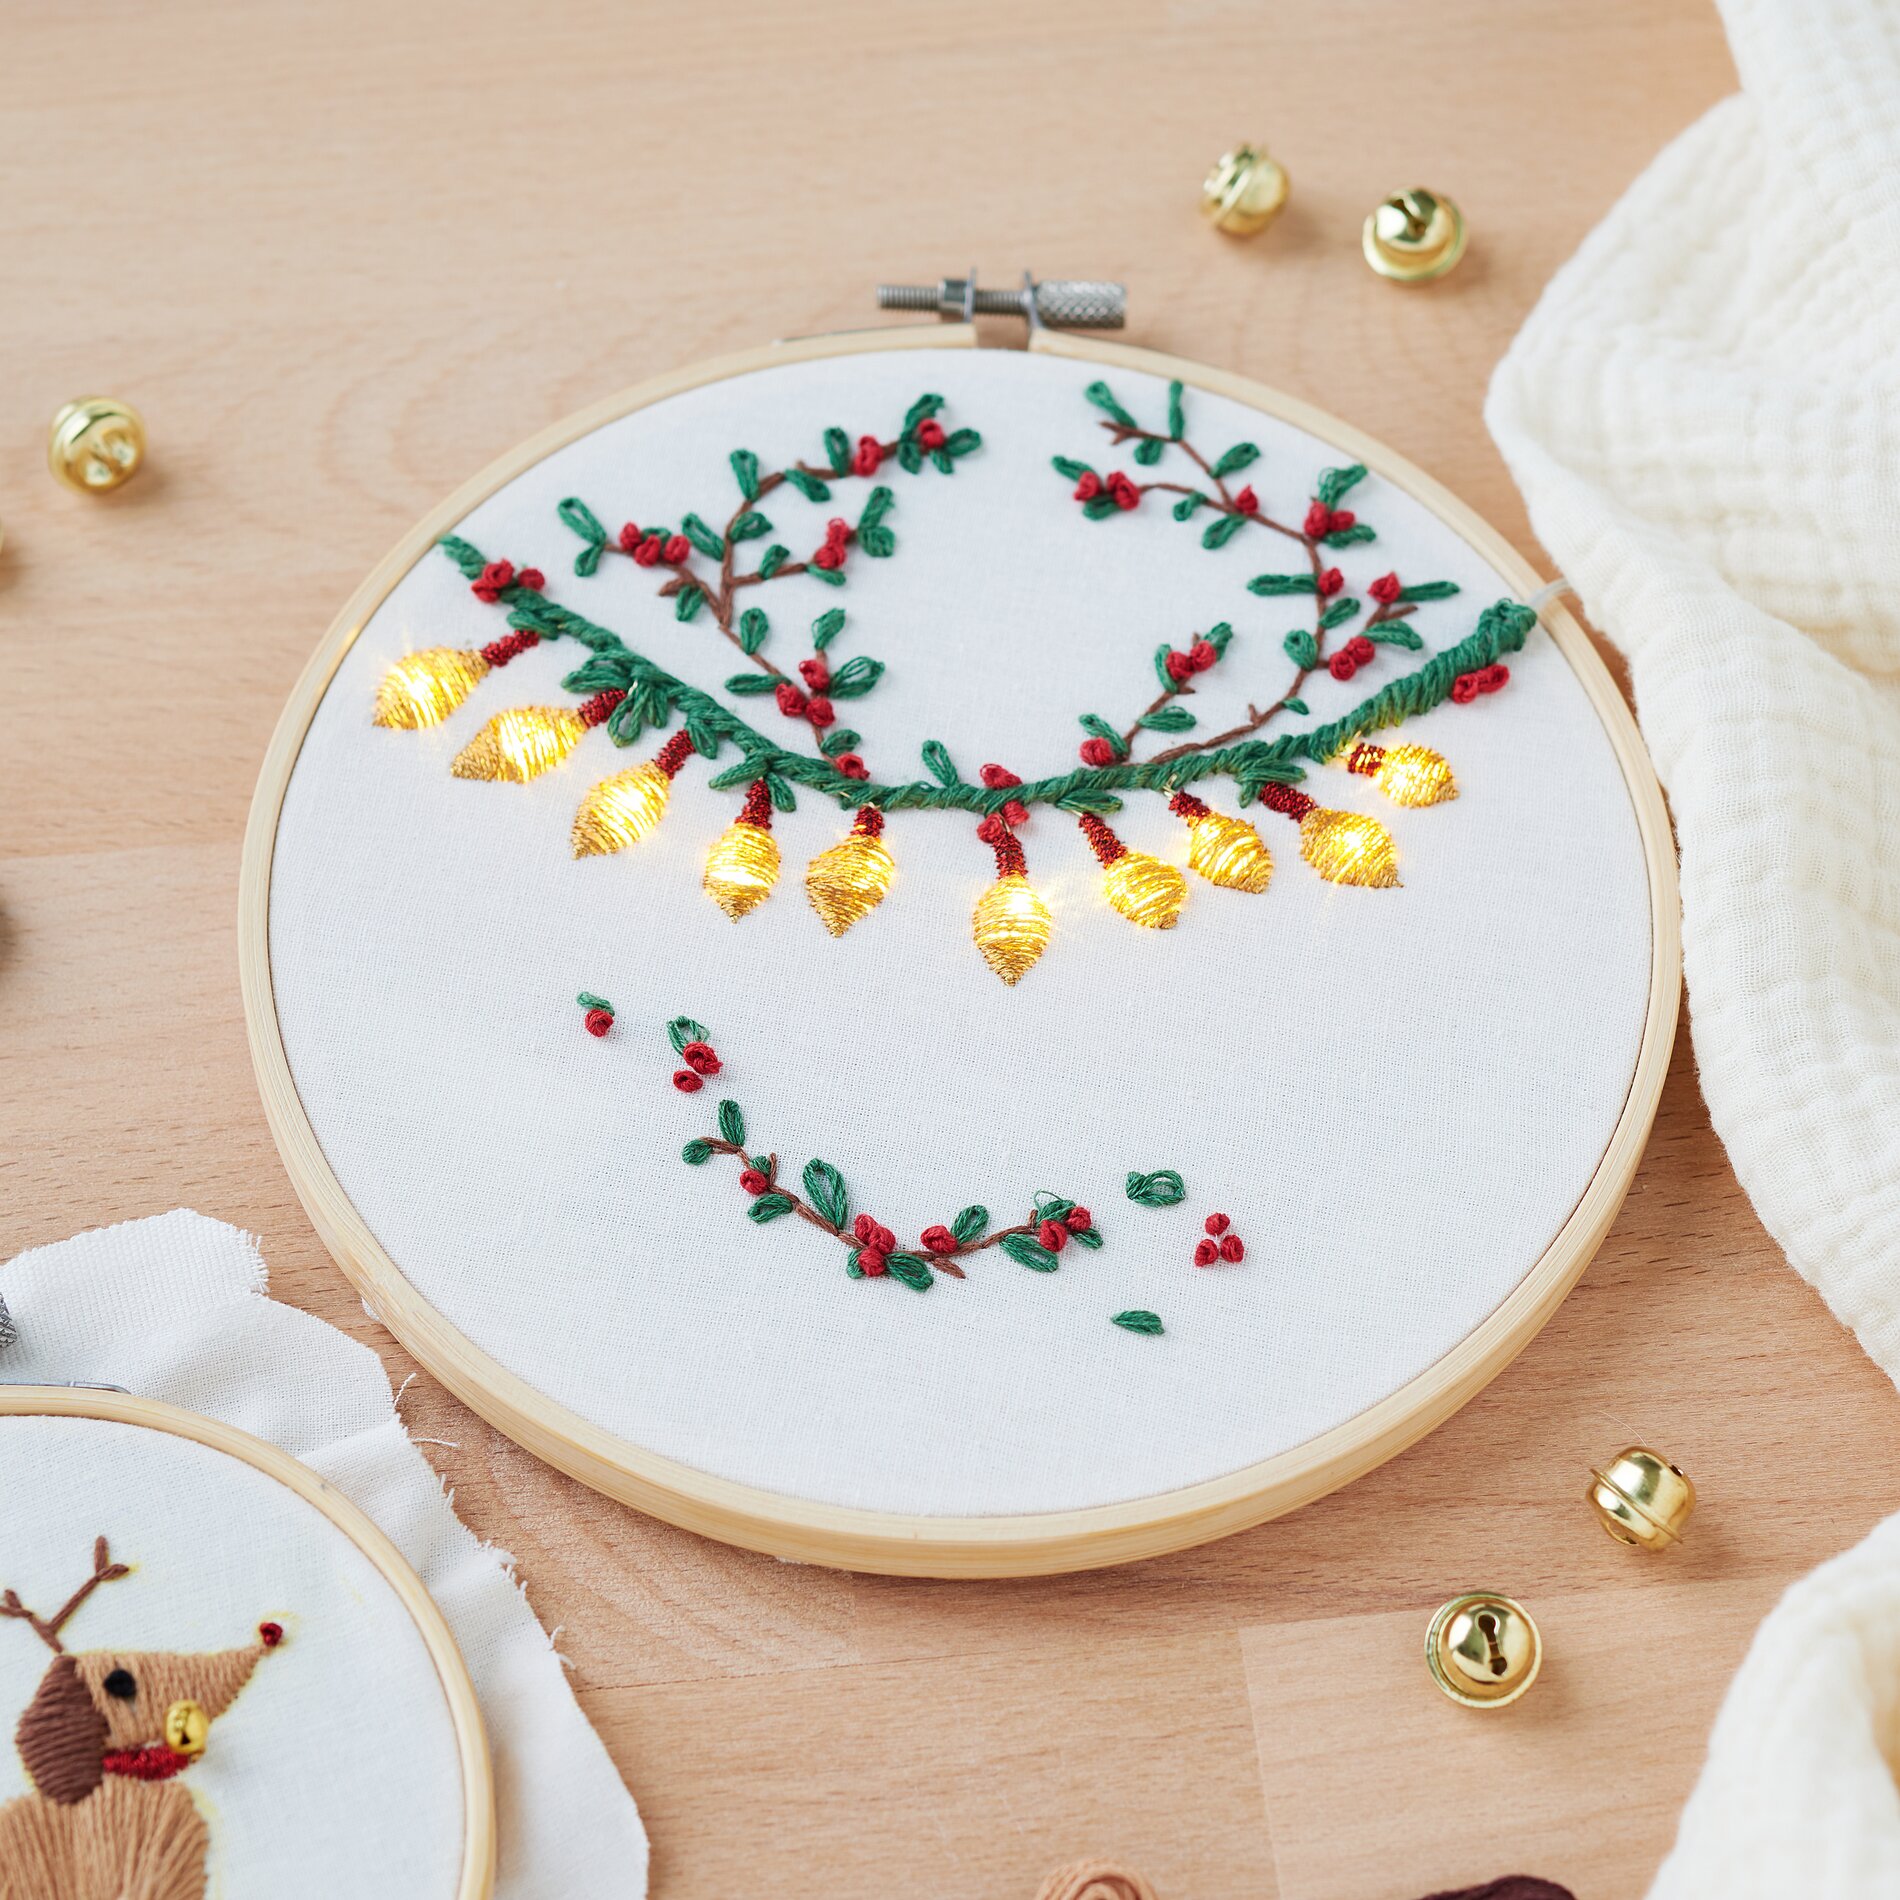
Attach the chain of light to your fabric with a few stitches so that it is firmly in place.
Step 3: Embroider the motifs
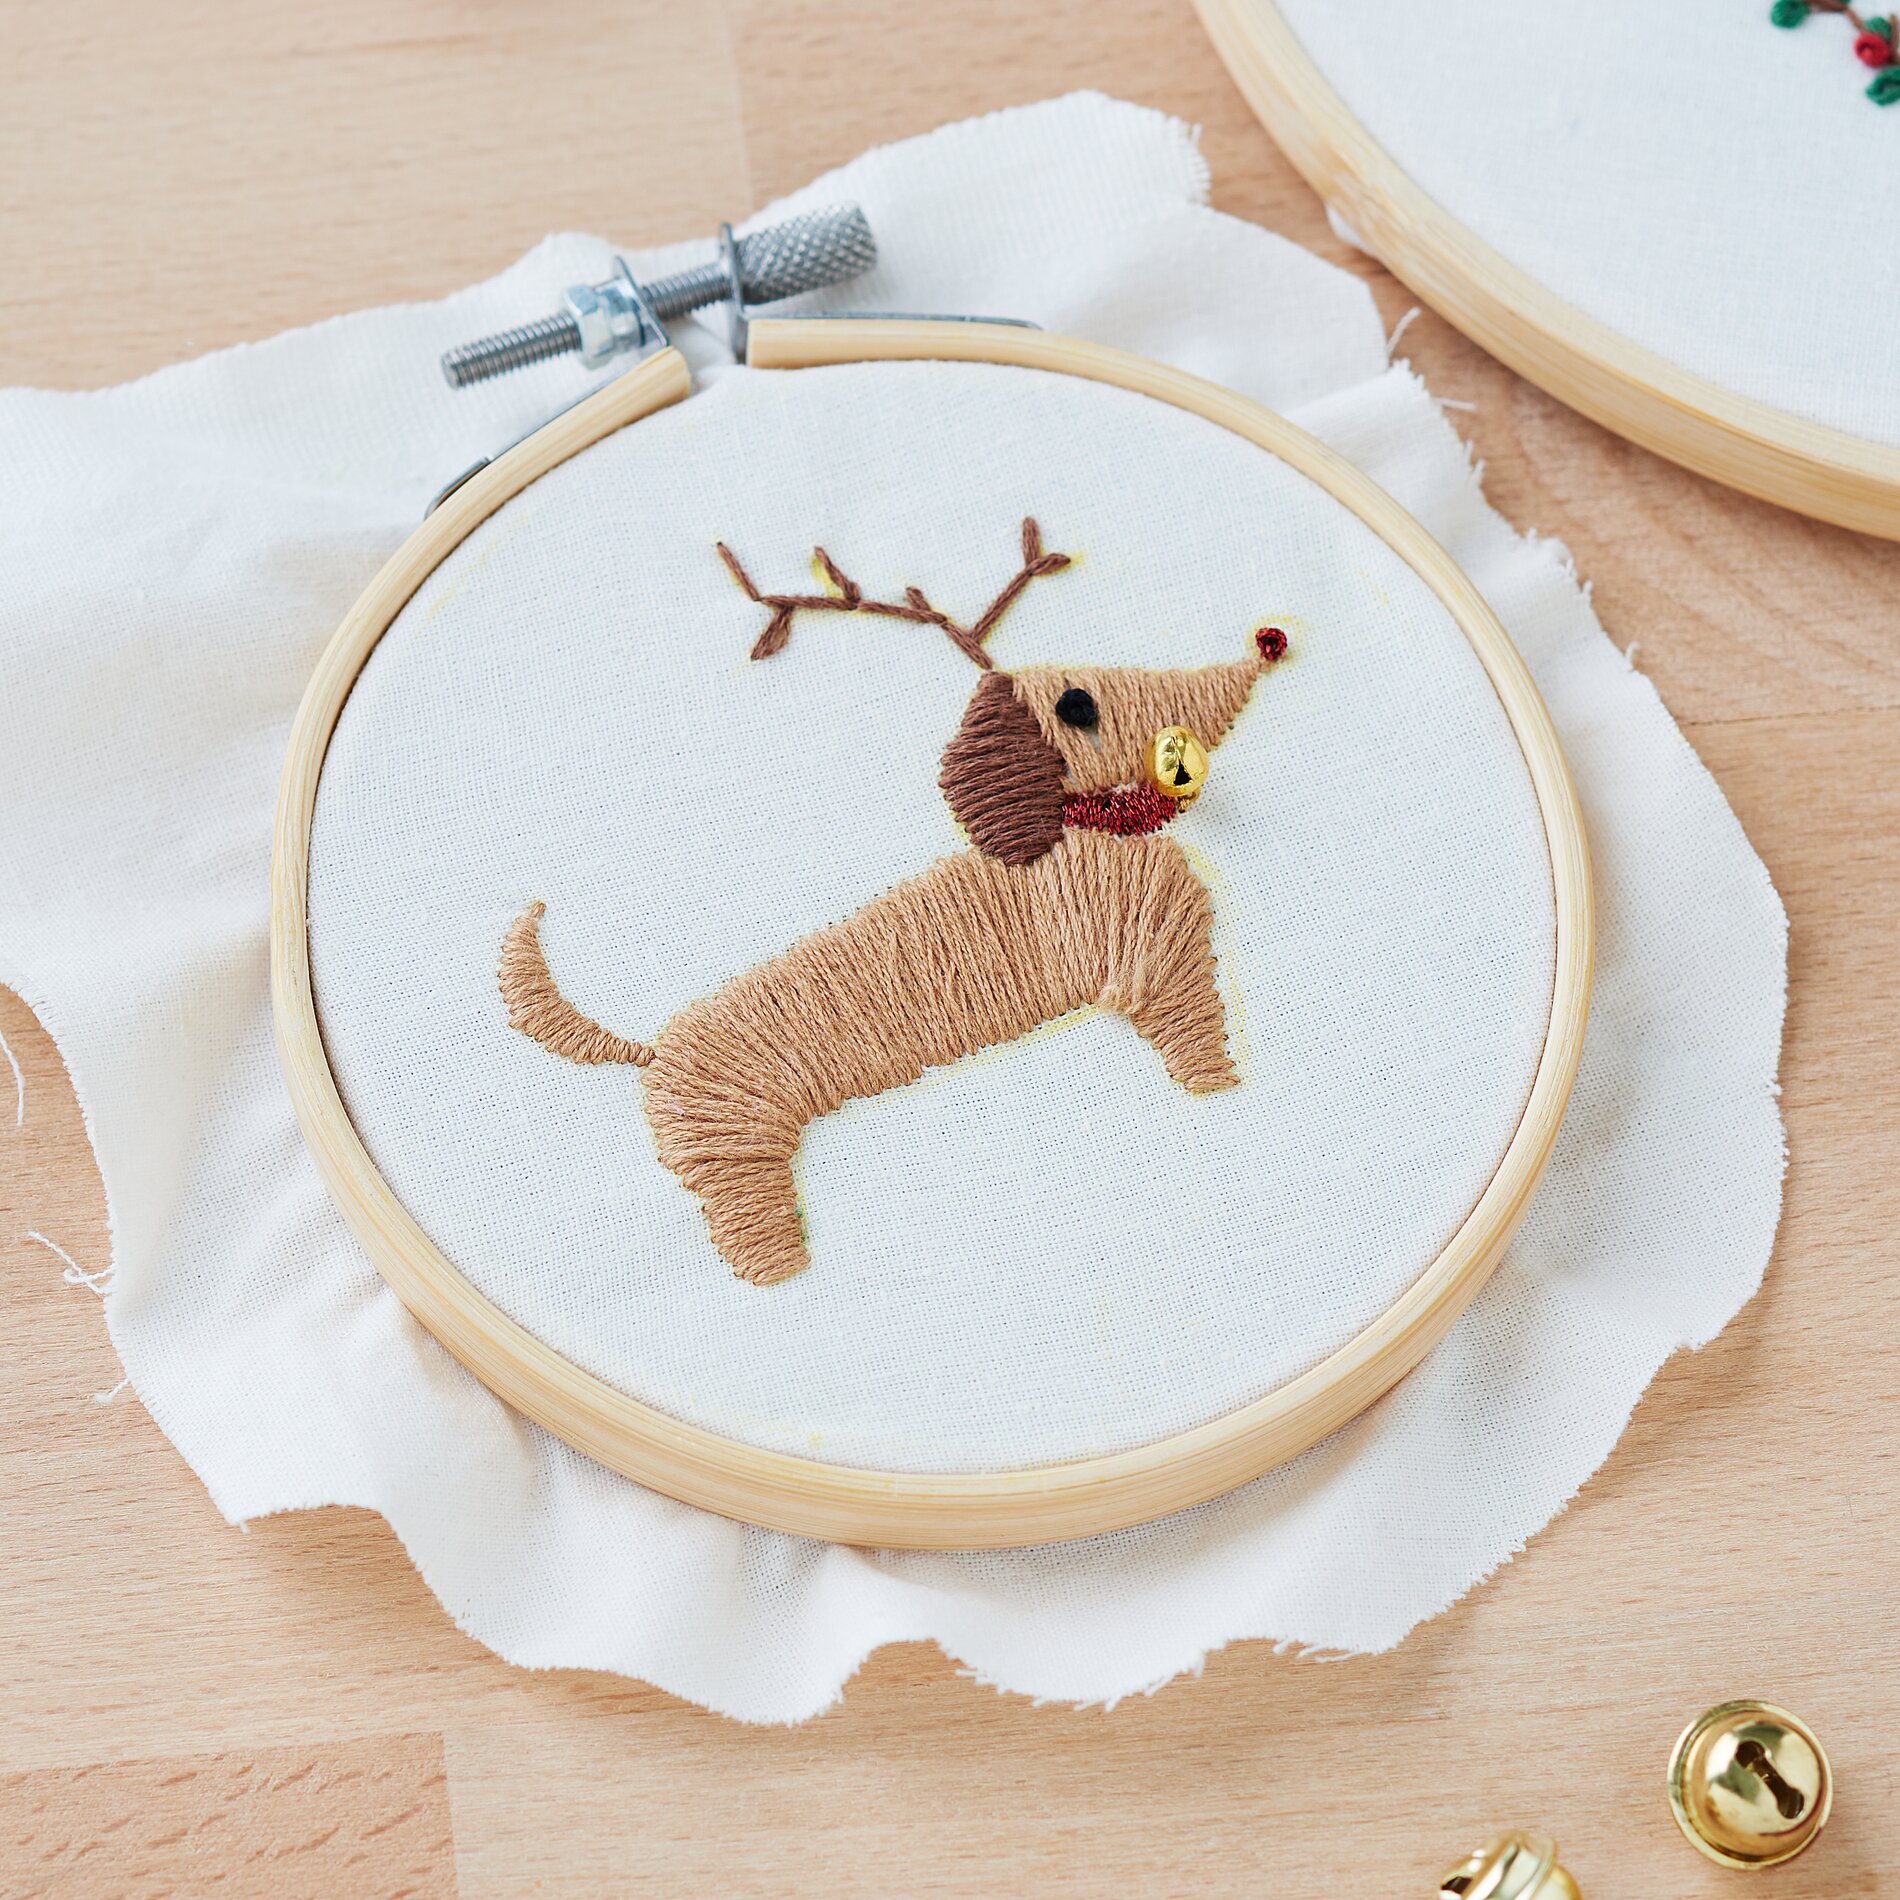
Now it's time to embroider the motifs. Follow the contours that you transferred to the fabric in the first step and let your creativity run wild. Use different embroidery techniques to give your motifs depth and texture. And also embroider over the LED bulbs.
Extra tip: Embroider berries and dachshund nose
The so-called French knot is suitable for the more delicate elements such as the berries and the dachshund's nose. Insert the needle through the fabric from below, wrap the thread around the tip of the needle several times and then guide the needle back through the fabric. This creates a small, circular knot. Repeat this process until the element is complete and knot the thread securely on the underside.
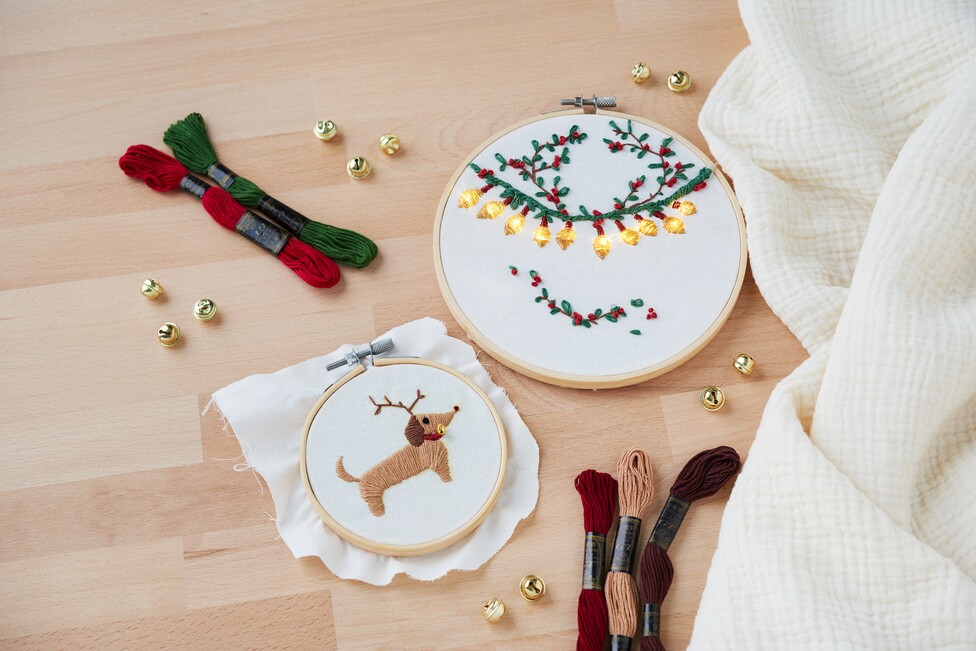
With a little patience and skill, you now have a bright fabric creation that will create a festive atmosphere in any living room. Your self-embroidered Christmas decoration is not only an eye-catcher, but also a personal message of your creativity and dedication.
If you are still looking for the necessary materials or need additional inspiration for other craft projects, visit our online store. We offer a wide Selection of high-quality craft products that will make your creative ideas shine. Get everything you need now and start your next DIY-Masterpiece!