- Secure order
- Easy return shipment
- Service-Hotline +32 50 89 35 27
Instructions No. 3172
Difficulty: Beginner
Working time: 30 Minutes

Prepare and cut the materials
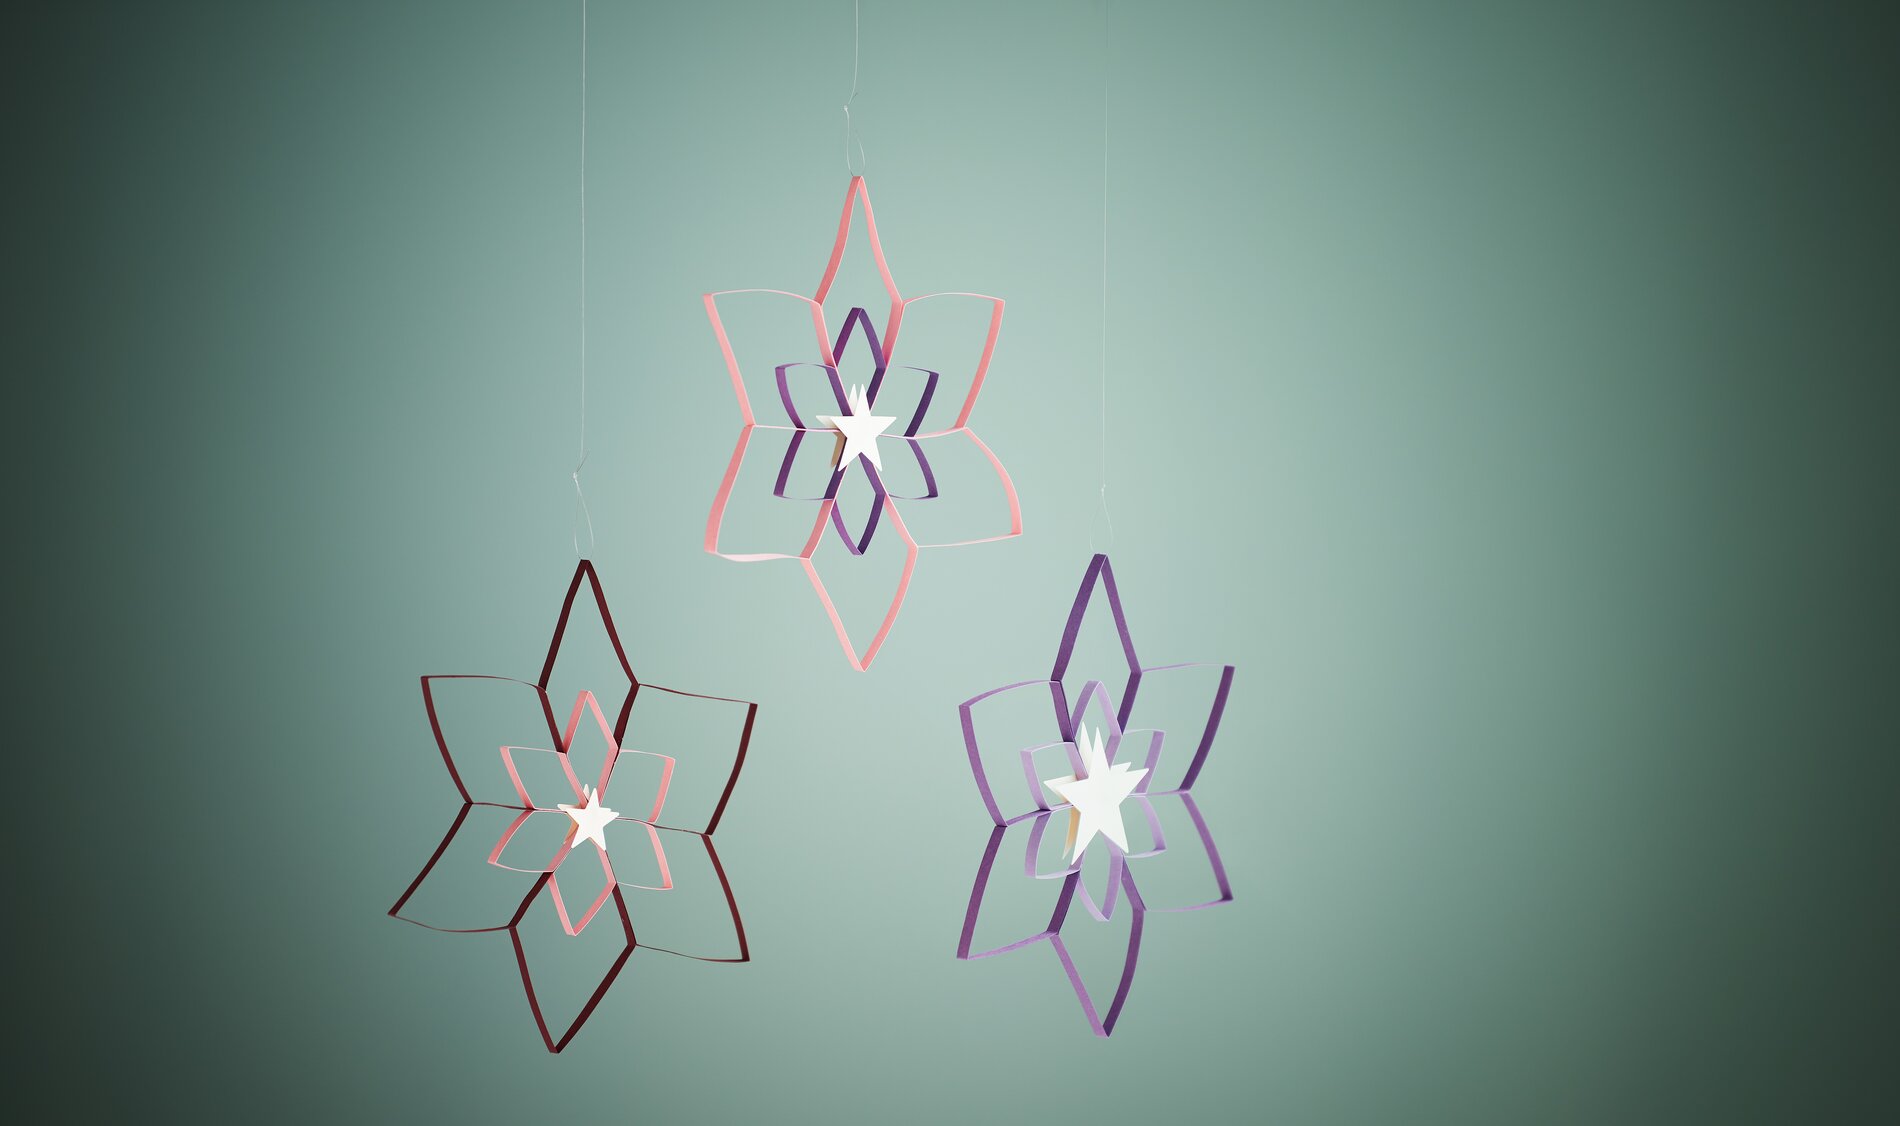
To get started, take your quilling strips. For the larger squares, cut the strips in half, while for the smaller squares, cut the strips into quarters. Cut the strips evenly to create a harmonious overall look later on.
Shape the checks
Now it's time to shape the checks. Glue the ends of the cut quilling strips together to create closed rings. Then fold these rings into squares by carefully pressing the sides inwards. Glue two sides of each square together to create the typical diamond or check pattern.
Create stars
Next, punch out stars from sturdy Paper or cardboard. These serve as a centerpiece and give your quilling stars stability and a beautiful shape. Glue the punched-out star to the center of your quilling check design.
Attach the suspension
To hang up your finished stars, you will need a piece of perlon yarn only . Tie the yarn to one of the lace of your stars so that you can easily attach them to the Christmas tree, window or door.
Finish
And now your unique quilling stars are ready! They radiate a special elegance and are perfect as handmade decorations for the festive season.
Are you ready to make your own Christmas stars? Visit our online store and discover our extensive range of quilling strips, beading yarn and other craft materials. Let your creativity run wild and conjure up a special Christmas atmosphere!


