there was probably an
iron-on bead hype in every household with children. Many patterns and shapes were created in a very short time and had to be ironed quickly so that the plates were free again for the next artwork. As is the case with trends, the iron-on beads became uninteresting for many at some point and disappeared deep down in the craft box.
There is now good news for anyone who still has a secret stash of iron-on beads: They are totally popular again!
Today we want to inspire you with a few craft ideas with iron-on beads to get the beads out of the craft box again.
Iron on beads ideas:

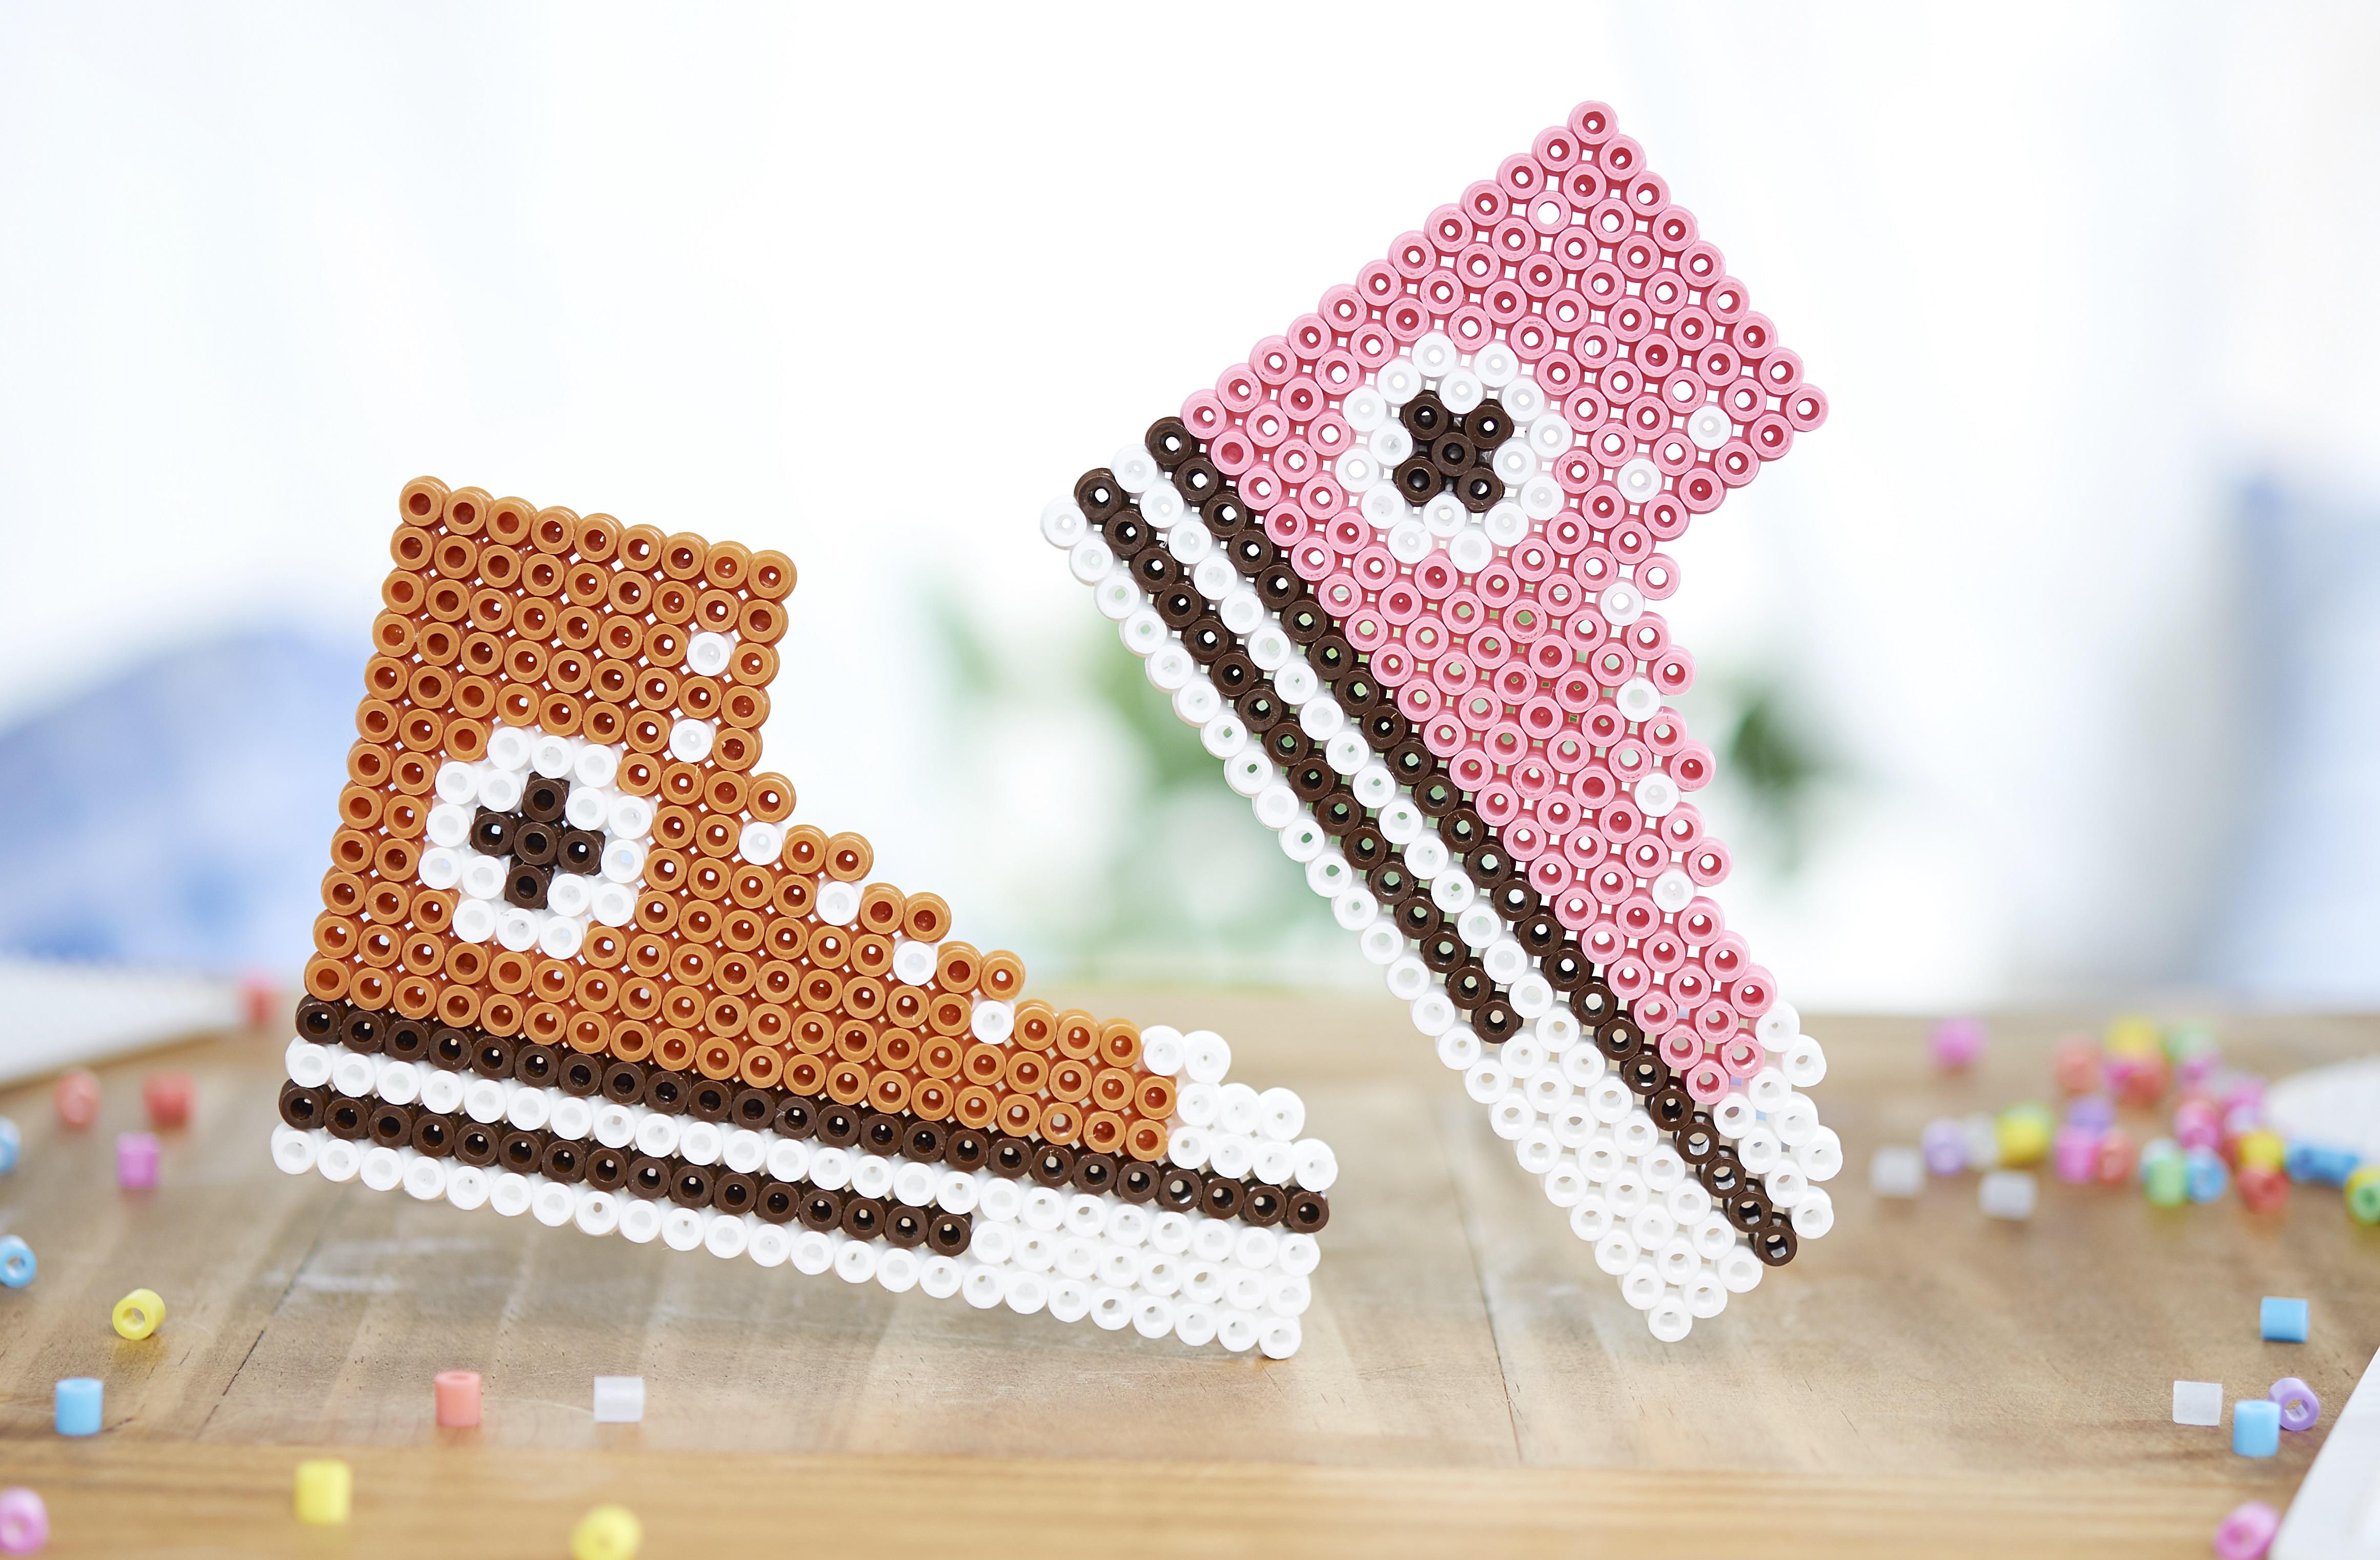
The pegboards for iron-on beads usually come in standard shapes and sizes. However, this does not have to stop you from creating patterns or objects that do not correspond to the dimensions of the plates. An example of this are the sneakers or the blue car. We simply took a larger, rectangular pegboard and got started. If you prefer to use a template, you can simply search for templates for iron-on beads on the internet. There you will find a huge Selection of free templates. For beginners, the
ready-made sets consisting of pegboards, templates and all the beads you need are also great.
Jewelry made from iron-on beads

Small pieces of jewelry can also be created from colorful iron-on beads.
For this ring, we created and ironed a small flower and then attached it to a ring using a
hot glue gun (alternatively
handicraft glue) onto a
ring.

You can also make earrings in a similar way. Simply decide on a pattern, iron it and attach it to a
ear hole hooks, stud or clip. Make sure that your iron-on bead artwork is not too big and heavy. Larger pendants are better suited for
necklaces.

With key rings, you can make any pattern or figure out of iron-on beads to create an individual
key ring . The key ring is simply pushed through the top of one of the beads and you're done. This craft idea is also great for children's birthday parties and also encourages creativity.
Bowls, coaster and protective lids made from iron-on beads
Iron-on beads can be used to make much more than iron-on pictures on pegboards. One example of this is vases or bowls. You don't even need pegboards for this.

You need a container of your choice, which must be only oven-safe. We opted for a plate and a bowl. Brush these with oil so that the beads don't stick afterwards. Now sprinkle iron-on beads into the bowl and arrange them so that they form an even layer. Make sure that the beads are not on top of each other. Next, place the bowl in the oven and keep it there at 180°C for 5-10 minutes. When the beads have melted, carefully remove the bowl. Leave it to cool slightly and carefully remove the melted beads. It is best to leave the iron-on bead tray to cool completely and then wash it off. Ventilate the kitchen well.

You probably already know
our protective lids made from iron-on beads. In addition to lids, you can also make coaster for jars, cups and the like. In summer, for example, in bright, cheerful colors with flowers, in winter perhaps classic black and white with snowflakes or Christmas patterns in red and green. If the pattern does not quite match the desired size of the coaster, you can use transparent or milky iron-on beads in these areas to keep everything stable. The iron-on beads can also be used to create small gift tags. Simply iron a small motif, e.g. a heart or a snowflake, and attach it to the gift with a thread or pretty ribbon . You can also decorate cards, gift boxes and more in the same way.
What have you already conjured up from iron-on beads? We are curious!
Discover the variety in our online store: Now that you have lots of creative ideas, take a look at our online store and browse through our Selection range of iron-on beads and accessories. Your next art project is already waiting!
To the store