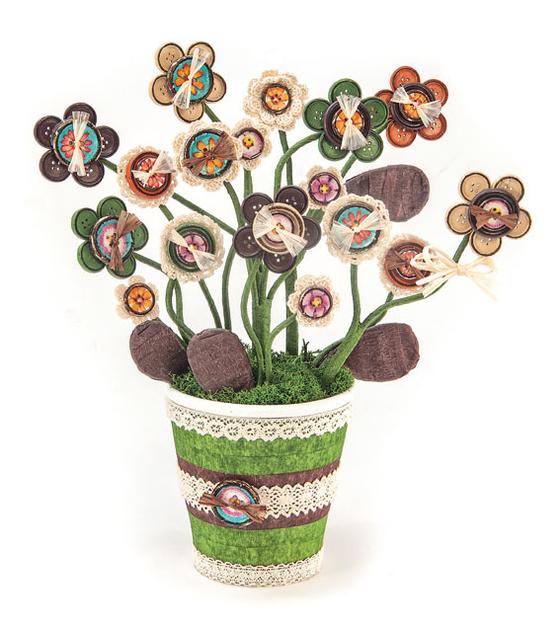
Here's
how it works First, paint the buttons with Handicraft paint . Cut different flower motifs from Napkin and remove the two unprinted layers of paper. Glue the printed paper layers with Napkin varnish on the buttons that should form the center of the flower. You can also glue small and large buttons on top of each other.
Important: For the middle of the flower, white buttons must be used, because the thin napkin paper becomes very translucent through the Napkin varnish .
After drying, wipe over the edges of the buttons with the Ink Pads . Lay out the small buttons to form a circle, apply hot glue to the back of the centre of the flower and stick this button onto the button circle.
Important: Leave the buttonholes free. Pull through the buttonholes of the middle buttons Viscose-Raffia and knot them. Glue individual buttons on crocheted flowers.
Cut off approx. 20 cm and 25 cm long pieces of aluminium wire with the side cutter and wrap them with green Florist tape . Bend the leaves from aluminium wire and wrap them with brown Florist tape . Wrap the leaves with green Florist tape on the stems, combine different stems and glue the ends to the back of the flowers with hot glue.
Prime the rose pot white, wrap it with Florist tape after drying. Stick crochet lace around the pot and decorate with a button. Fit the stick into the pot, cut the stems of the button flowers to the desired length and put them into the pot. Finally cover the surface with moss.