- Secure order
- Easy return shipment
- Service-Hotline +32 50 89 35 27
Instructions No. 3448
Difficulty: Beginner
Working time: 1 hour


Step 1: Preparing the parts
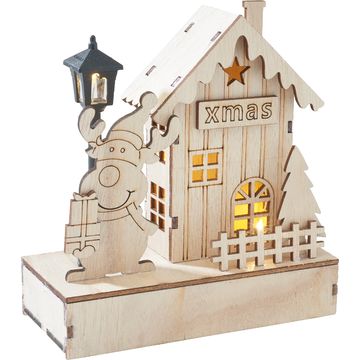
Before you start painting, make sure that all the parts of the pegboard motif are clean and dry. This preparation will ensure that the paints adhere well and that the end result looks professional. You should also make sure that you use a suitable base to protect your work area from paint residue.


Step 2: Creative painting
Now the creative part begins: take the craft VBS Craft paints and start painting the individual parts however you like. think about a color scheme that matches your interior style or go for bold contrasts for a vibrant look. Make sure to let the paint dry thoroughly before moving on to the next step. This prevents smudging and ensures clean edges.
Step 3: Gluing the elements together
Once the paint has dried, you can glue the individual parts together. To do this, use the VBS handicraft gluewhich has been specially developed for such projects. Apply a thin layer of glue to the connection points and carefully join the parts together. Hold the parts for a moment in Position, to ensure that the glue adheres well. Precision is required to achieve a perfect result.
Step 4: Add your light
To give your house of lights the finishing touch, add a small LED light. This will give your work of art a warm glow and create an enchanting atmosphere.
Step 5: Presentation and enjoyment
Now your artwork is ready! Find a nice place in your home to display your house of lights. Enjoy the soft glow and let yourself be flooded with a touch of coziness. Or give your house of lights as a gift to a loved one and spread joy and light.