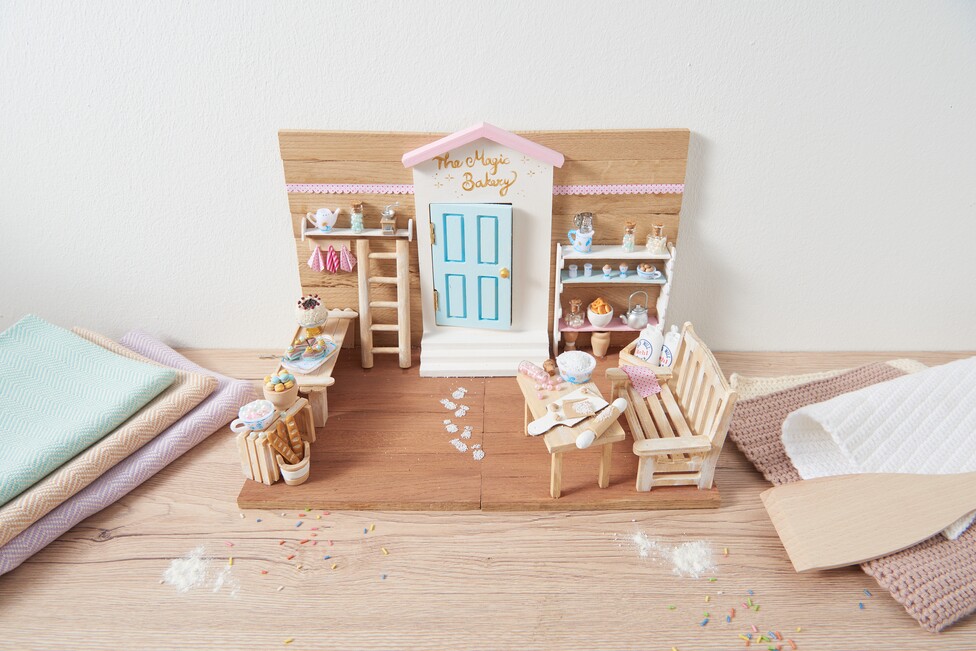
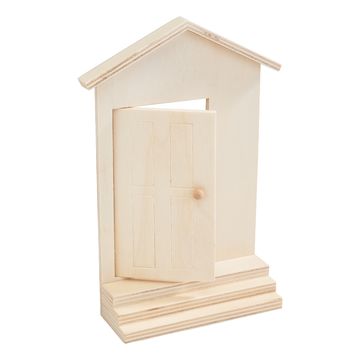
Step-by-step instructions for the miniature bakery
Glue the craft blocks together
Start by gluing the craft blocks together to form a stable base and back wall for your miniature bakery. Make sure that the glued joints are tight so that the base frame is stable.
Adding color accents
Now it's time to embellish the furniture. Use the VBS handicraft paintto paint the furniture to your taste. This paint is specially developed for craft work and provides bright, long-lasting colors. Allow the paint to dry completely before finishing the furniture.
Designing the shelves and counter
Use popsicle sticks for the shelves and counter, cut them to size and paint them with the VBS-handicraft paint paint them. These elements give your bakery structure and make optimum use of the space for a realistic look.
Add details
Fill the small bottles with beads to make them look like filled candy jars. Also paint the white miniature tableware with the same handicraft paint as before to create a harmonious overall impression.
Modeling treats from polymer clay
Now shape small pastry specialties out of polymer clay, such as croissants, baguettes, eggs or macarons. Fimo is a moldable modelling clay, that hardens after baking. Bake the molded pieces in the oven for about 20 minutes at 110 degrees Celsius. Make sure to allow the pastries to cool completely.
Fixing furniture and decorations
Now stick all the finished furniture and decorative elements in the desired place in your bakery. Use a strong handicraft glueto attach everything securely.
Snow-like decoration
Use decorative snow, to enchant the miniature. Sprinkle the snow lightly over the furniture and decorations to make it look like flour. This gives the scene a particularly authentic touch.
Create paper towels from Paper
Cut out small diamond-shaped pieces from Paper and fold them to resemble miniature towels. Place them in your bakery to give it the finishing touch.