- Gratis verzending vanaf 75 € binnen België
- Eenvoudige retourzending
- Telefoon +32 50 89 35 27
Instructies Nee. 3210
Moeilijkheidsgraad: Beginners
Werktijden: 2 Uren

Stap 1: Houten tags gronden en voorbereiden
Begin met het zorgvuldig gronden van de VBS Zet de houten tags voorzichtig in de grondverf met witte knutselverf . Deze primer zorgt ervoor dat de kleuren van je servet later bijzonder goed uitkomen. Laat de verf volledig drogen voordat je verdergaat.
Stap 2: Knip het servetmotief uit
Neem de servet en scheur er voorzichtig het gewenste motief uit. Door het uit te scheuren krijg je een natuurlijke, gladde overgang. Verwijder alle onbedrukte servetlagen. De makkelijkste manier om dit te doen is met een plakstrip: plak hem halverwege op de onderkant en trek hem er dan weer af. Nu heb je slechts nog steeds de dunne, bedrukte laag in je hand.
Stap 3: Ontwerp houten labels met een servetmotief
Breng een dun laagje servetlak aan op je houten tag. Leg dan het servetmotief erop en bestrijk het opnieuw van binnen naar buiten met servetlak. Let op: Oefen niet te veel druk uit, want de delicate servet zou kunnen scheuren. Laat alles goed drogen.
Voor een langdurige bescherming breng je na het drogen een laatste laag servetlak aan op de hele houten hanger. Eventueel kun je een jute koord door het gat rijgen en het met een strik sluiten om de tag een rustiek tintje te geven.
Stap 4: Versier VBS hout-stekers
Neem een decoratief houten-stekers en verf het met je favoriete knutselkleuren om het levendig en kleurrijk te maken. Smeer het stokje van de stekers in met servetlak, om het te beschermen tegen het vocht in de grond. Zo blijft je decoratie duurzaam.
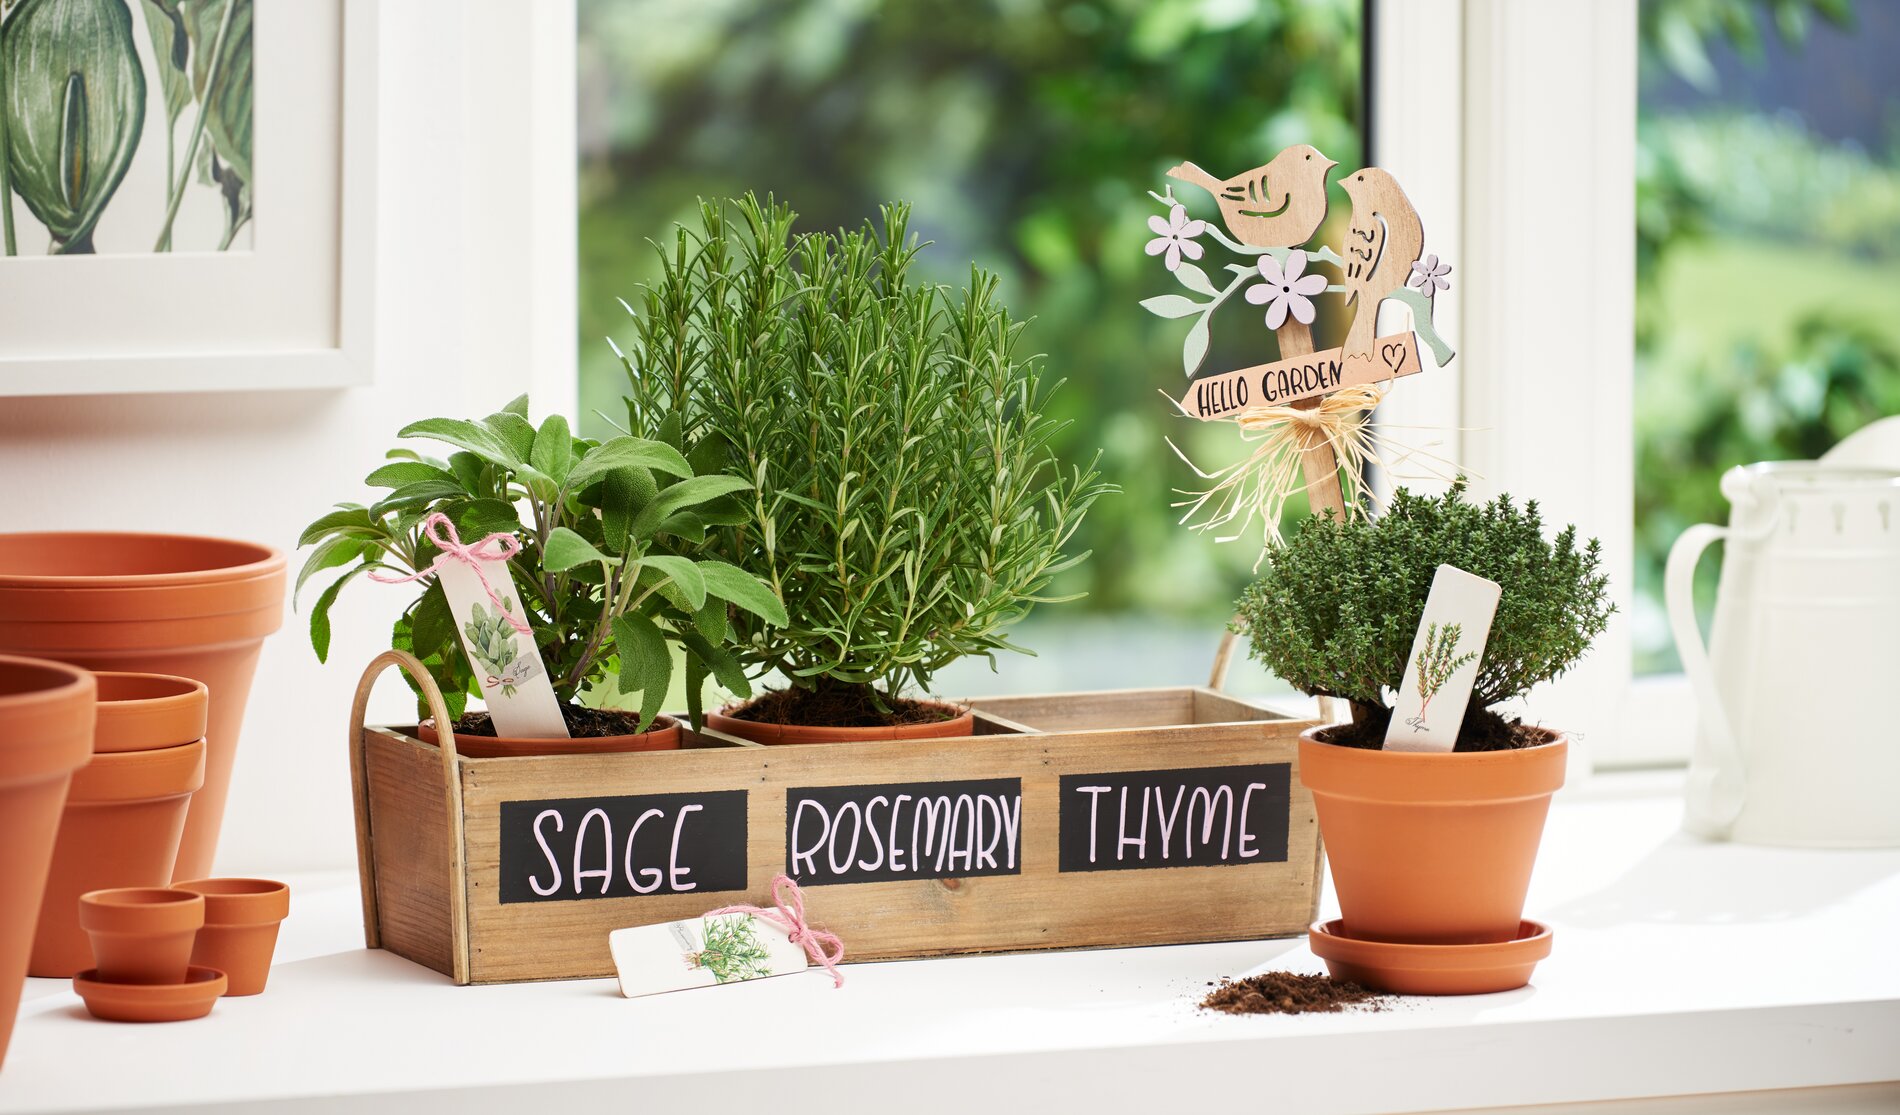
Stap 5: Ontwerp de plantenbak met bordverf
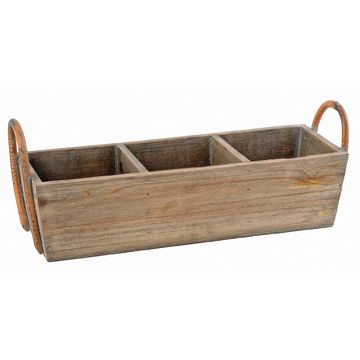
Nu is het tijd voor de plantenbak! Lijm één kant van de VBS Plantmand met crêpe-plakband om drie rechthoeken van gelijke grootte te maken. Bestrijk deze rechthoeken met schoolbordverf. Breng de lak kruislings aan in 2-3 lagen en laat 24 uur volledig drogen.
Eenmaal droog kun je je plantenbak labelen met krijtmarker . Het vloeibare krijt heeft een bijzonder hoge dekkracht, is gemakkelijk aan te brengen en kan met een vochtige doek weer worden weggeveegd. Zo kun je je plantenbak een persoonlijk tintje geven en op elk moment een nieuw ontwerp maken.
Stap 6: Plant en versier de plantenbak
Nu de bloembak klaar is, is het tijd om hem te vullen met leven. Kies je favoriete kruiden of bloemen en plaats ze in de bak. Zorg ervoor dat je planten genoeg ruimte en geschikte grond hebben voor een gezonde groei.
Versier de plantenbak vervolgens met de zelfontworpen stekers. Deze geven je arrangement een charmant, creatief tintje en zijn bovendien een persoonlijk hoogtepunt in je tuin of op je balkon.
Gebruik de vlakken die bedekt zijn met krijtbordverf om de geplante kruiden of planten te labelen met de krijtmarker . Zo kun je altijd zien welke planten waar groeien en je kunt de oppervlakken van het bord op elk moment met een vochtige doek afvegen en opnieuw labelen als je andere kruiden of planten wilt planten.
Met je op maat gemaakte plantenbak heb je nu niet alleen slechts een nuttig, maar ook een decoratief element dat je leefruimte een persoonlijk tintje geeft.