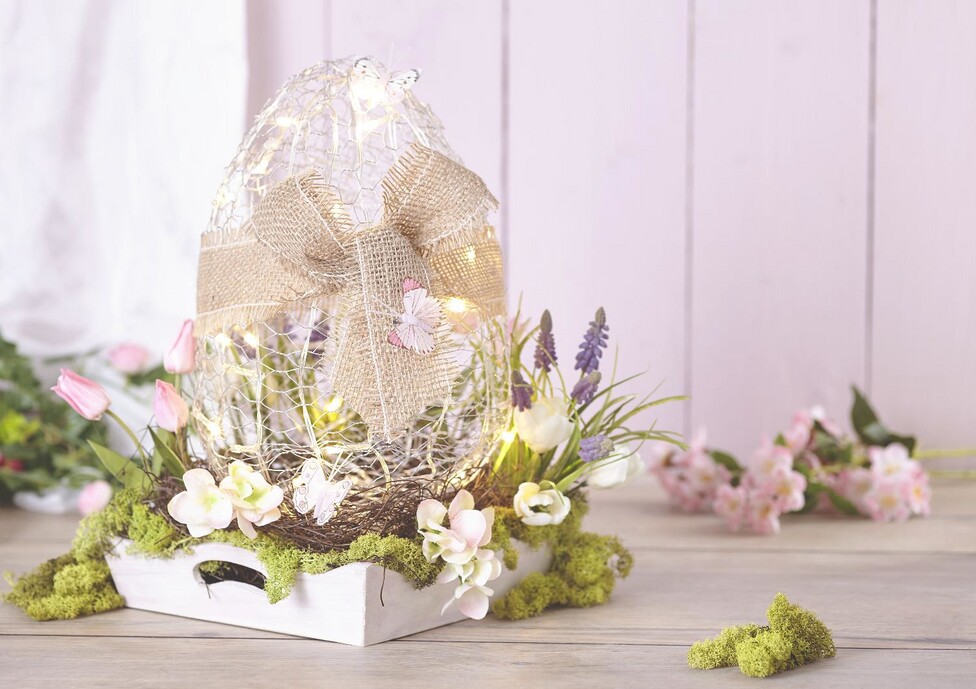
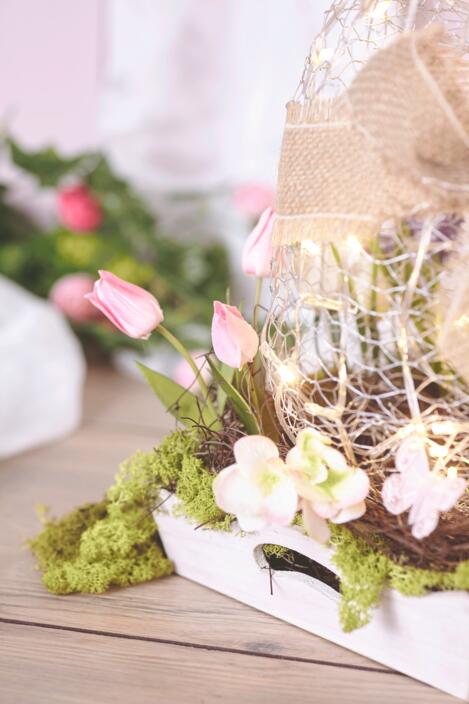
It's that simple:
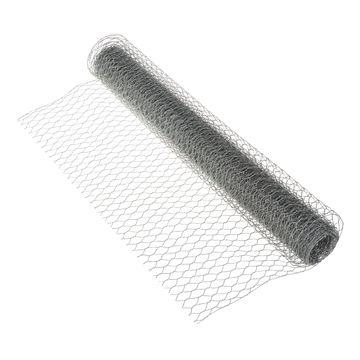
Cut a piece of wire mesh and form it into a wire egg
To do this, first glue together a 30 cm Polystyrene egg. The wire netting is rolled out slightly and loosely laid around the Polystyrene-egg to form a wire egg. Use the pliers to bend the wire ends together - not too tight, so that the Polystyrene-egg can still be removed from the wire netting. Cut off the protruding wire at the ends. Starting at the top end of the egg, the ends of the wire are woven together and the Polystyrene-egg can be removed through the opening. This can then be closed. Now pull only still two fairy lights through the wire
The wooden tray is now fixed with VBS Chalky Color painted in the colour antique white. Then a layer of Chalky Wax is applied to some parts of the tray (edges). After it has dried, simply apply a little bit of wax with a sponge VBS Chalky Color in Old Pink wiped over the surfaces. After this second layer of paint has dried, the areas previously coated with wax are carefully treated with Sandpaper until the typical Chalky look is achieved.