- Secure order
- Easy return shipment
- Service-Hotline +32 50 89 35 27
Instructions No. 3258
Difficulty: Advanced
Working time: 5 Hours


Before you start gluing the blocks together, make sure you have all the materials to hand. The VBS handicraft glue is ideal as it sets quickly and becomes transparent after drying.
Start by creating the four side parts of your future lamp.
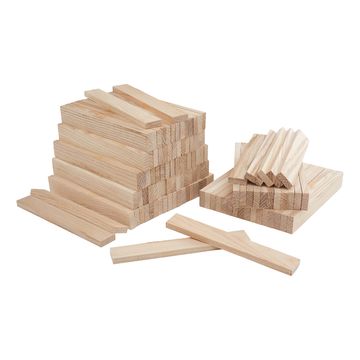
You will need for each side part:
- Four 16 cm blocks
- Two 8 cm blocks
- Two 4 cm blocks
- Six acrylic blocks (three satin and three clear)
Make sure that you leave out a 4 cm long craft block from one of the side sections. This guarantees that the plugs of the lamp base will have room later. After you have assembled the side parts, leave them to dry overnight.
Coat the wooden blocks with the VBS Acrylic varnish to give them a perfect finish. This not only gives only a great look, but also protects the wooden surface from external influences.
Glue the four finished side sections together at the outer edges using the handicraft glue . For additional stability, you can attach additional blocks from the inside for reinforcement. Make sure that the lamp base still has enough space.
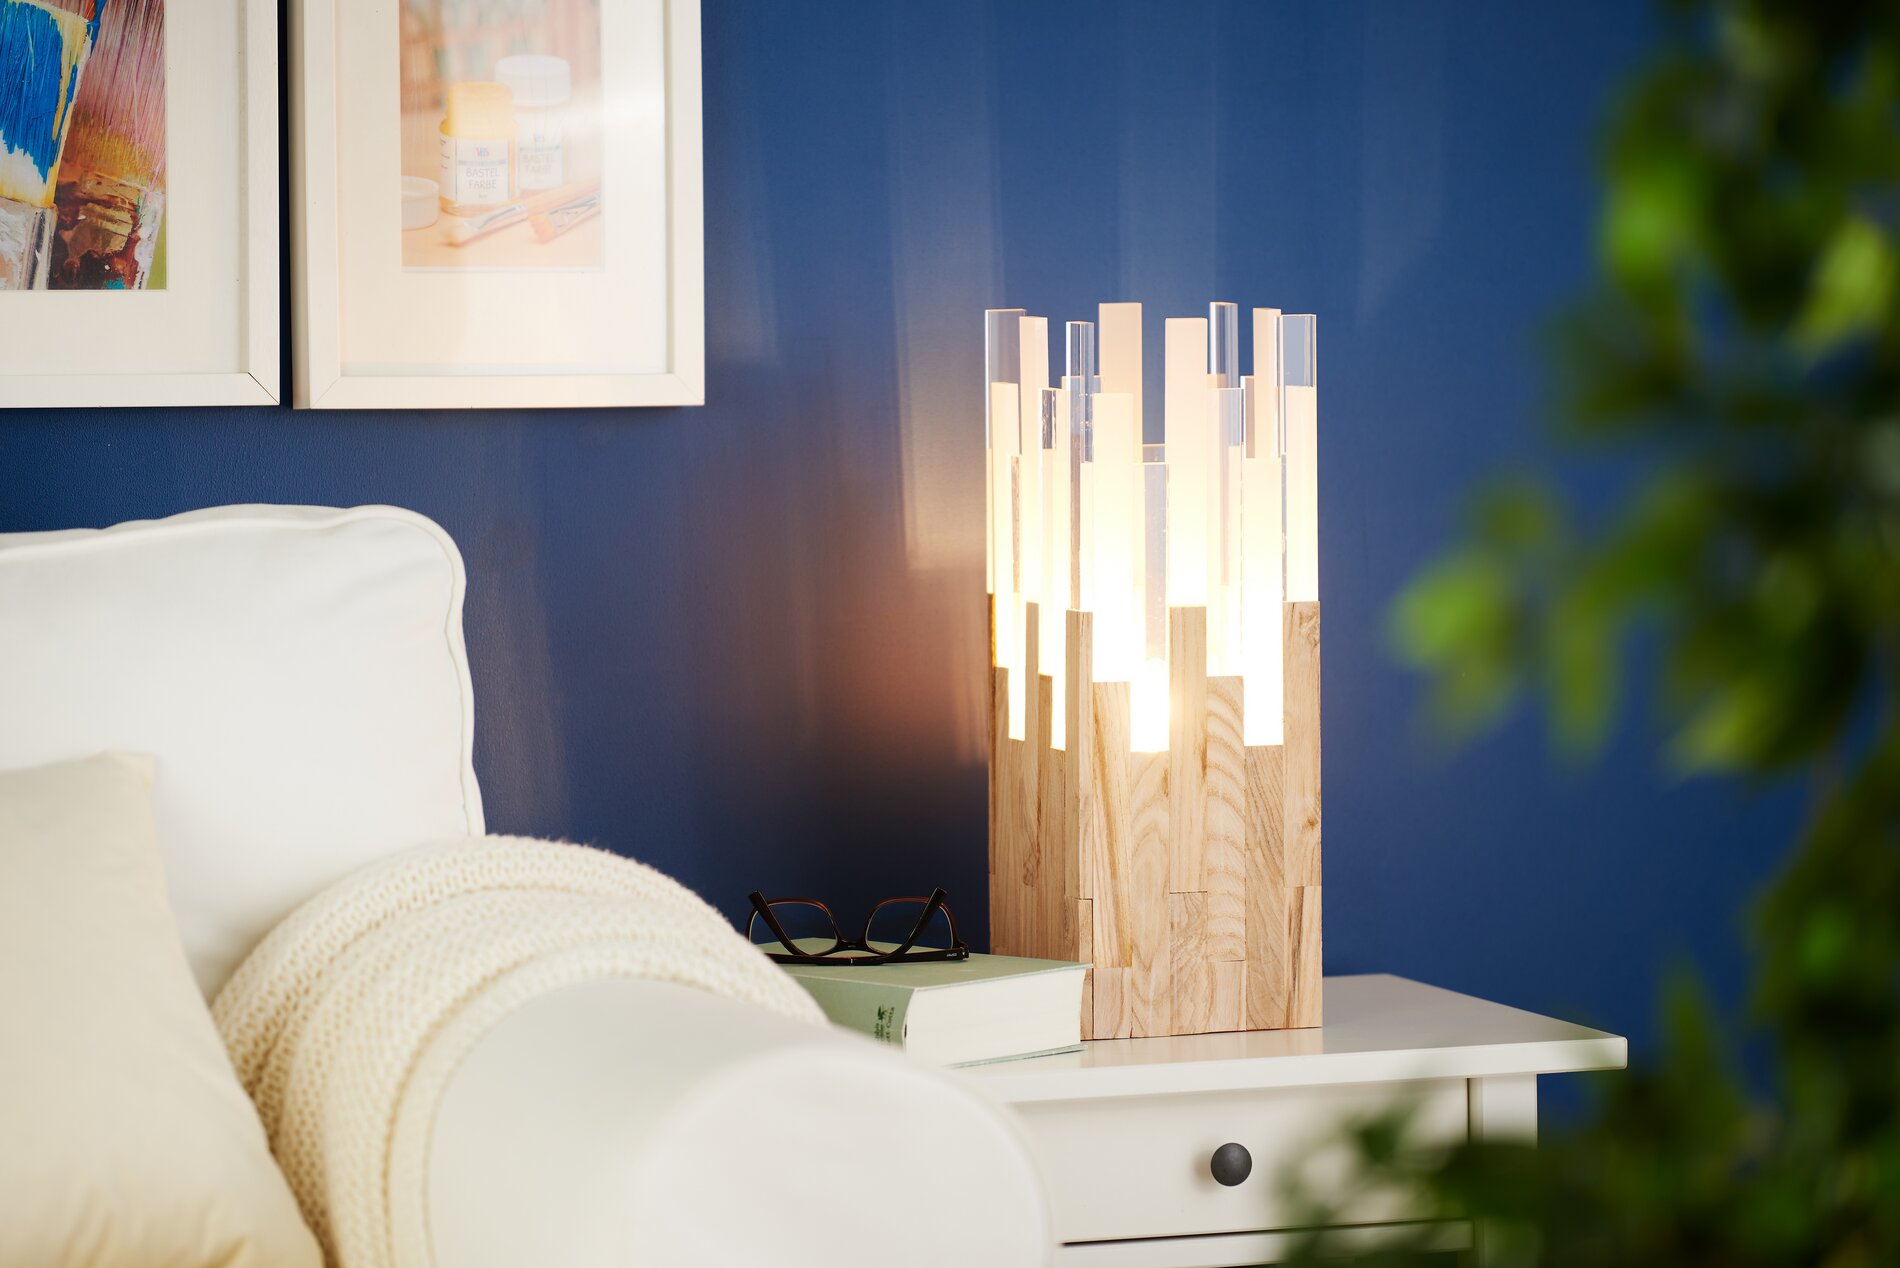
Then fit the lamp base with an E14 light bulb.
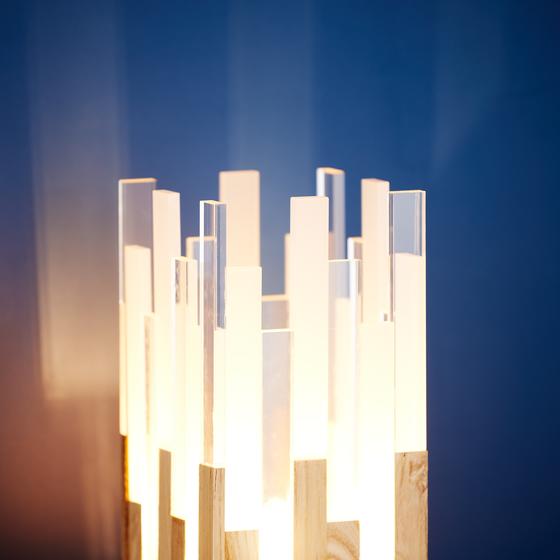
As soon as all parts are sufficiently dry, you can carefully put the lampshade over the lamp base. Finally, check that the lamp is stable and that the light emitted matches your design!