 www.vbs-hobby.com
Lantern Ufo
Instructions No. 2001 Instructions No. 2001 Difficulty: Advanced Working time: 4 Hours
Aliens off.. who wouldn't want to have a funny homemade lantern like this as a kid? With our instructions and template you can do this very easily and you will conjure a joyful smile on your child's face.
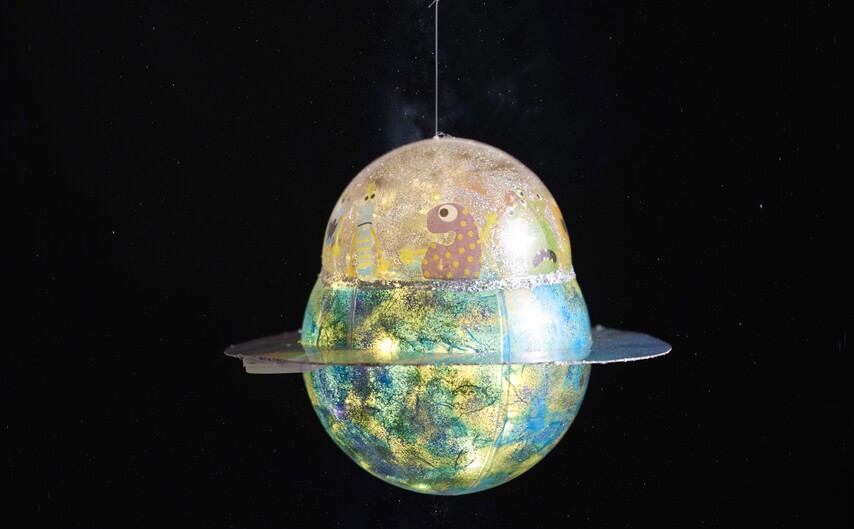
This is how the alien good lantern is made:
As preparation for the design of the lantern, first put the 14 cm Acrylic ball together. Now place one half of the 12 cm ball in the middle of the large 14 cm ball and mark with a thin pencil where the hemisphere is located
Using a hot needle or the hot tip of the hot glue gun, melt a hole in the middle of the 12-point hemisphere. This is for the later suspension and the laying of the light chain in the lantern
Tear the Straw silk paper into little pieces. Spread the 14cm ball from the inside with the Napkin varnish and sprinkle some blue, green and silver glitter on it. Now place them Straw silk paper and coat them again with Napkin varnish. Important: Do Straw silk paper not glue them over the mark you have drawn before, otherwise you will see the Straw silk paper.
Cut some small monsters out of the Napkin off. Glue the monsters from the inside Napkin varnish into the 12 cm hemisphere. To do this, spread the monsters on the inside of the hemisphere with Glue Napkin varnish, on Napkin varnish. the monsters and spread Napkin varnish them again with Glitter. Cut off the eyelet of the small hemisphere with scissors or pliers
When everything is dry, put a light chain through the hole in the 14 cm ball. The battery compartment remains outside. Attach a nylon thread to the eyelet and pull it through the melted hole in the 12 cm ball. Glue the hemisphere to the 14 cm ball with hot glue. Cover the end with Flaky Glue
Print out the template, cut it out and transfer it twice to the holographic cardboard. Cut out the ufo discs and glue them together. Cover the edge with Flaky Glue as well. After drying, slide the ring over the 14 ball and fix it with some hot glue. The battery compartment of the light chain is glued underneath with some hot glue
It Lantern rod can be connected at will with Handicraft paint be painted and sprinkled with glitter.


