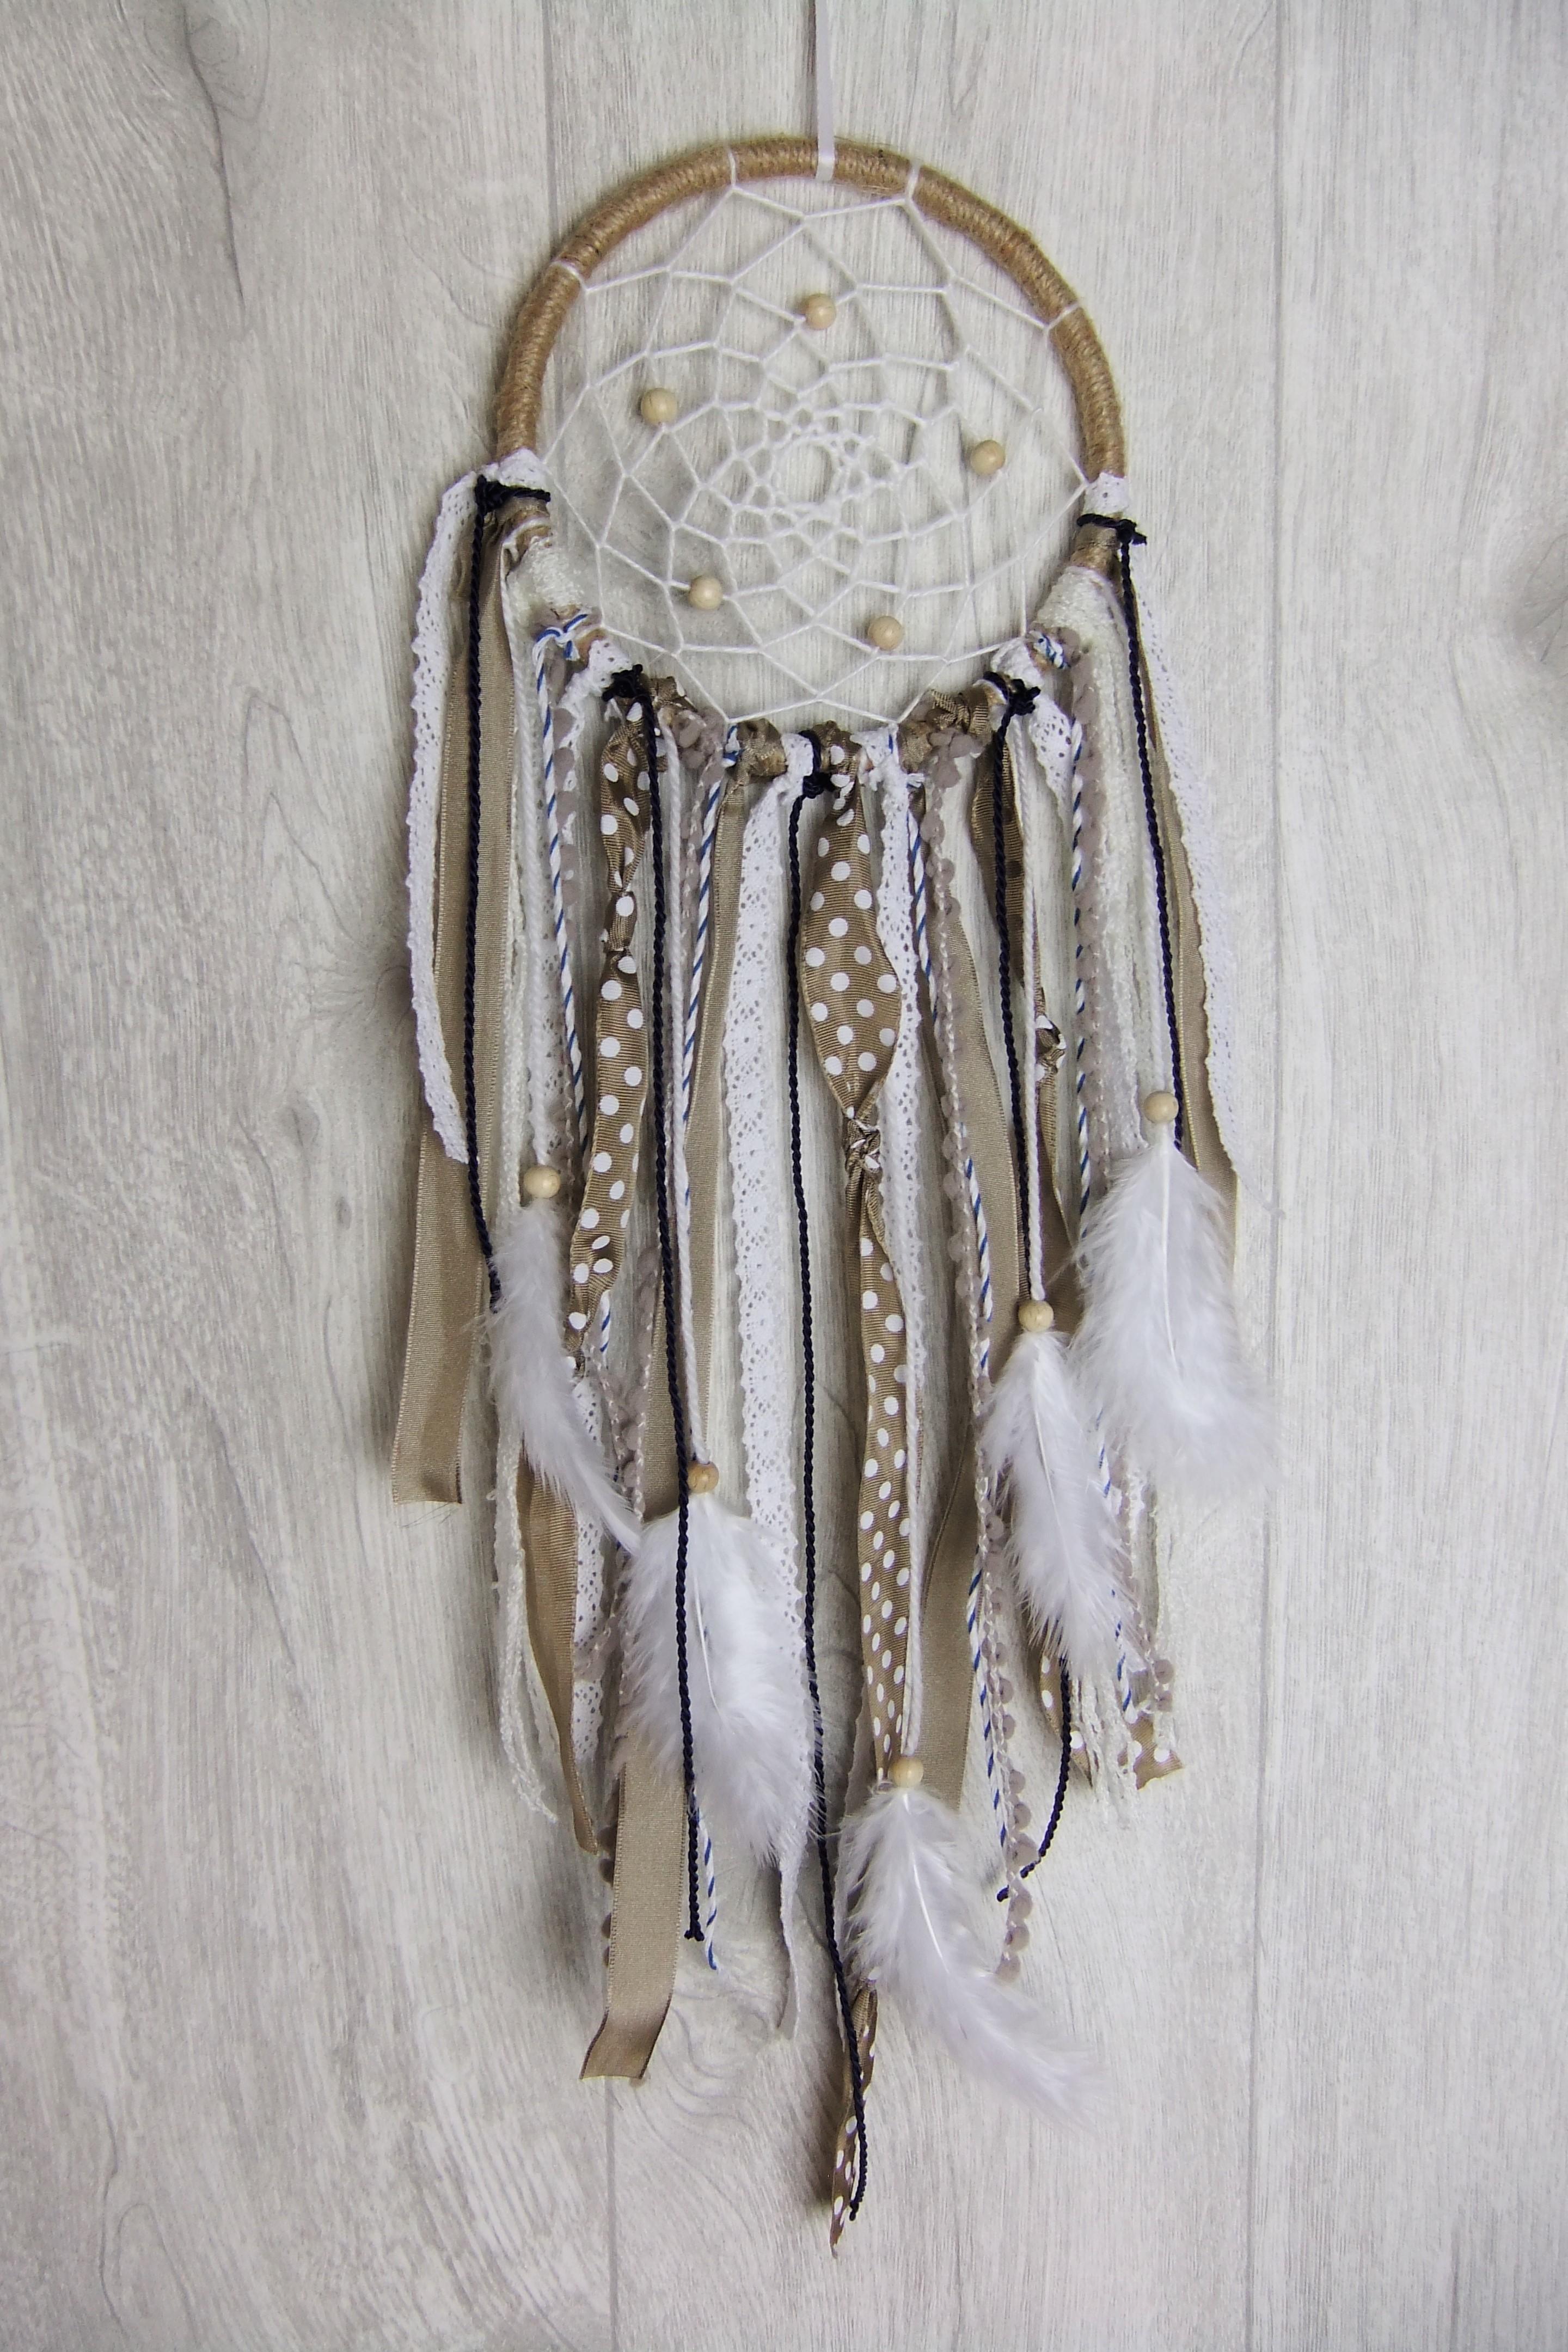
Do you have bad dreams or do your children often have nightmares? Maybe a homemade dreamcatcher is the solution! The dreamcatcher has its origins in Native American traditions. It catches bad dreams in the deco fishing net and neutralizes them in daylight, while good dreams glide through ribbons and feathers to the sleeping person. And the best thing about it: a dreamcatcher is also a real eye-catcher. Be inspired by these instructions and create your own dreamcatcher!

Making a dreamcatcher - step-by-step instructions
Step 1: Wrap the ring
Start by wrapping the wooden ring. Knot the end of the jute ribbon to the wooden ring and secure it with a drop of handicraft glue. Then wrap the ribbon tightly around the entire ring so that nothing from wood remains visible. Once you have reached the end, tie the ribbon back into a knot and cut off the ends. Finally, put some handicraft glue over the knot to secure the ribbon .

Step 2: Weave the deco fishing net
For the deco fishing net , unwind about 3 to 4 meters of wool. Knot the end of the wool to the ring and secure it with handicraft glue. Divide it visually into ten equal sections.

Now lay the thread once OVER the ring (to make your first division), lay it once around the outside of the ring and then thread it through from behind between the thread and the ring. You can see this very clearly in the picture


Now tighten this first section by pulling on the thread.

And then just keep going like this further, along the entire ring, loop by loop.

To close the thread ring, i.e. to connect it to the beginning, thread through the first section from the back and form a loop directly under your beginning. Now you have ten equal sections and you can start the second round.

The principle is exactly the same as for the first round, only the loops are no longer placed around the ring, but in the middle of the thread of the previous round. With the first loop, you first "move" the beginning of the round to the center of the thread, and from the second loop onwards, the pattern you already know from the first round is created.

The end of the second round is then closed in the same way as the first round: from the back through the first section of the round and tighten a loop there.

Continue like this, round after round further. If you wish, you can work beads into the deco fishing net . These are simply threaded onto the wool thread, pushed to the desired position and Position and automatically fixed by looping the next loop.

As soon as the opening of the net is small enough, knot the last loop, cut off the wool and seal the knot with handicraft glue.

Step 3: Adding feathers and ribbons
We've already taken care of the bad dream defense, now the part of the dreamcatcher that lets the good dreams slip through is missing
Let's start with the feathers : These are attached to a piece of white wool with handicraft glue . Then thread a wooden bead over it. Be sure to do this while the glue has not yet dried. This will keep everything securely together.
We decided to use five feathers on our dream catcher, but you can of course vary this to suit your taste.

Cut pieces from the other ribbons and cords too. As the ribbons should be longer in the middle of the dreamcatcher than at the edges, you will need different lengths. In my case, the longest ribbon in the middle is approx. 40 cm long, the shortest at the edge just under 20 cm (so you have a rough guide).
A little tip: wide ribbon falls particularly nicely if you tie a few knots in it at intervals.

Now knot everything to the ring. I started with the feathers , as it was particularly important to me that the spacing was even.

Then gradually add the other ribbons and cords until you are happy with the overall look.

Finally, add a ribbon to the top of the ring for hanging. Your personalized dreamcatcher is ready and guarantees a restful night of sweet dreams. Close your eyes and enjoy the calming effect of your homemade work of art!

Sleep well with your personalized dreamcatcher!
Svenja

Would you like to create your own dreamcatcher? Visit our online store and discover a variety of materials that you need for your personal dreamcatcher. Have fun crafting!