- Secure order
- Easy return shipment
- Service-Hotline +32 50 89 35 27
Instructions No. 3239
Difficulty: Beginner
Working time: 2 Hours 30 Minutes

Step 1: Selection and preparing the colors
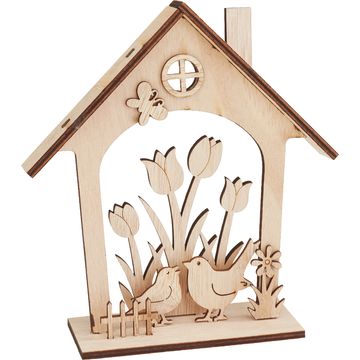
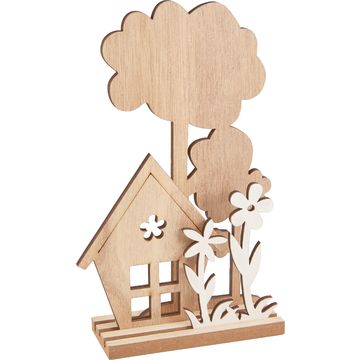
First, pick up the parts of the two kits that you want to design. Choose your favorite colors and have fine round brushes ready. These are particularly suitable for painting evenly and precisely.
Step 2: Apply paint to the wooden surfaces
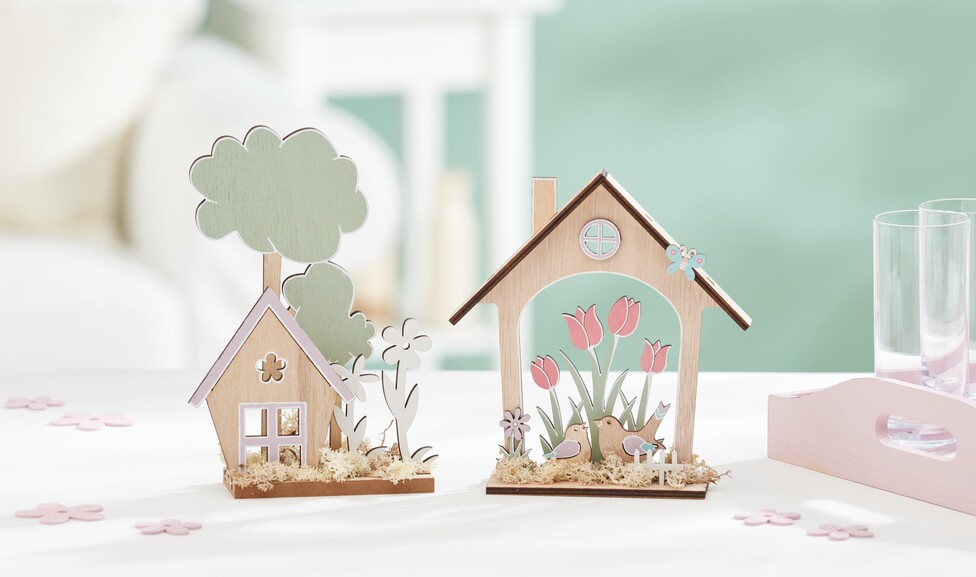
Start by painting the individual parts as desired with the selected colors. Make sure to let the colors dry well to prevent smudging and ensure bright results.
Step 3: Work out the details with pens
To add the finishing touches to your artwork, you can use a fine-tip pen to highlight the details and outlines. Our tip: Use the Gelly Roll pens from Sakura for this. These are particularly opaque and adhere reliably to various surfaces.
Step 4: Assembling the individual parts
Once all the painted parts are completely dry, you can start to put the individual parts together. If necessary, fix the joints with a little glue to ensure a stable construction.
Step 5: Decorate and finish
Finally, decorate the assembled motifs with a little moss for a natural look. Hot glue is best for this as it dries quickly and fixes the moss well.
Congratulations, you have now completed your unique wooden-building kit ! These projects are not only only a great activity, but also offer wonderful decoration options for your home. Discover various kits and other creative accessories in our online store and start your next adventure today DIY-Adventure today. Let your imagination run wild and fill your world with your own personal works of art!