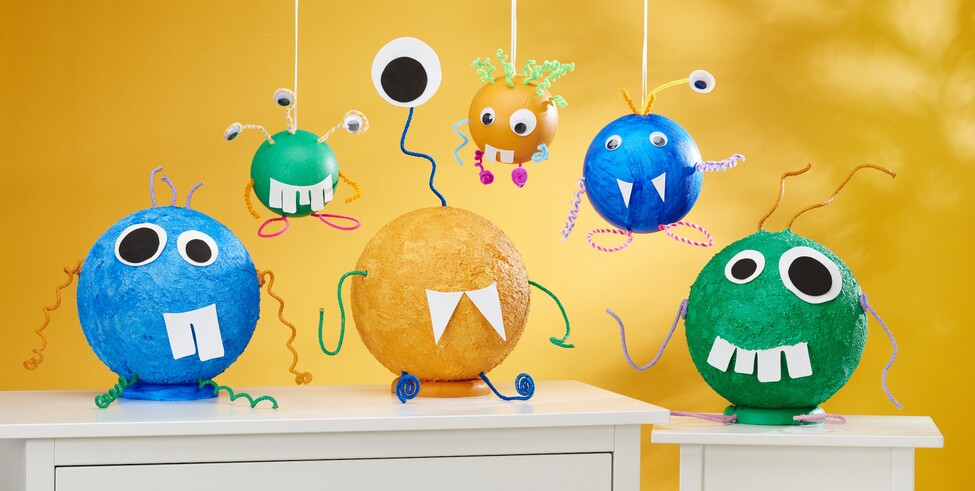
How to make an XL pompom monster
1. First glue the two halves of the polystyrene ball together with handicraft glue . Important: If you want your monster to stand, glue the ball to a polystyrene ring. Do you want it to hang? Then attach the ribbon to a wooden stick and place it between the halves from the inside before gluing them together. This will wedge the wooden stick and the ribbon cannot be pulled out.
2. Now spread the decorative snow over the ball using a plastic spatula. Allow it to dry well. You can then paint it with any handicraft paint color you like.
3. For the arms and legs, cut the figure wire into strands of different lengths and paint them with handicraft paint. After Time to dry: you can then bend them into any shape you like and stick them to the polystyrene balls with hot glue.
4. now transfer the motif templates onto the foam sheets. The "Strich-Ex" pen is very suitable for this. The lines can then be erased with a little water - this will give you a clean result. Cut all the parts and stick them to the monster with hot glue.
5. Tip: For smaller monsters, you can also use wobbly eyes with a diameter of 30 mm and chenille wire instead of figure wire.
Have fun crafting