- Secure order
- Easy return shipment
- Service-Hotline +32 50 89 35 27
Instructions No. 3638
Difficulty: Challenging
Working time: 6 Hours
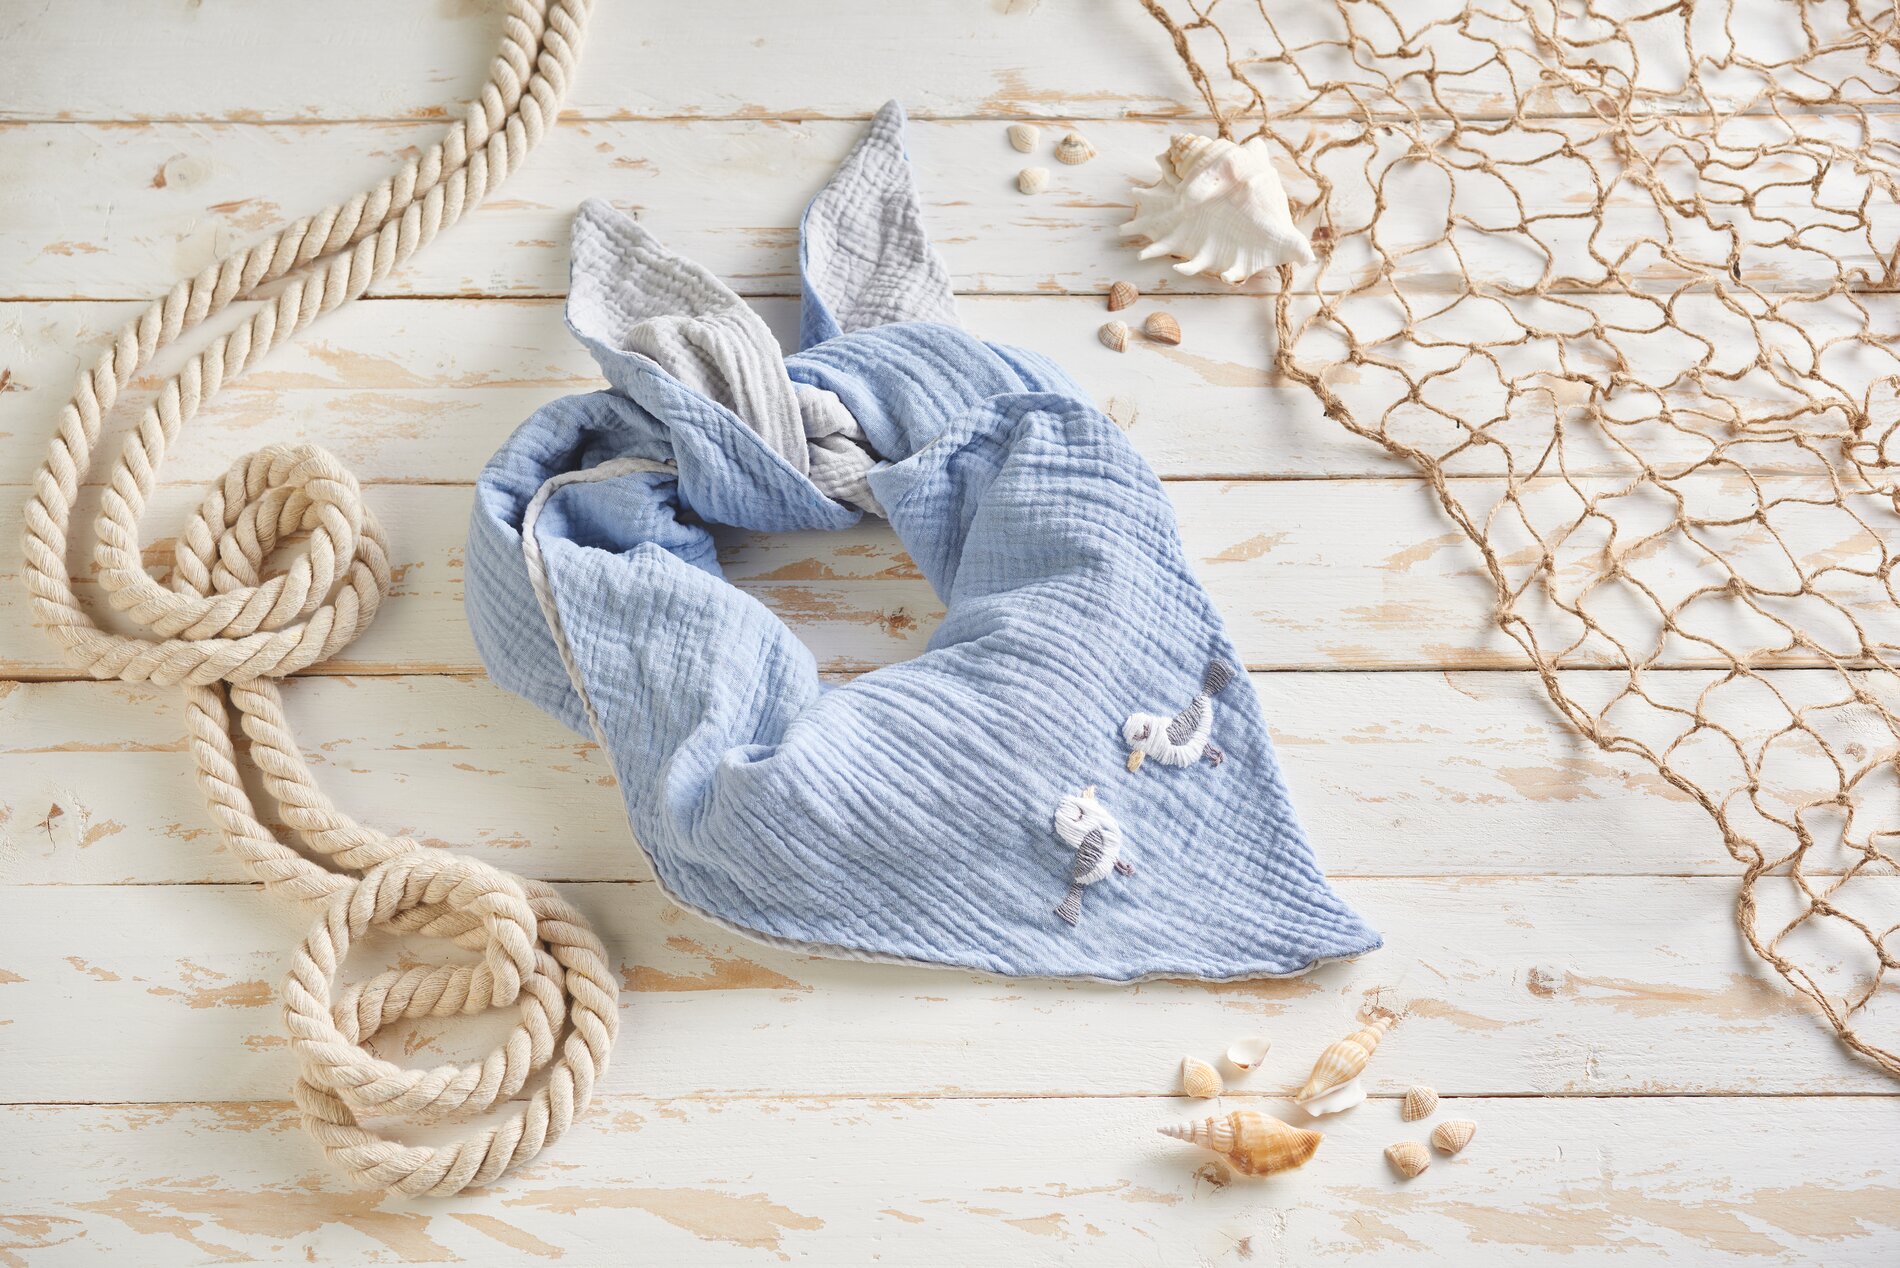
Are you ready to add a personal touch to your style? Sewing and embroidery are not only creative hobbies, but also fantastic ways to create personalized fashion accessories. In this tutorial, I'll show you how to sew a unique scarf and embellish it with beautiful embroidery motifs. From the Selection fabric to the finished product - all in simple, easy-to-understand steps. The special advantage? Your self-made scarf is not only a unique piece, but also an expressive accessory that gives your outfit that certain something.

Before you start sewing, wash your fabric thoroughly. This will prevent it from shrinking later and the finished scarf will not warp during the first wash. Dry the fabric and iron it smooth so that you have a clean work surface.
Cutting the fabricsLay two different fabrics on top of each other to fit perfectly. Secure them on one side with pins or Wonder Clips to prevent them from slipping. Now cut out a triangle about 130 cm long and about 60 cm high. Remember to add 1-2 cm seam allowance so that you have enough room to maneuver when sewing.
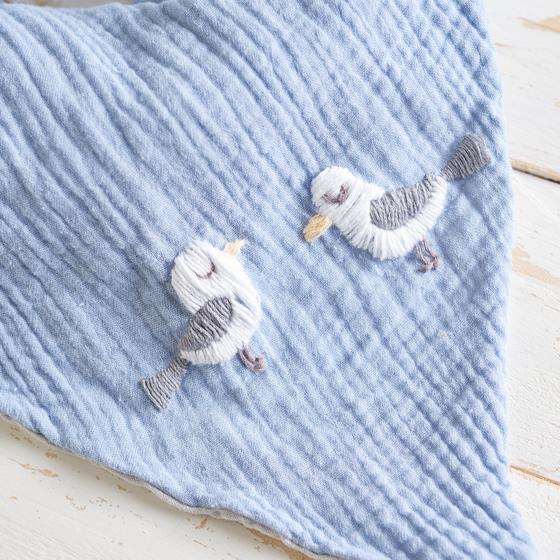
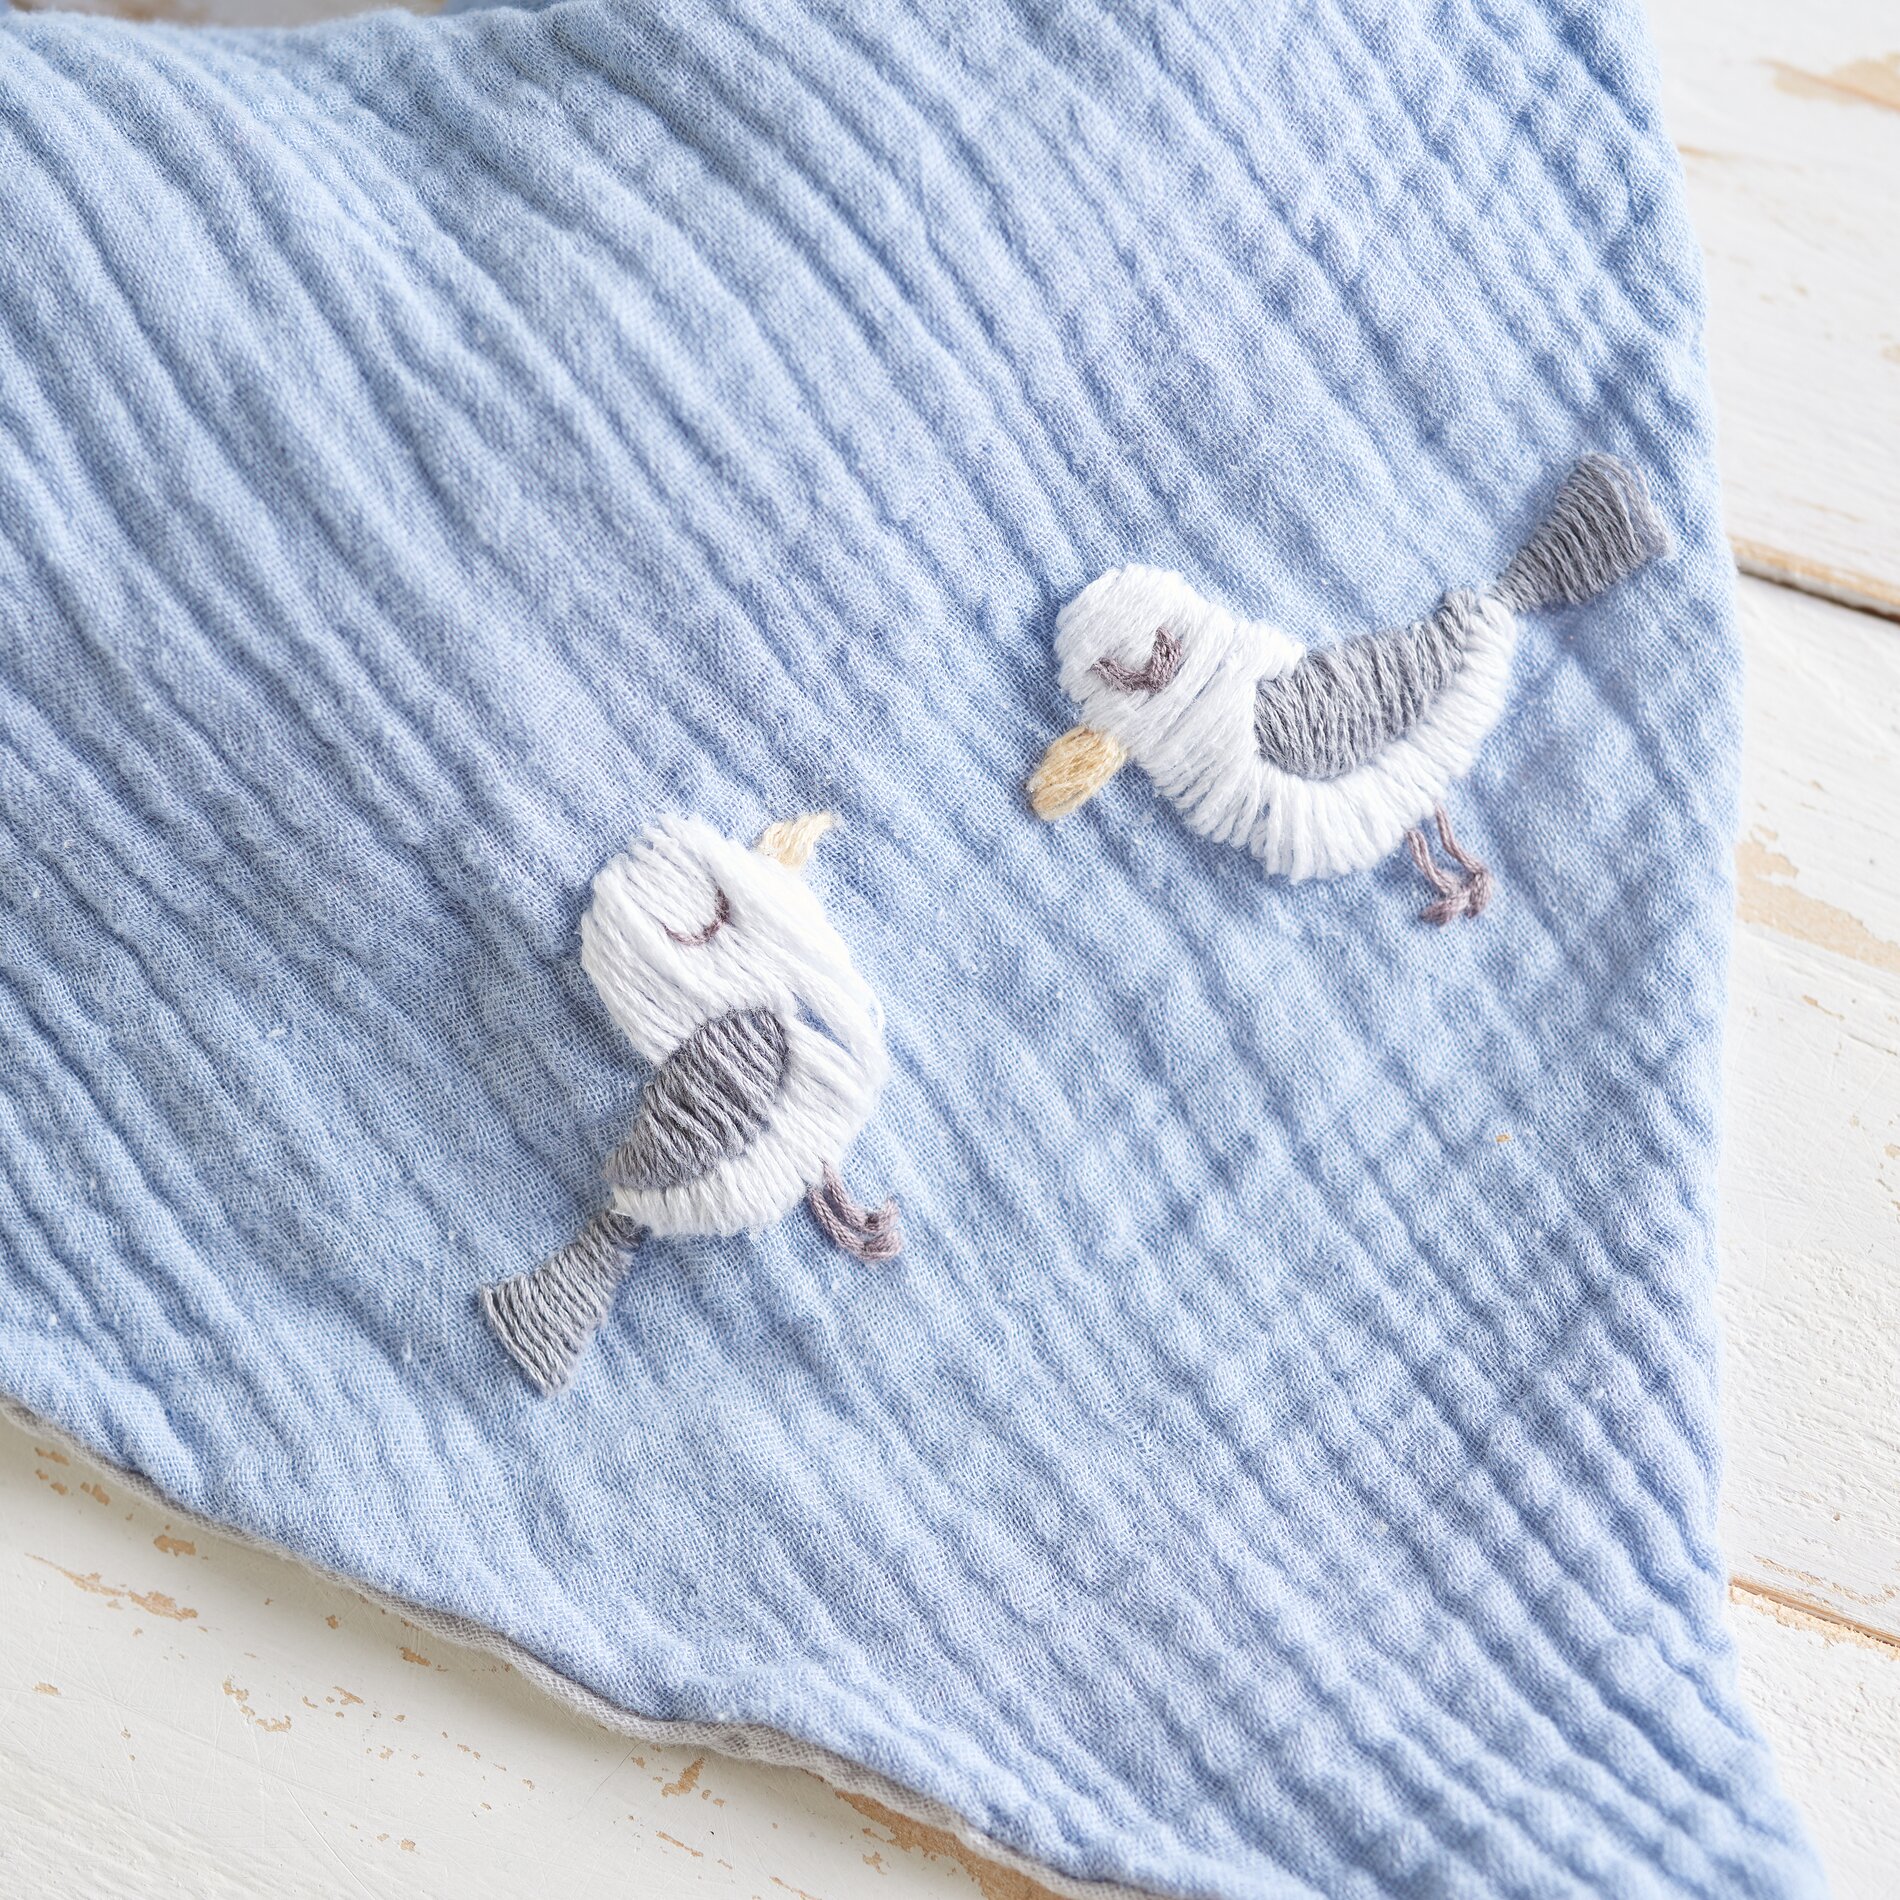
Before you sew the fabrics together, select the area you want to embroider. Print out our free embroidery template and transfer the motif to your iron-on stabilizer - make sure that the smooth side of the stabilizer is facing up. Trace the motif with a pencil of your choice and fix the stabilizer to the fabric with an iron. Hoop this piece into a embroidery hoop. Use embroidery twist (a special embroidery yarn) and thread it into a needle to embroider the motif as desired.
Sew the fabrics
Make sure that you lay the fabrics so that the embroidered motif is on the inside - so you can see the back of the embroidery when sewing. Equip your sewing machine with a universal needle and choose a 2-3 mm wide zigzag stitch. Then sew the fabrics together all the way around, leaving an opening of approx. 10 cm for turning.
Turn your scarf inside out through the turning opening so that the visible seams are on the inside and can no longer be seen from the outside. Close the turning opening by either sewing close to the edge with a straight stitch using the sewing machine or closing it by hand with a needle and thread.
The finishWash the finished scarf on a gentle cycle so that the iron-on fleece comes off completely and your scarf is clean and ready to wear.
Now you are ready to wear your homemade scarf proudly or give it as a personalized gift. With these creative techniques, you can design as many variations as you like to suit your personal style.
Ready to get started? Visit our online store to discover high-quality fabrics, embroidery templates and other sewing accessories to add the finishing touches to your projects. Let your creativity run wild and create your next favorite piece with our products!