- Secure order
- Easy return shipment
- Service-Hotline +32 50 89 35 27
Instructions No. 3329
Difficulty: Beginner
Working time: 2 Hours
In the world of creative play kitchens, there are countless opportunities to design your own individual accessories for your children's kitchen or store. Why not make your own homemade pasta or some sweet cherries? In these instructions, we show you how to conjure up imaginative additions using simple materials. Whether as a gift or simply only to play with, these handmade pieces will bring fun and play into any child's room.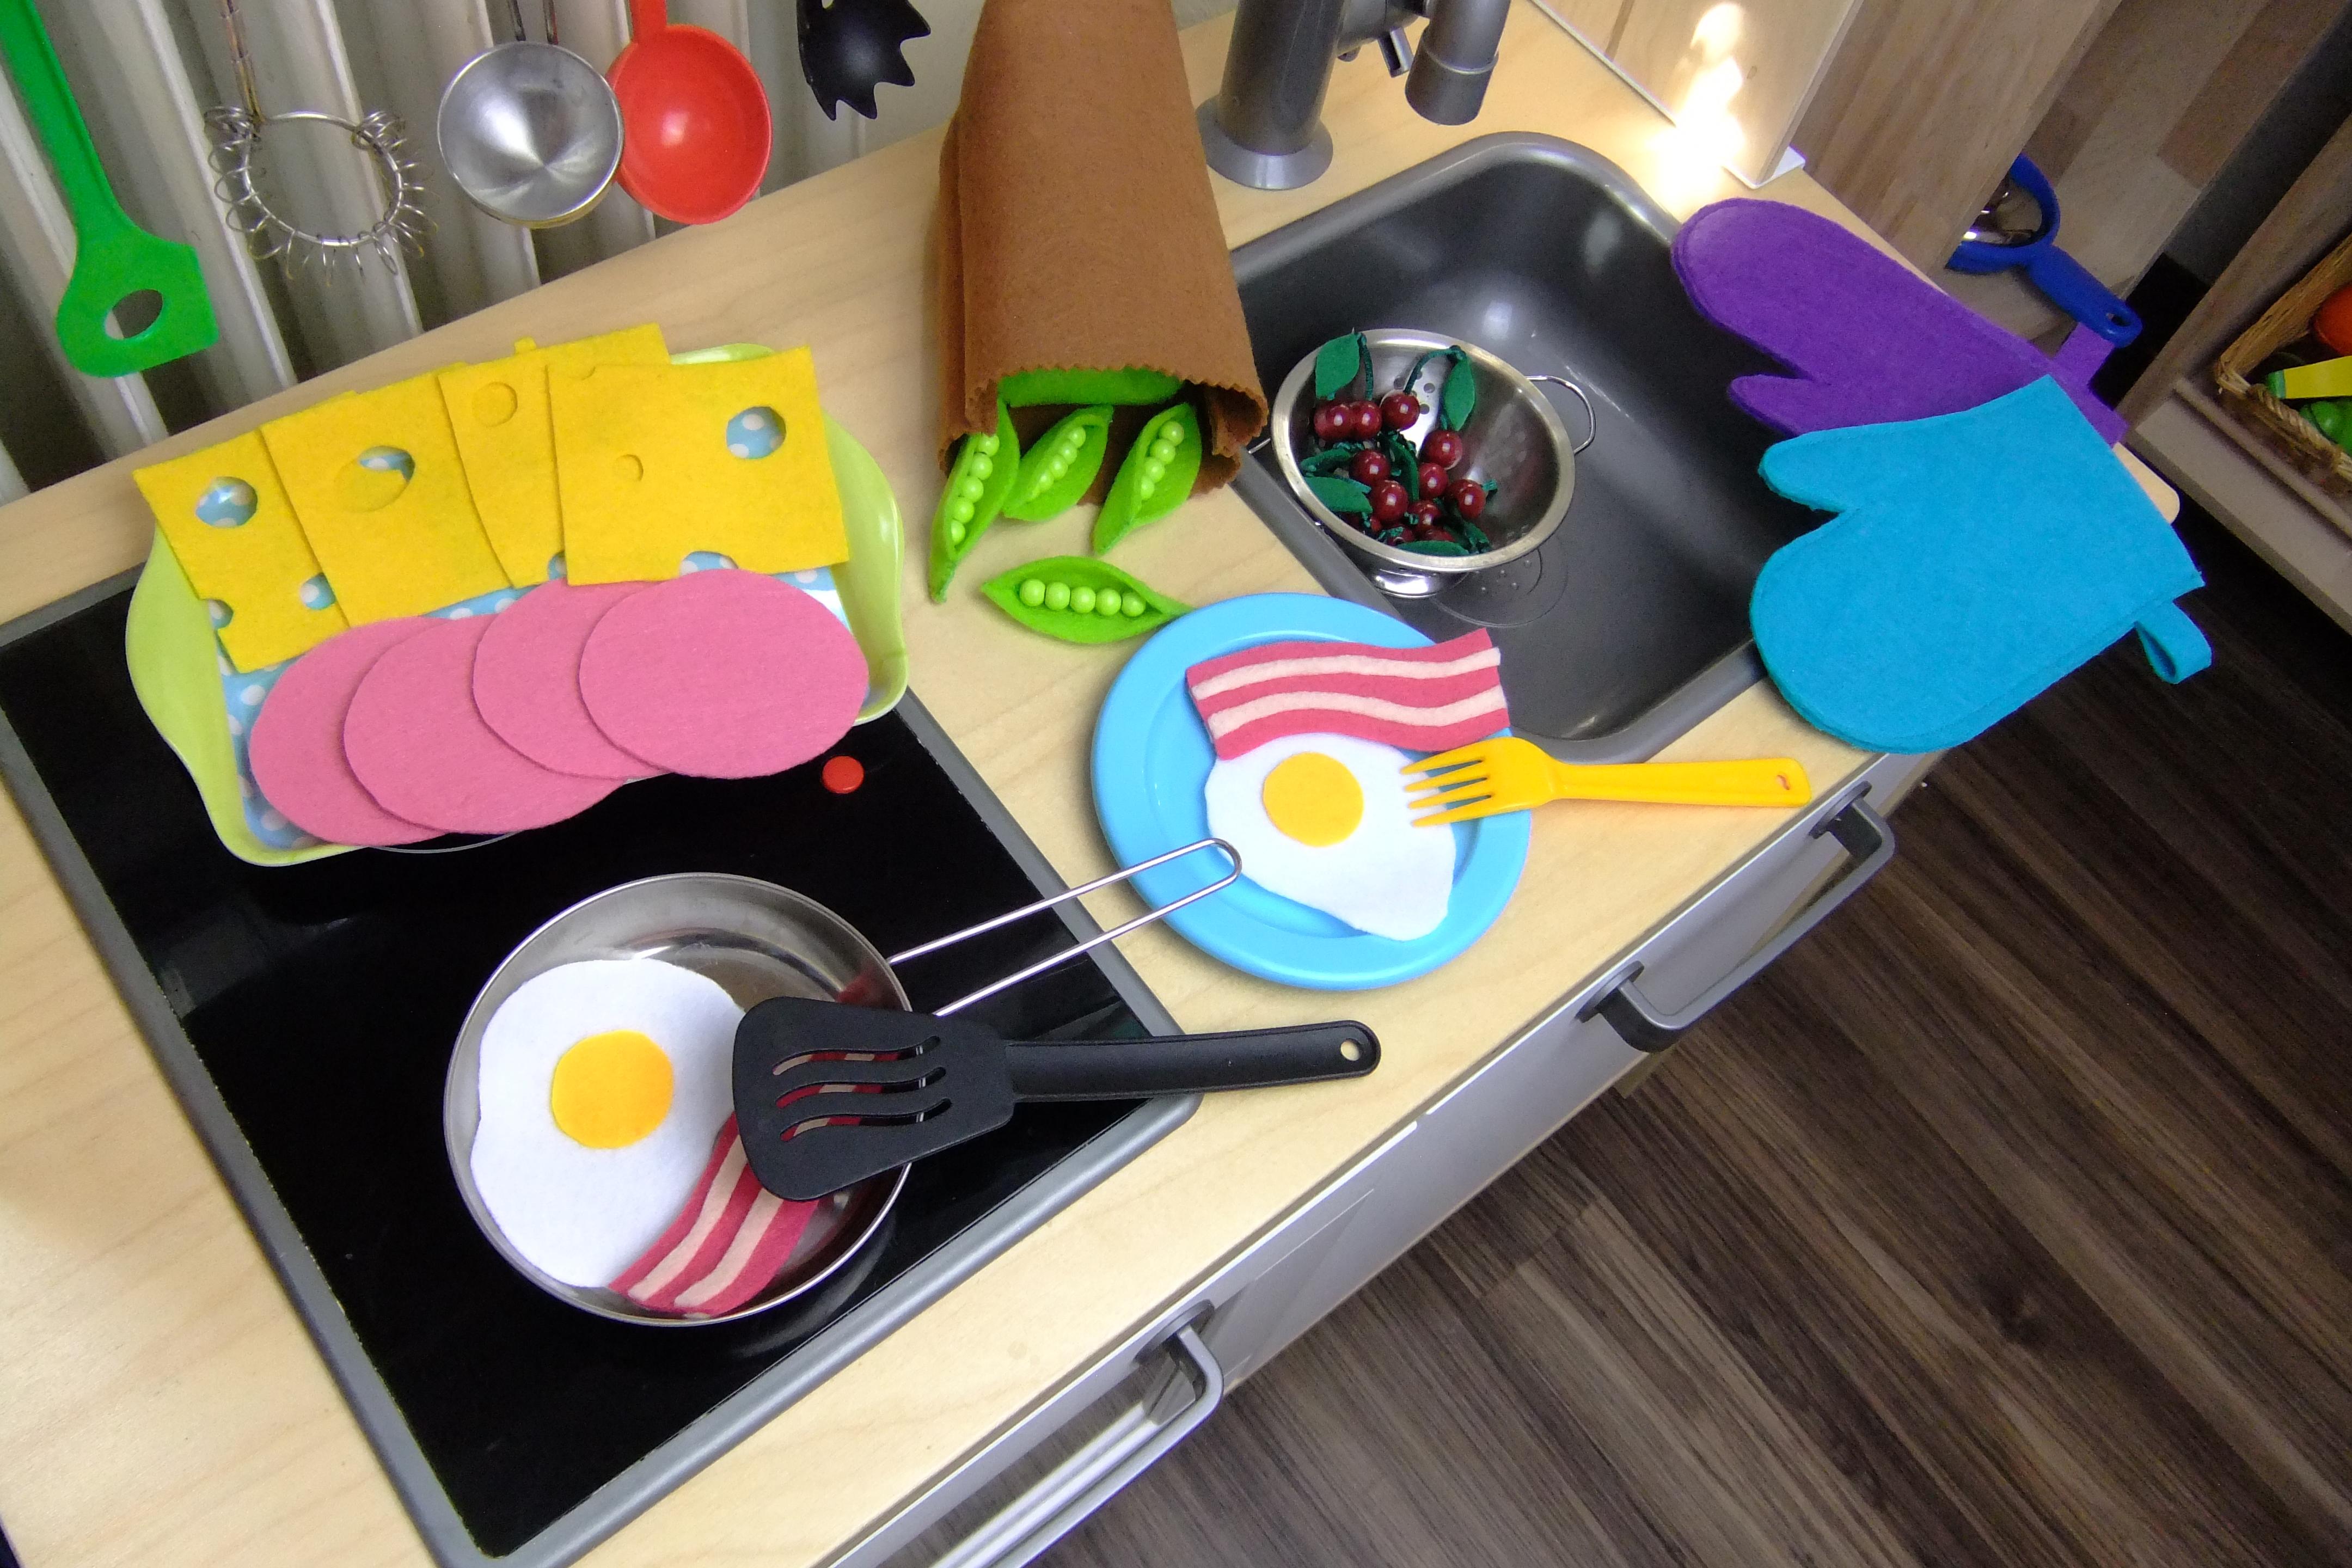

Step 1: Spaghetti
Start with the spaghetti. Cut pieces of Paracord-cords or cords in yellow. about 15 cm long, melt the ends slightly with a lighter and then shape them together with your fingers. Be careful not to burn yourself!

Pour the finished spaghetti into a jar with a label and write on it. You can use the chalk marker for this, so the label remains permanent.

Step 2: Farfalle
For the farfalle, use pinking shears to cut strips of yellow felt. about 3.5 cm wide. These strips are then cut into 2.5 cm high pieces.
Use a needle and thread to stitch three times through the middle of the pieces, then pull the thread tight until you get the typical butterfly look. Knot the ends well!

These cute things also go into a labeled jar.
Step 3: Ravioli
For the ravioli, form 4x4 cm squares from felt .
Sew them at the edges, leaving one side open. Stuff with some absorbent cotton and close the seam.


Cherries
Cut a 10 cm piece from the satin cord. Tie a red wooden bead to each end. Tie a knot in the middle of the cord, so that there is a pearl on both sides. Glue a small felt leaf to the stem to give the cherries a natural look.


Cut out round circles from pink felt for the sausage and squares with irregular holes from yellow felt for the cheese. You can also simply use a glass or something else round as a stencil . This creates a delicious cheese and sausage platter.

Start by making a stencil for the shape of the pea pod out of cardboard. The pods should be about 5 cm high, you can see the exact shape in the picture. transfer the stencil to green felt and cut out the shape. Fold the cut-out felt shape in half lengthwise.
Next, sew the two short sides (above and below the closed edge of the pod) together. The shape of the pea pod should now be clearly recognizable. Now attach a thread to the inside of the pod. Thread five small beads onto the thread to represent the peas and sew the other end firmly to the pod.
If you wish, you can close the top opening of the pod by about 1 cm to give the pea pod a more natural shape.


For the matching bag, cut a light brown felt sheet in half to create two rectangles (20 x 15 cm). Make a zigzag cut on one short side with pinking shears to achieve the typical paper bag look. Cut out 4 x 4 cm squares on the two opposite corners with the craft scissors.
Place the pieces on top of each other and sew them together on the long sides and on the bottom short side by hand or with the sewing machine. Fold the whole thing so that the seam on the side meets the seam on the bottom and close the resulting opening with a seam.

Turn the bag right side out and it's ready to store your felt peas in style!

Cut out two rectangles of the same size (approx. 10 x 6 cm) from brown felt and place them exactly on top of each other. Use the sewing machine to sew the rectangles together close to the edge on three sides and fill the resulting pocket with some wadding. 
To turn it into a chocolate board, topstitch the surface at regular intervals with further seams. You can wrap some aluminum foil around one end of the board to make it look even more real.
For the fried egg, cut out an irregular shape for the egg white from white felt and stick a circle of the corn-yellow felt onto it using the textile glue . And voilà, the fried egg is ready!


Cut 10 x 4 cm rectangles out of white felt and 4 x 2 cm rectangles out of light blue felt (one white and one light blue rectangle is needed per tea bag). 
Fold the white rectangle in half and cut off the corners at an angle on the open top. Sew one long side and one diagonal corner together from the closed underside. Now insert the bare ribbon and also close the short top edge. Stuff the inside with some wadding and close the remaining side.

The label is simply labeled with a marker (as with the pasta) and glued to the wooden box. Of course, you can also decorate the box as you wish with paint, napkin technique, Decopatch or other materials and techniques! 
For the gloves, cut out two glove shapes from felt and enlarge them by a few cm) and a strip (approx. 1 x 6 cm) from each. Make sure they fit the size of your child's hand.


Every kitchen becomes a highlight!

I hope these instructions inspire you to design your own creative kitchen from felt . Have fun crafting! Would you like to order the materials you need? Visit our online store and discover the extensive range of felt, accessories and much more. Let your creativity flow and bring the fun into your child's room!