- Secure order
- Easy return shipment
- Service-Hotline +32 50 89 35 27
Instructions No. 3223
Difficulty: Beginner
Working time: 3 Hours
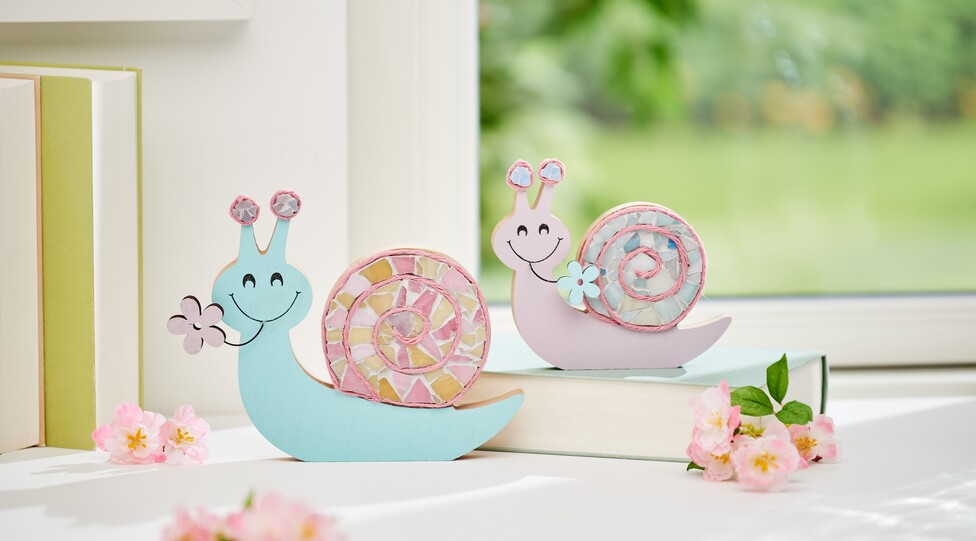

Start by painting the bodies, heads and antennae of your snails with high-quality craft paints. Choose colors that match your imagination - there are no limits here. Once the paint has dried, you can draw precise facial features with a fineliners to give the snails personality and expressiveness.
Select and edit your mosaic material
Immerse yourself in the world of colors and shapes: Choose your desired colors from the VBS Choose your desired colors from the broken mosaic. Use mosaic tongs to cut the mosaic pieces to the desired size. Remember to always wear safety goggles when cutting the pieces to protect your eyes.
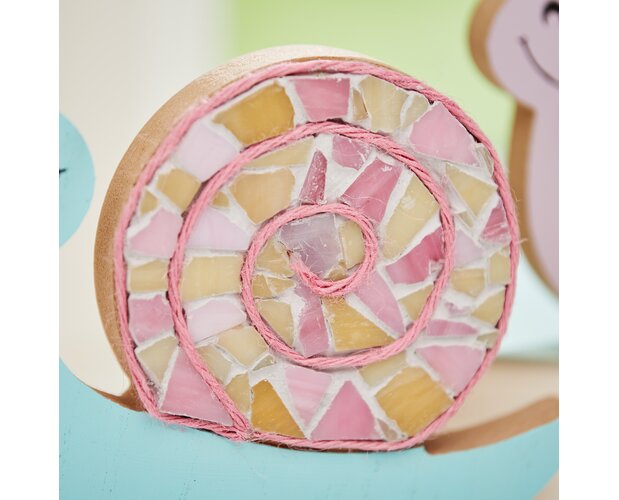
Cover the snail shell with mosaic tiles
Apply a thin layer of mosaic glue to the snail shell. You have about six minutes to position the mosaic pieces as you wish. Use this time to create a harmonious pattern. Then leave the adhesive to harden completely for around 4 to 12 hours so that the tiles hold securely.
Grouting joints for the perfect hold
Mix the grouting powder with water and stir vigorously until a uniform mixture is obtained. Use a spatula to carefully spread the joint filler between the mosaic tiles. Allow the mixture to set briefly and then wipe it off with a slightly damp sponge until the mosaic stones appears clear and shiny again. Make sure that the joint filler dries thoroughly to ensure its durability.
Add the finishing touches to the snails
For the finishing touch, glue a decorative jute ribbon to the antennae and the snail shell. This detail gives your mosaic snail a rustic and natural look that rounds off your project in style DIY-Stylish finish to your project.