- Secure order
- Easy return shipment
- Service-Hotline +32 50 89 35 27
Instructions No. 3499
Difficulty: Advanced
Working time: 30 Minutes
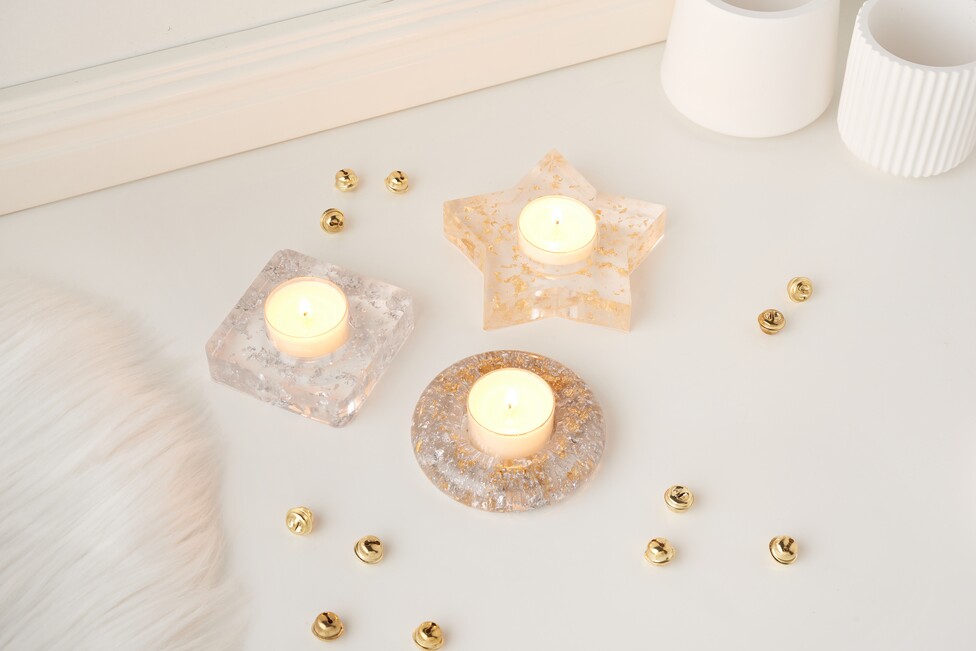
Immerse yourself in the creative world of cast resin! This versatile technique can be used to create not only only elegant pieces of jewelry or decorative accessories, but also atmospheric tealight holders. This guide will show you how you can easily create them yourself. Let yourself be inspired and create your own personal lighting accents!

Before you start, you should prepare your workplace well. Spread a robust handicraft mat on the work surface to protect it from soiling by the resin. Remember to always wear disposable gloves - casting resin can cause skin irritation and protecting your skin should be a top priority.
Step 1: Mixing the resin
Ideally, you should use an old plastic container that you can easily dispose of after use, such as an empty yogurt pot, to mix the resin. It is important that you mix only as much resin as you need to completely fill your mold. Use the handy VBS mini cups to measure out the correct amount of both components.
Mix the resin and hardener in a 1:1 ratio. Transfer both ingredients thoroughly into the mixing cup. using a wooden stick, then stir the mixture carefully until it has a uniform consistency - this ensures that the resin hardens properly and no unwanted lumps form.
Step 2: Add glitter
If you want to add a personal touch to your artwork, you can now add glitter particles in gold or silver . This step will give your work a festive, elegant shimmer. Carefully sprinkle the particles into the resin mixture and stir again thoroughly so that they are evenly distributed.
Step 3: Filling the mold and finishing the surface
Pour the mixed resin slowly and evenly into the prepared mold. Make sure that the mixture reaches all corners and edges of the mold. To remove any air bubbles that could affect the clear appearance, gently go over the surface of the resin with an embossing dryer. The heat creates the heat needed to pop bubbles, resulting in a crystal clear surface.
Step 4: Act quickly in the event of mishaps
If something goes wrong while working, you need to act quickly. Fresh resin can be easily removed with special resin remover before it hardens. Clean the affected areas quickly to avoid permanent stains.
Step 5: Drying the resin tealight holders
Allow your resin artwork to dry for at least 24 hours before you process it further or remove it from the mold. During this time, the resin hardens completely and gains its final stability.
As soon as your work is completely dry, you can carefully remove it from the mold. If you wish, you can place a tea light candle in the middle to turn your resin artwork into a sparkling light object.


