- Secure order
- Easy return shipment
- Service-Hotline +32 50 89 35 27
Instructions No. 3256
Difficulty: Beginner
Working time: 2 Hours

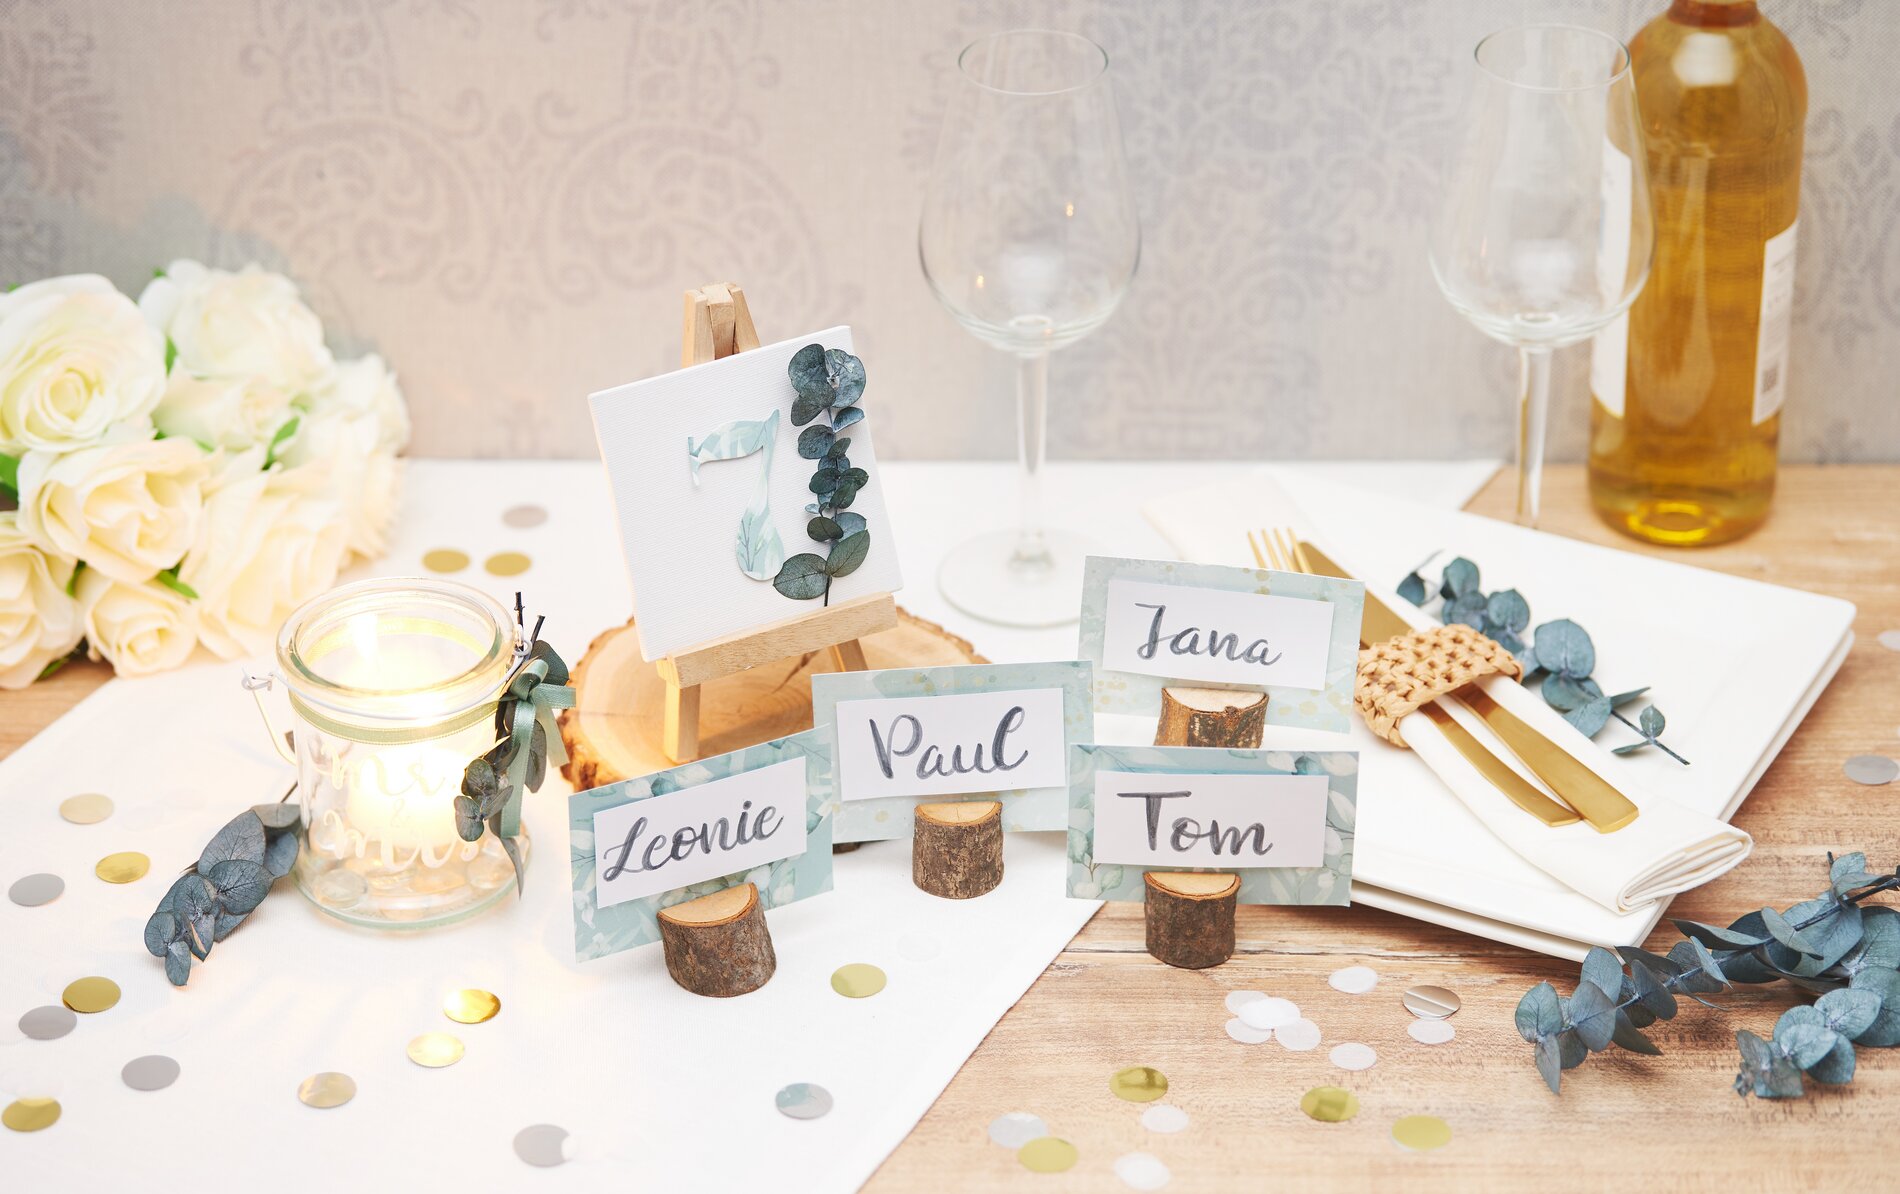
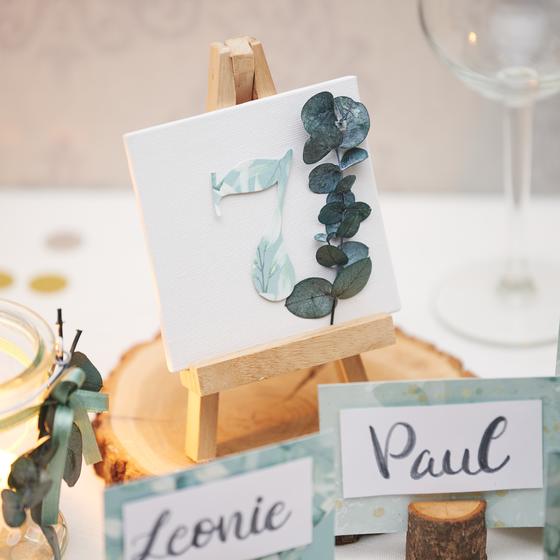

Step 1: Table numbers in eucalyptus-design
motif cardboard prepare: Select the motif cardboard "eucalyptus" and place a stencil with numbers on it. Trace the outline with a pencil.
Cut and assemble: Use tweezers scissors to cut out the numbers precisely. Glue them to the painting boards. using 3D-glue pads . These glue pads create a raised 3D effect that adds depth and distinction.
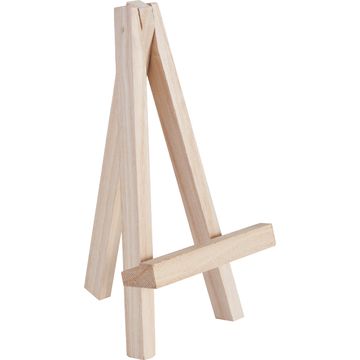
Prepare the mini decorative easel: Coat the mini decorative easel with napkin varnish. The varnish darkens the wood slightly and also makes it water-repellent. Then place a piece of the eucalyptus branch on the canvas and secure it with handicraft glue.
Presentation: Place the finished easel on a decorative tree slice. Arrange some eucalyptus branches and a little confetti around the tree disc.
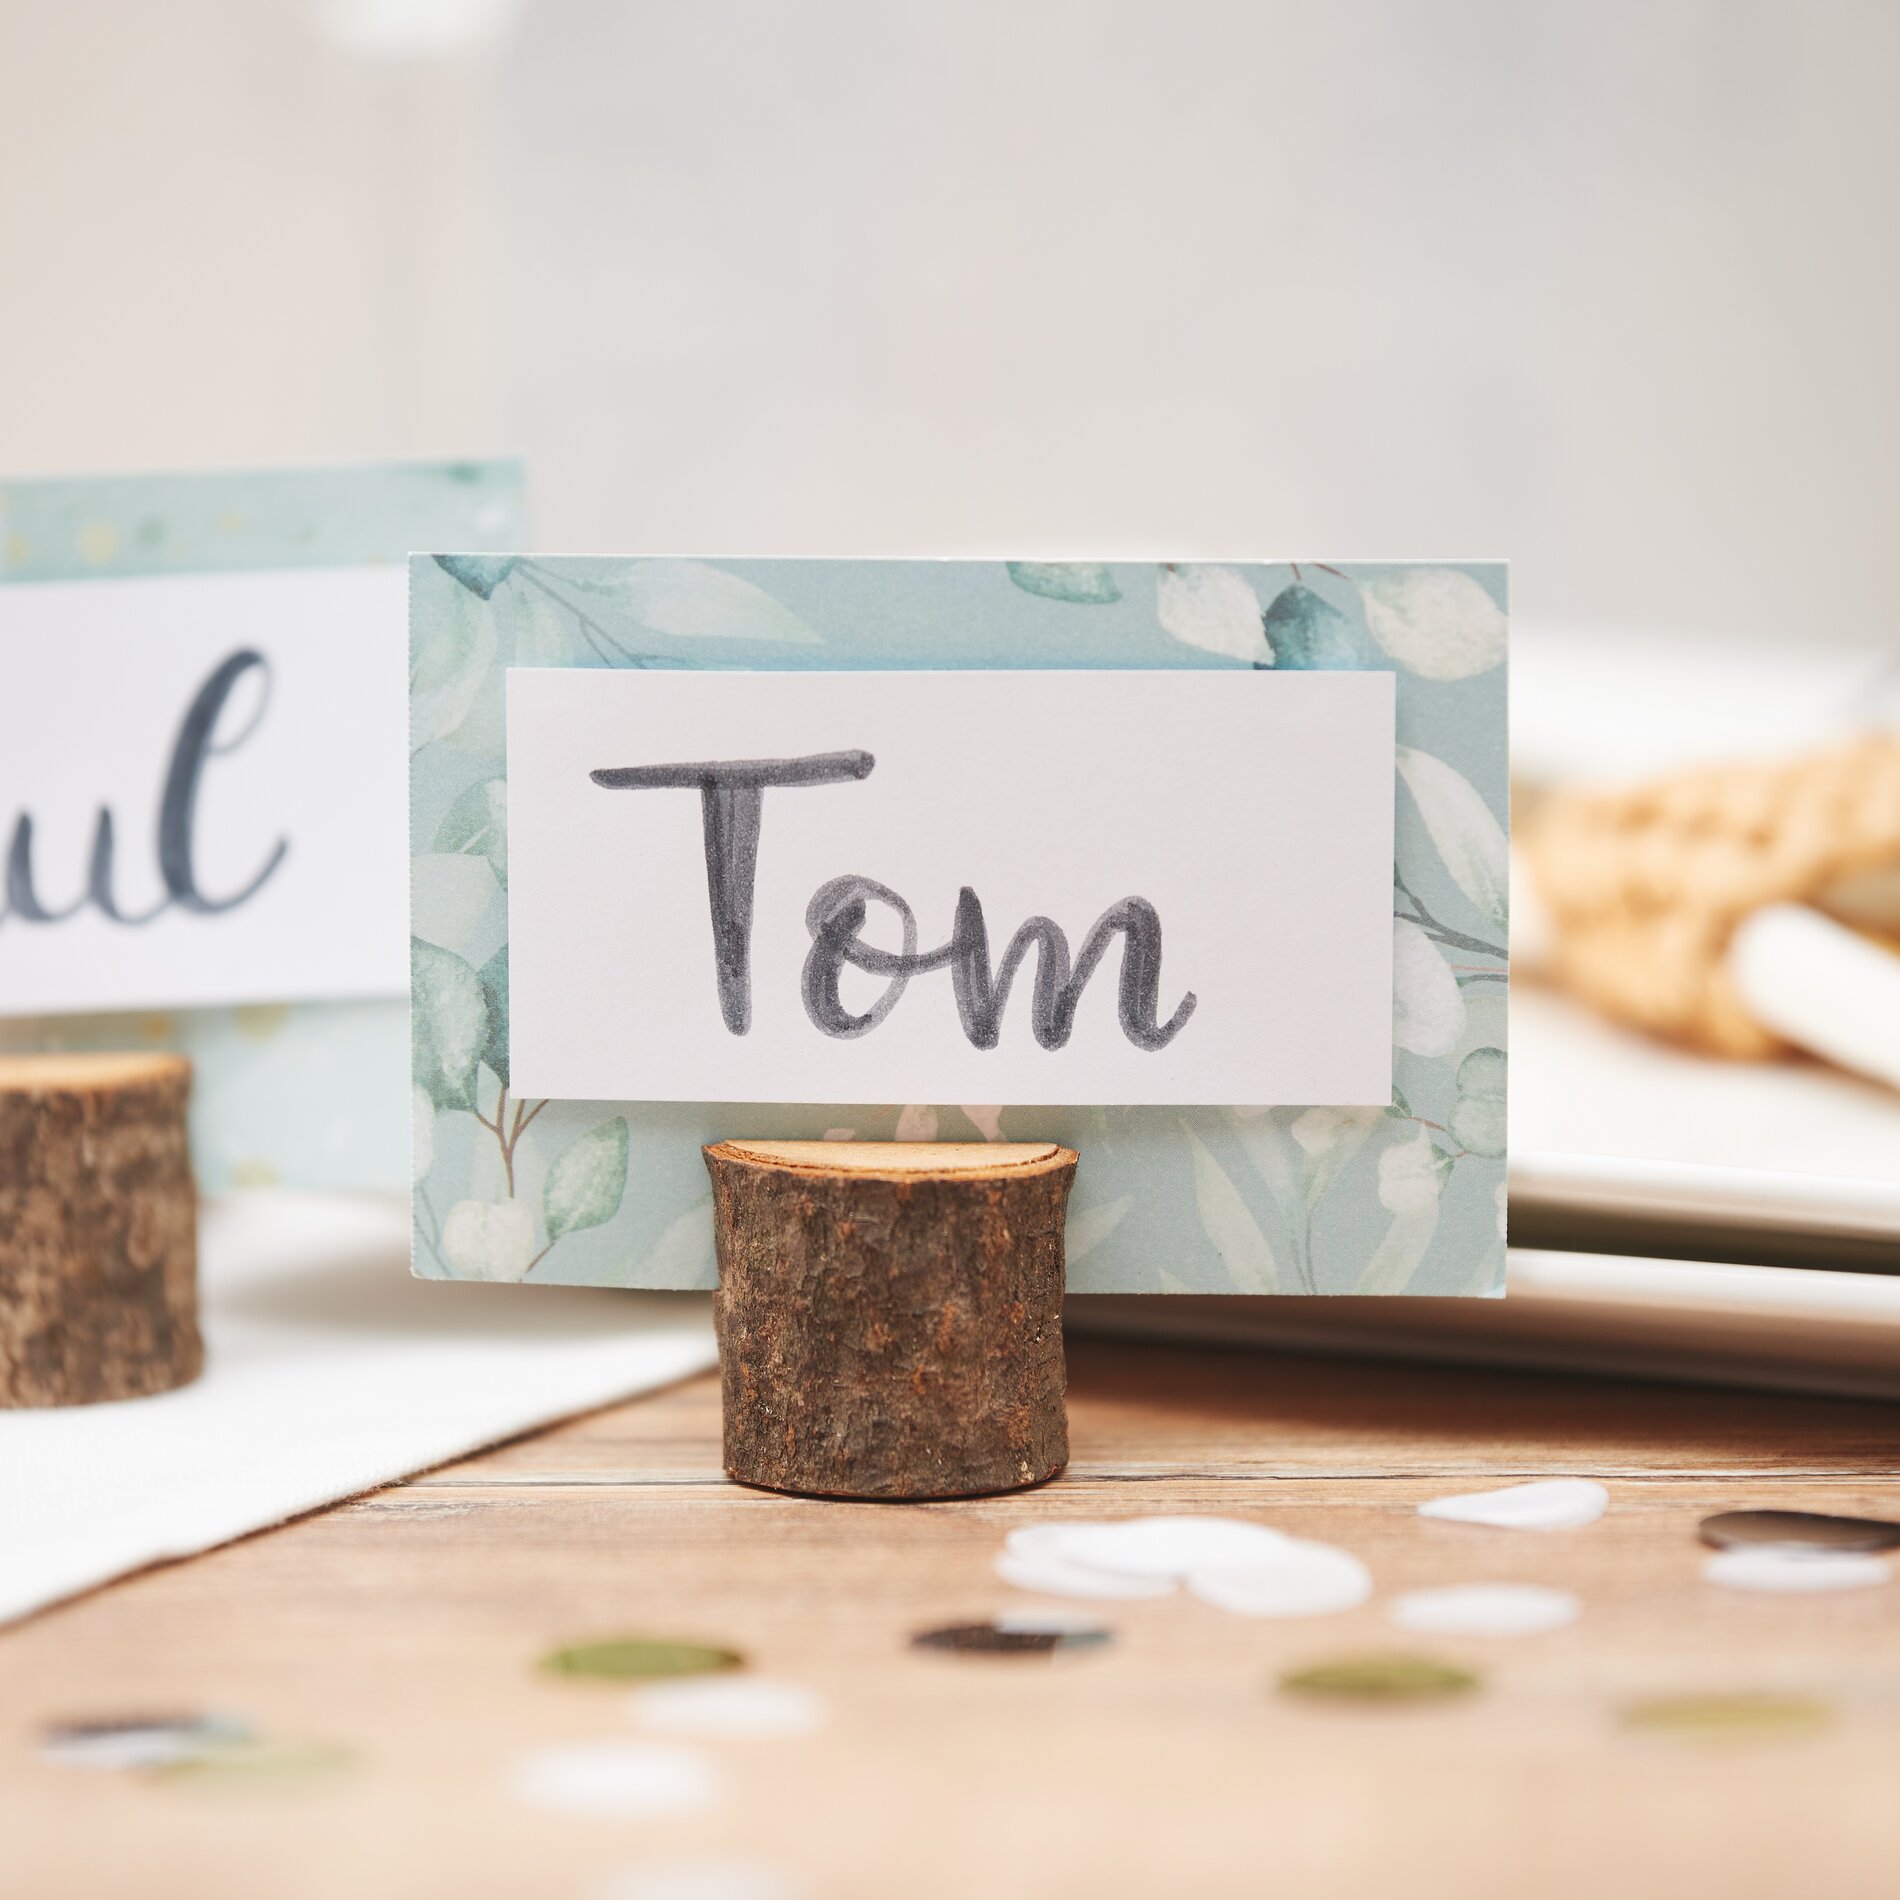
Step 2: Design personalized card holders
Cut the cards to size: Cut out rectangles measuring 10 x 7 cm from the motif cardboard .
Labeling: Prepare smaller rectangles (8 x 4 cm) from white craft cardboard sheet . These are labeled with a brush pen. A brush pen enables calligraphy-like lettering, which looks particularly appealing.
Assemble the cards: Attach the labeled craft cardboard sheet-rectangles to the card using 3D-glue pads motif cardboard.
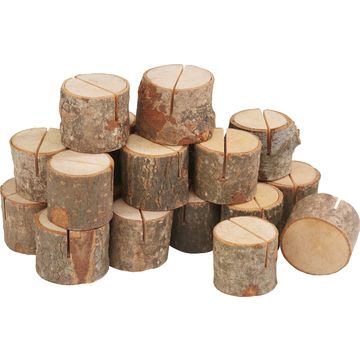
Presentation in card holders: Insert the finished cards into the VBS Card holder "tree slice".

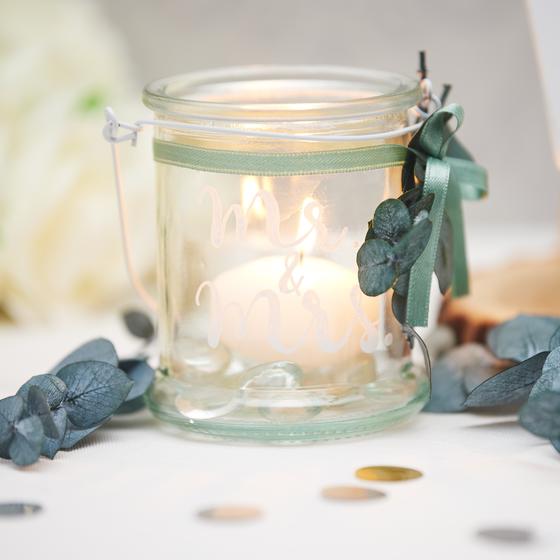
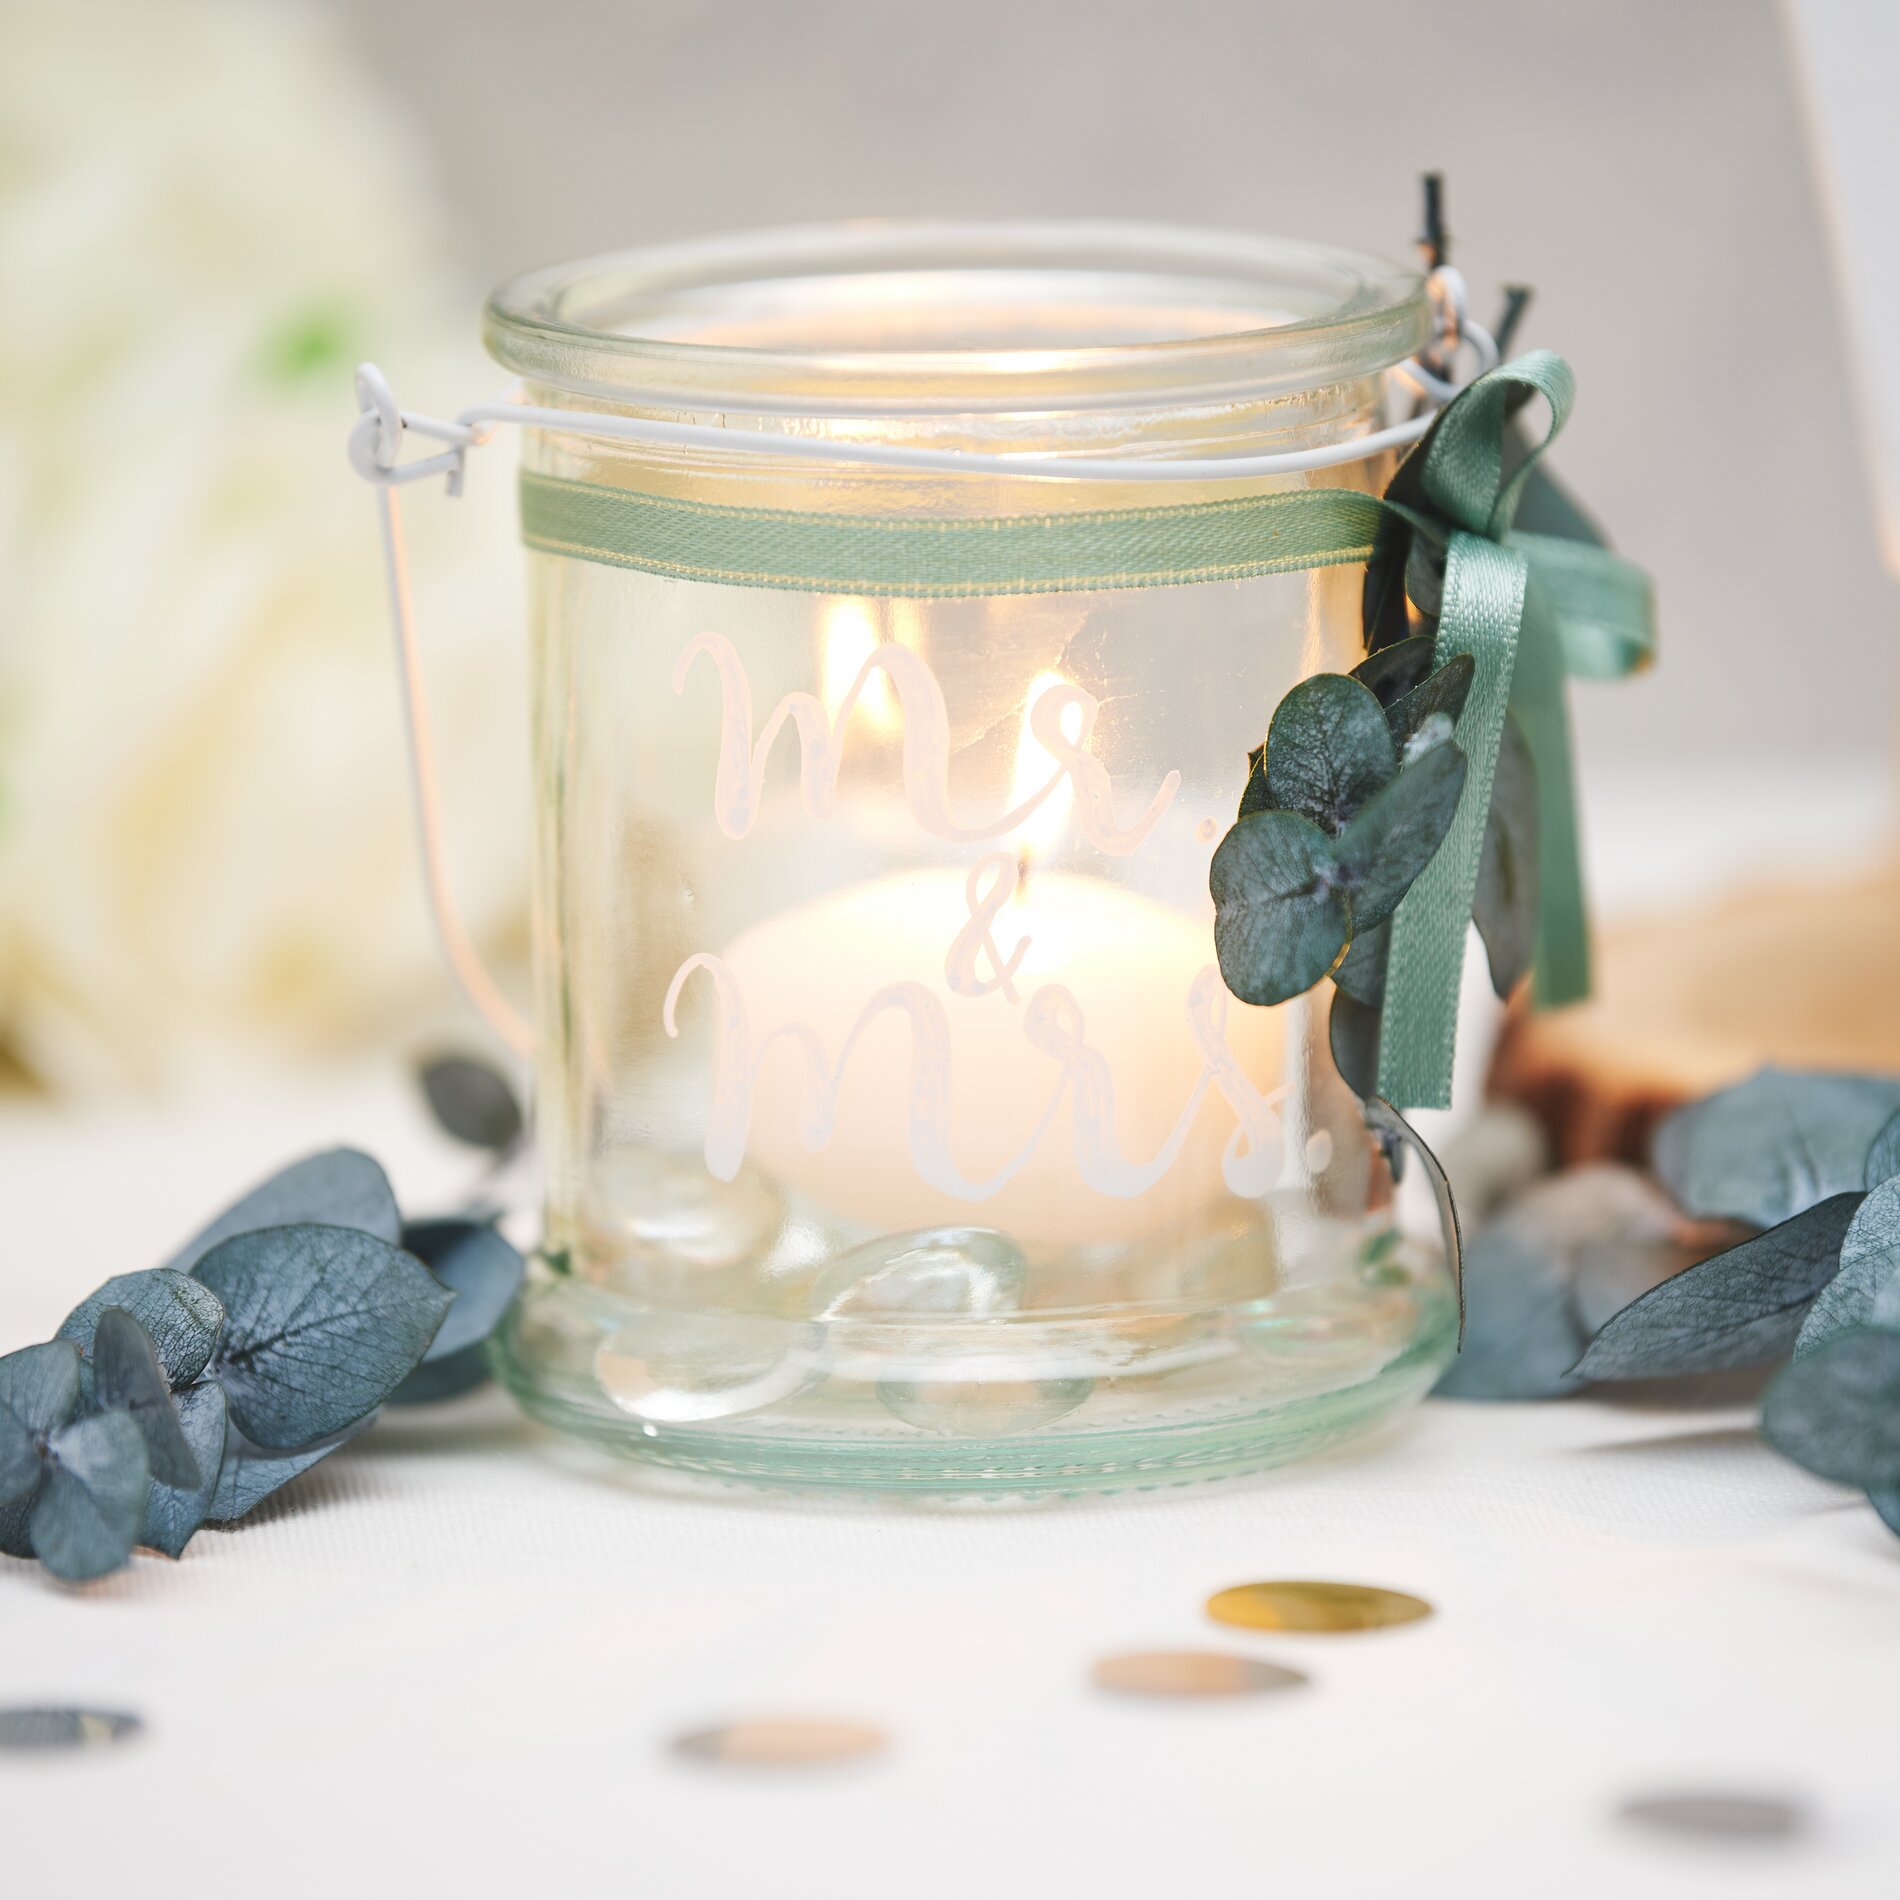
Step 3: Atmospheric glass lantern design
Prepare the template: Print the free template or create a customized text. Cut it to size so that it fits into the glass lantern and stick it on from the inside.
Decorate the glass: trace the lettering with a Posca marker . For a permanent result, you can heat the glass lantern in the oven to burn in the lettering.
Attach the decoration: Tie the satin ribbon around the glass and attach a sprig of eucalyptus in the knot.
Final details: Fill the lantern with a few Muggle stones, fill the glass halfway with water and place a floating candle on top.