- Secure order
- Easy return shipment
- Service-Hotline +32 50 89 35 27
Instructions No. 3445
Difficulty: Beginner
Working time: 30 Minutes

Step 1: Preparing the wooden crate
Start by painting part of the wooden crate with a color of your choice. It is best to use acrylic paint, as it adheres well to wood and dries quickly. Then let the paint dry thoroughly so that the next step can be carried out easily. This base provides the perfect background for your wooden burning and adds color accents at the same time.
Step 2: Designing the lettering
While the paint is drying, you can start designing your lettering. open a word processing program on your computer and create lettering in the font and size of your choice. Once you are happy with your design, print it out. Then place the graphite paper on the painted part of the wooden box and the Paper with your printed lettering on top. Make sure that everything stays firmly in place while you transfer the lettering to the wood.
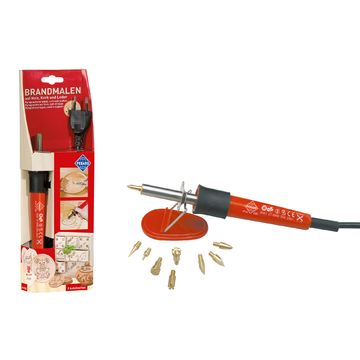
Step 3: The branding
Now comes the exciting part: the wooden burning. Take your branding pen, a special tool that works like a soldering iron. It burns the surface of the wood to create lines and patterns. First, carefully outline the transferred lettering with the branding pen. Make sure to apply even pressure to achieve clean lines. As soon as the outline is in place, you can color in the lettering. Work slowly and with concentration to avoid burn marks.
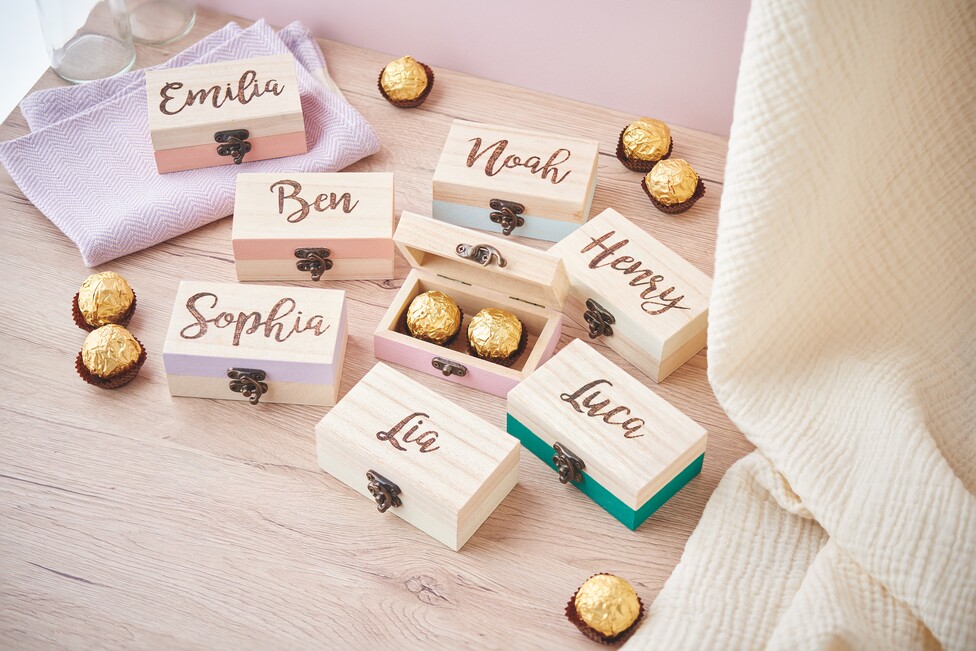
The finishing touches: your personal wooden box
Once you have finished the branding, look at your work: a stylish personalized wooden box that impresses with its individual design. Whether as a gift wrapping or as a decorative element in your home - your unique work of art will be admired.
Ready to start your own creative project? Visit our online store and discover our extensive Selection range of quality tools and materials for the wooden burning. Equip yourself with everything you need for your customized wooden box and start your adventure today! DIY-Adventure today!