You can make this illuminated decoration yourself with little effort: With the help of the instructions, you can create a beautiful winter magic for your home.
And it is as simple as that:
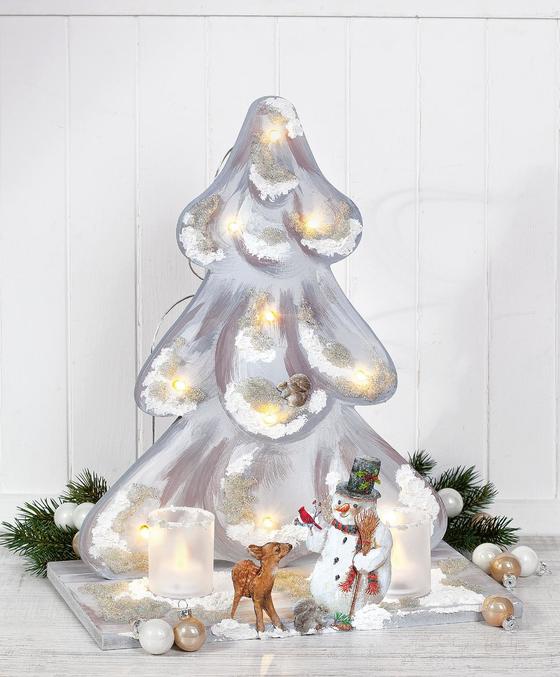
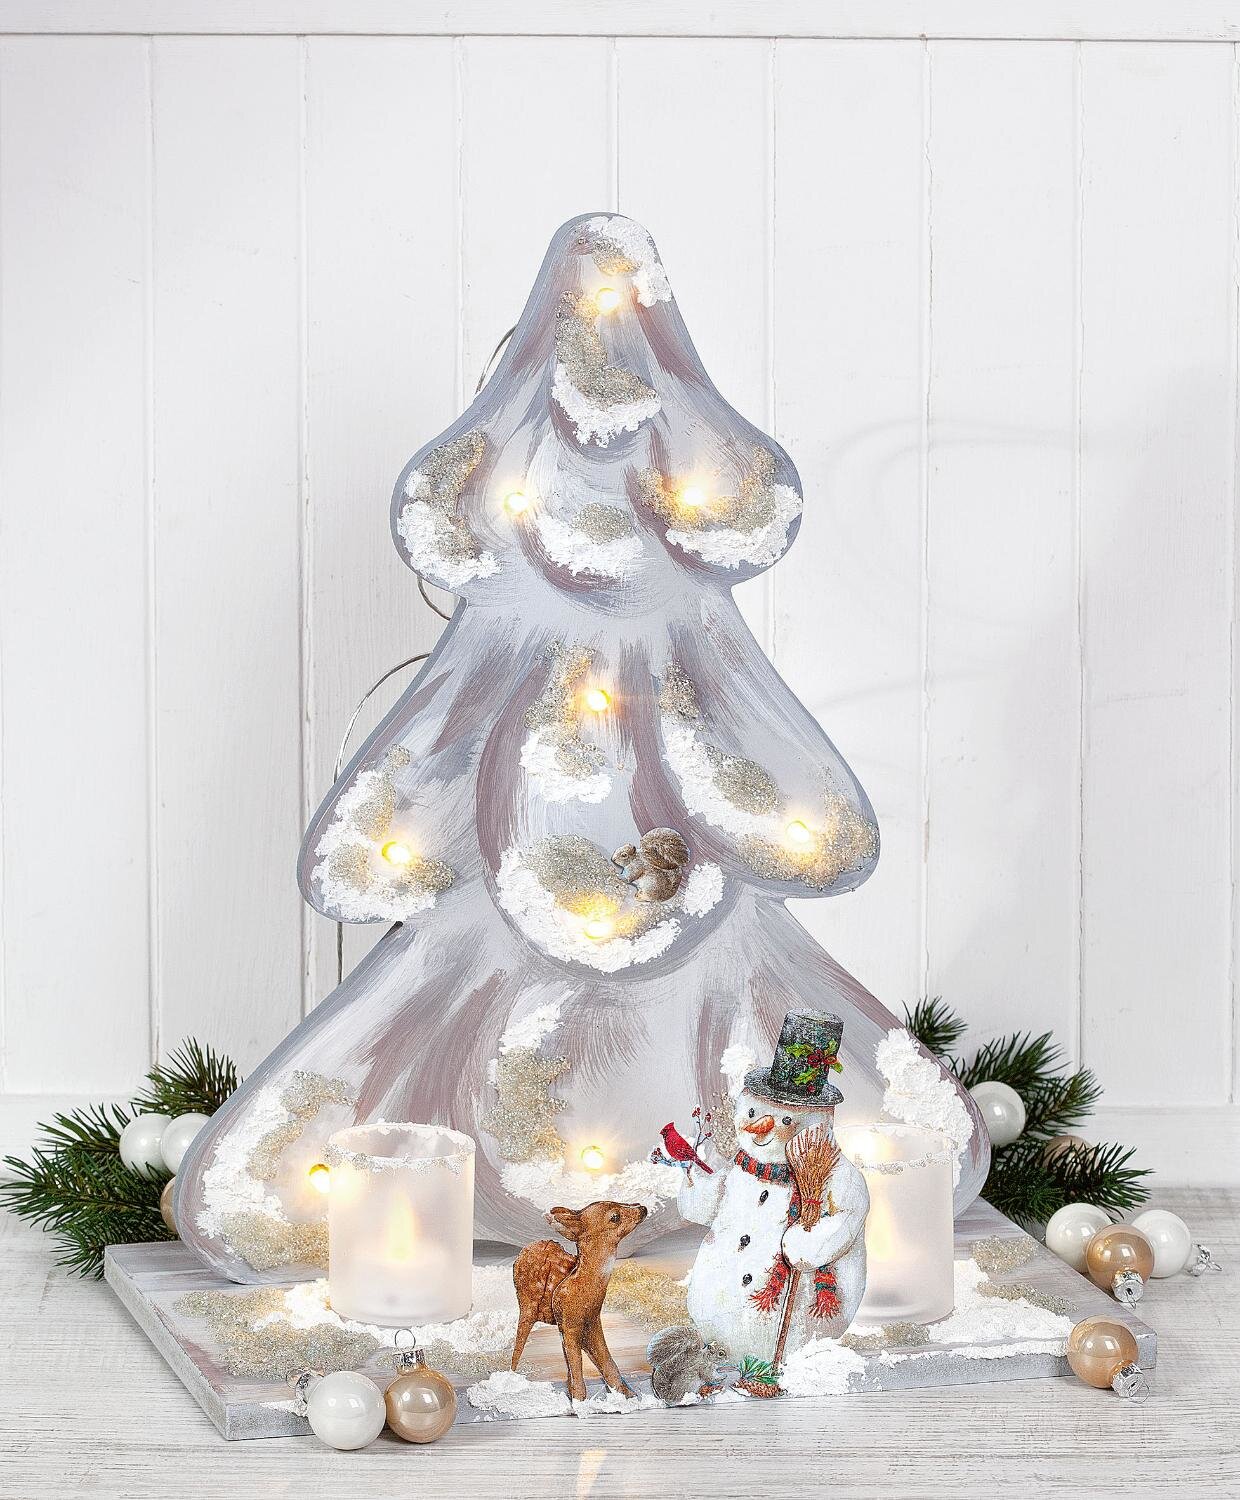
First prime the decorative tree and base plate and Grey. then mix another, darker shade Grey-: a little and mix Brown it into grey Black . Use this to paint light tree contours in an arch shape onto the Fir painted and painted on and wipe over the base plate (with a )
After drying, mark with a pencil the places on the base plate where the LED tea lights are to be arranged later. With a spatula now model decorative snow: around the marks of the tea lights, on the tree and on the edge of the tea lights. As soon as the decorative snow has dried, apply another layer of snow - this will create a 3D effect.
While everything is drying well, prime the aluminium sheet in white and glue the napkin motif on after drying. Use the special brush for this. This provides for a precise result. For 3D optics, work the whole thing twice. Cut out the motif completely and then cut out the only head and leg of the from deer, the arm with the broom from , the snowman and the squirrel. Use the embossing pins to emboss the motif on the embossing mat. Then glue the Glue pads individual parts onto the complete motif using the 3D.
Now you can glue the finished motifs to the front edge of the base plate and cover the adhesive surfaces with decorative snow and let them dry
As a last step, insert the fairy lights and fix the lights with hot glue.