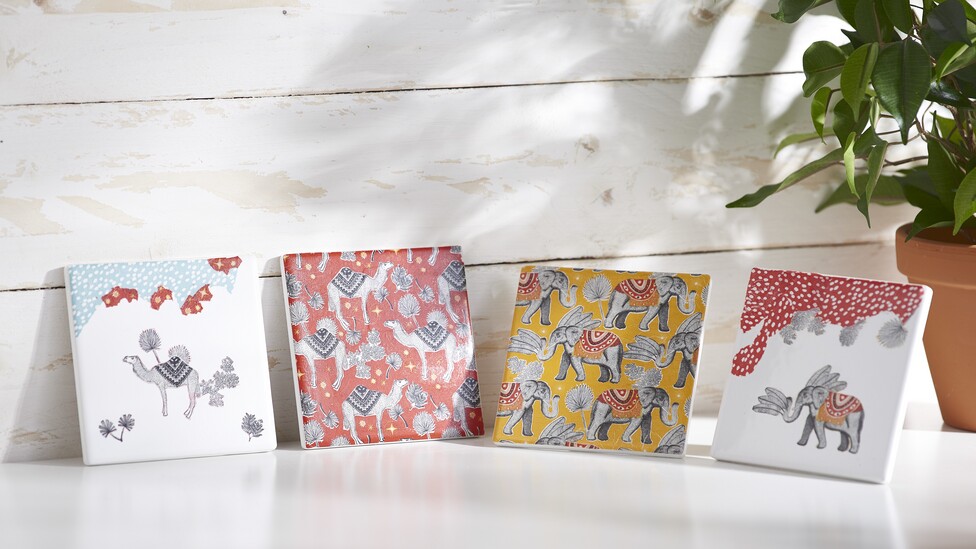
Design colourful tiles
1. First choose a Décopatch paper for the first tile. Then measure the area of the paper you want to have on your first tile. In our example, the tiles have a size of 15 x 15 cm.
2. Then start to apply the Paperpatch glue evenly to the tiles using a VBS bristle brush. Now carefully place the Décopatch paper on the tile. It is best to start in one corner and work your way up step by step.
3. When the paper is in the desired position, apply another layer of glue. This makes the surface even smoother and has an additional protective effect on the Décopatch paper.
4. You can either repeat the whole thing for all further tiles, or to create an even more unique look, you can connect individual motifs with each other.
5. To do this, cut or tear out individual motifs or elements from the different Décopatch papers and then arrange them slightly overlapping on the tile and the first layer of Paperpatch adhesive. Tearing the paper and then overlapping it creates a great soft transition. Then apply another layer of glue to make it firm and smooth.
6. Tip: You can pick up smaller motifs and elements with a brush and a little glue and stick them onto the tile.
7. In our example, the two tiles on the very outside were designed with several papers and the two tiles in the middle with one. There are no limits to your creativity when choosing the motif. And there you have it, great decorated tiles with Décopatch.