- Gratis verzending vanaf 75 € binnen België
- Eenvoudige retourzending
- Telefoon +32 50 89 35 27
Instructies Nee. 3213
Moeilijkheidsgraad: Beginners
Werktijden: 2 Uren

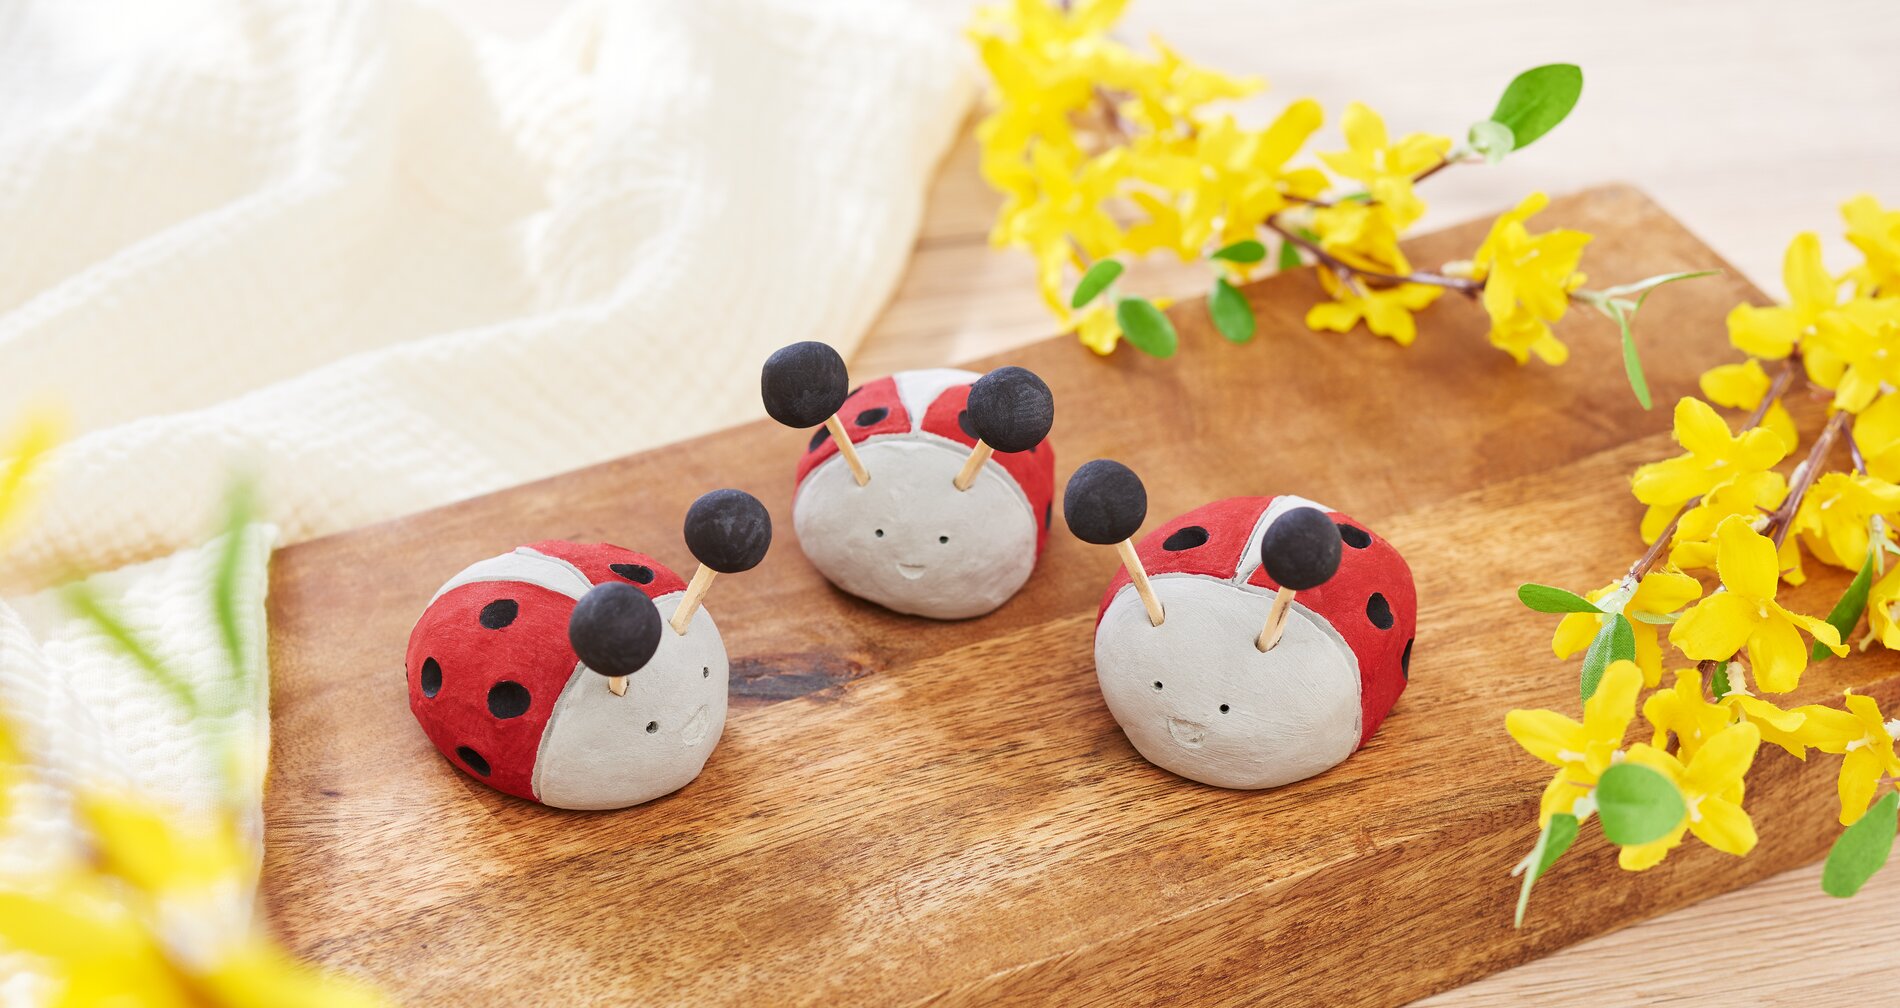
Stap 1: Voorbereiding van de modelleerklei
Snijd om te beginnen zoveel van de modelleerklei af als je wilt en kneed het goed door. Het grondige kneden zorgt ervoor dat het mengsel glad is en makkelijk te kneden.
Stap 2: Het lieveheersbeestje boetseren
Gebruik het gekneedde modelleerklei om het lijfje van het lieveheersbeestje te boetseren. Vergeet niet om ook twee kleine bolletjes te kneden die later als voelsprieten zullen dienen.
Stap 3: Details toevoegen
Hier kun je creatief worden. Je kunt de karakteristieke stippen op de vleugels van het lieveheersbeestje later schilderen of ze nu met een rond stokje in de modelleerklei drukken. Gebruik ook boetseergereedschap om het gezicht en de fijne lijntjes van het lieveheersbeestje uit te snijden. Als er tijdens het werken oneffenheden of scheurtjes ontstaan, kun je die met een beetje water gladstrijken.
Stap 4: De antennes plaatsen
Neem de knutselstaafjes en prik ze waar je de antennes wilt hebben en leg de kralen erop. Trek de bolletjes er wel meteen weer af zodat ze apart kunnen drogen. Daarna kun je ze zonder problemen verven.
Stap 5: Drogen en verven
Als alles goed gedroogd is, kun je de lieveheersbeestjes inkleuren met permanent markers. Wees creatief met de kleuren en patronen! Vergeet niet de bolletjes te versieren, die later weer op de knutselstaafjes worden geplaatst.
Stap 6: Eindmontage
Zodra de verf is opgedroogd, plaats je de geverfde ballen terug op de knutselstaafjes en je gepersonaliseerde lieveheersbeestjes zijn klaar!
Nu is het aan jou om de wereld te verrijken met je zelfgemaakte lieveheersbeestjes van modelleerklei .