- Gratis verzending vanaf 75 € binnen België
- Eenvoudige retourzending
- Telefoon +32 50 89 35 27
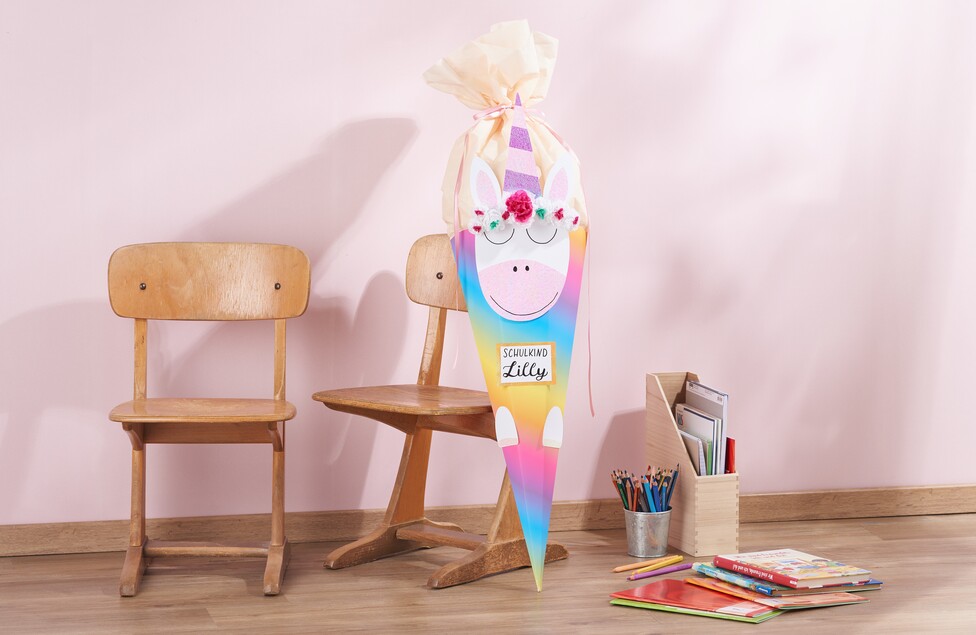
Instructies Nee. 3061
Moeilijkheidsgraad: Beginners
Werktijden: 3 Uren

Druk eerst de sjablonen af en knip ze uit.
Breng de sjablonen A tot E over op de fotokaart en knip de motieven uit.
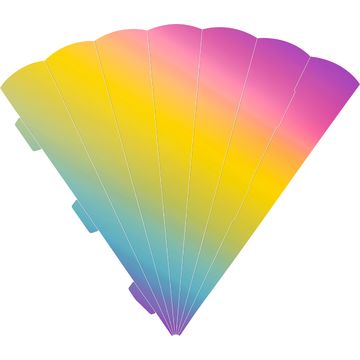
Breng de sjablonen F tot I over op de "Papier- Mix Iridescent Crispy rainbow" en knip ze uit.
Lijm de afzonderlijke delen aan elkaar met knutsellijm op elkaar. Plak vervolgens afwisselend gekleurde stroken iriserend papier op de hoorn (sjabloon D) en knip het opnieuw uit.
Daarna kun je de mond (sjabloon F), de oren (sjablonen C+G) en de hoorn (sjabloon D) op het hoofd (sjabloon A) plakken. Laat de lijm drogen. teken de ogen, neusgaten en mond op het gezicht met een zwarte marker .
Maak nu kleine bloemen van het assortiment bloemzijde. Knip hiervoor de zijdepapier stukken van 10 x 10 cm. Leg 5 - 6 stukken papier op elkaar. Vouw ze samen als een accordeon. Knoop een stukje kettinggaren. rond het midden en trek de gevouwen papiertjes een beetje uit elkaar. Begin dan voorzichtig Papier voorzichtig naar boven. Herhaal dit met alle lagen papier. Je hebt nu een Papier-Bloem. Je kunt verschillende maten krijgen door het papier na het vouwen in te korten Papier met de schaar na het vouwen.
Maak met de perforator twee gaatjes in het voorhoofd van de eenhoorn. Trek de draden van de bloem erdoor en knoop ze aan de achterkant vast. Herhaal dit met de andere bloemen zodat het lijkt alsof de eenhoorn een bloemenkrans draagt.
Neem twee stukjes papier van de strozijden papier en lijm ze aan de rand aan elkaar tot een langer stuk. Lijm de strozijden papier vanaf de binnenkant op de bovenste rand van de schoolkegel. Laat de lijm drogen.
Vouw de schoolkegel leeg op de gevouwen punten en speld hem samen met de flappen vast. Zet deze vast met knutsellijm.
Lijm het eenhoornhoofd op de schoolkegel met knutsellijm . Label het "bord" (sjabloon E) en plak het op de glitterbordrand (sjabloon i). Lijm het bord en de hoeven ook op de schoolkegel met knutsellijm .
Vul tot slot de schoolkegel met kleine cadeautjes voor je schoolkind. Je kunt hiervoor inspiratie vinden hier
Bind tot slot de strozijden papier samen met wat satijnen lint zodat de schoolkegel mooi gesloten is.
De bijpassende uitnodigings-/dankkaartjes vind je hier.